CASE STUDY: My Experiences of the QNAP TS-435B NAS
As you will have seen in my recent blog posts, I have focussed quite heavily on storage, the importance of protecting your data and Network Attached Storage (NAS). Having used a NAS system for over six months now, I feel in a good position to share my findings on whether it has helped me, any pitfalls I have found and if I would change anything about my setup.
Is NAS right for you?
The first thing to address is that not every storage solution is right for every photographer and there is definitely an element of choosing 'what fits for you'. I still continue to use small, portable hard drives when I travel but knowing that the vast majority of editing would be done at home, meant that I could afford to choose a solution that did not need to be portable. furthermore, I knew that the volume of storage I would need would be huge, in the Terabytes! Which automatically meant that Cloud Storage would be a bit of an issue. So rather quickly, I knew that I was looking at a 'home' based solution.
Secondly, I knew that I would be using multiple computers as (for my sins) I use both Mac and PC to edit on. So I need a system that was both flexible and could be used across a network. Naturally, NAS kept coming up as an option, so I decided to explore it a little deeper. Everyones needs will be slightly different, so doing your research is essential. however, NAS is such a versatile tool, as we will see, that it can really be adapted for most peoples needs.
Choosing the right NAS system
There really are hundreds of options out there and like cameras, they range from the very basic to the extremely complicated and the costs span a similar range, form quite affordable to very, very expensive! Due to the wide range of choice, I would set a realistic budget before even looking at requirements and try to stick to it! The second, important factor to consider is that you will (in most cases) also need to populate the NAS with hard disks, so don't forget to budget for the disks as well!
As with everything in photography, the costs soon add up so being budget conscious is essential. Once you have an idea of what you can spend, look at what your most 'essential' requirements are and go from there. Many NAS systems offer a plethora of additional services, such as the ability to be used as a virtual PC, a media centre, as 'cloud storage' - but these can be costly additions in some circumstances. Whereas if you know that your main concern is large storage that offers redundancy, you should be able to tick that box fairly simply. Once again, research is essential before taking the plunge!
How much Storage do I need?
This is a very definitely a 'how long is a piece of string' kind of question! Everybody's needs will be different but i applied some simple maths whilst working out what I would need. I looked at what I had shot over the past few years and noticed that with an increase in client work, my storage needs were growing roughly 20% a year. I was also shooting more video, which is very 'space hungry' and new that I aimed to grow this by around 20% a year as well. Then, I simply totted up what I was already using and added the required additional storage for the next three years, taking into account the expected rate of growth.
This gave me a figure of around 10 Terabytes, so with a degree of 'flexibility' built in, I knew that 12 Terabytes of storage should be sufficient. A couple of things to consider here are how much do you expect your requirements to grow (it will more than likely be different to mine!) and how many years do you want to protect yourself for? I know that every couple of years, I tend to upgrade my storage anyway, so building in three years of protection should see me right! Finally, you need to consider what RAID set up you are going for? No idea what RAID is? Read on...
Choosing the right RAID set up...
Now, this is where the fun really begins! At first, RAID, which stands for 'Redundant Array of Independent Disks' sounds like something straight out of a Sci-Fy film, and in a way, it is! It's a brilliant piece of technology but one that can seem quite daunting at first. In essence, choosing the right RAID is just a case of marrying your desired level of 'protection' with your budget. Why the emphasis on 'protection' - because there is a common misconception that RAID is 'Backup' and very simply, it's not. RAID offers certain protections against mechanical failure, so if you have a hard disk fail - the other disks in the RAID array will either be mirroring that data or can re-build it. What it does not protect against is 'human error' so you deleting a crucial file - as the disks sync, it will be deleted in all locations so that file is gone! Worst still, if all of your data is in one place, such as at home, if you a flooded or robbed etc. Say goodbye to your data!
Obviously, this does not mean that RAID is pointless, far from it. It just means that you have to consider your 'whole' data handling plan. Back to the RAID options, there are many different setups but the most common three that you will come across are:
RAID '0' - Disk stripping splits data across multiple disks to improve performance. Files are 'split' so that data transfer speeds are improved. There is no redundancy so if any data is lost, it is not recoverable using conventional methods.
RAID '1' - Disk mirroring - Two disks are used and they are read & written too simultaneously, meaning that if you have a disk failure, you (should) still have one 'good' disk. This means you can simpy install a new disk and copy all of the data across. However, this is very 'storage' heavy, as you are duplicating data and does not offer the same performance increases of RAID '0'.
RAID '5' - Stripping with parity - A very good choice as it common uses three or more disks and takes the stripping performance of RAID '0' and adds the Parity (small pieces of usable information that can recover large pieces of lost information) so you have the redundancy of RAID '1' as data can be used from the good disks to rebuild the bad disk. The obvious disadvantage is having to buy at least one additional disk.
RAID '6' - Very similar to RAID '5' but with additional disks for increased performance and parity. This means that it is possible for two disks to fail and still offer redundancy to rebuild lost data.
There are alternative options and once again, it is advisable to do some research before choosing what works best for you. I personally chose RAID '1' as my main concern is disk failure. However, as we will look at later, this is not considered a 'backup' and requires you to do some further steps to fully protect your data.
Setting up a NAS for the first time!
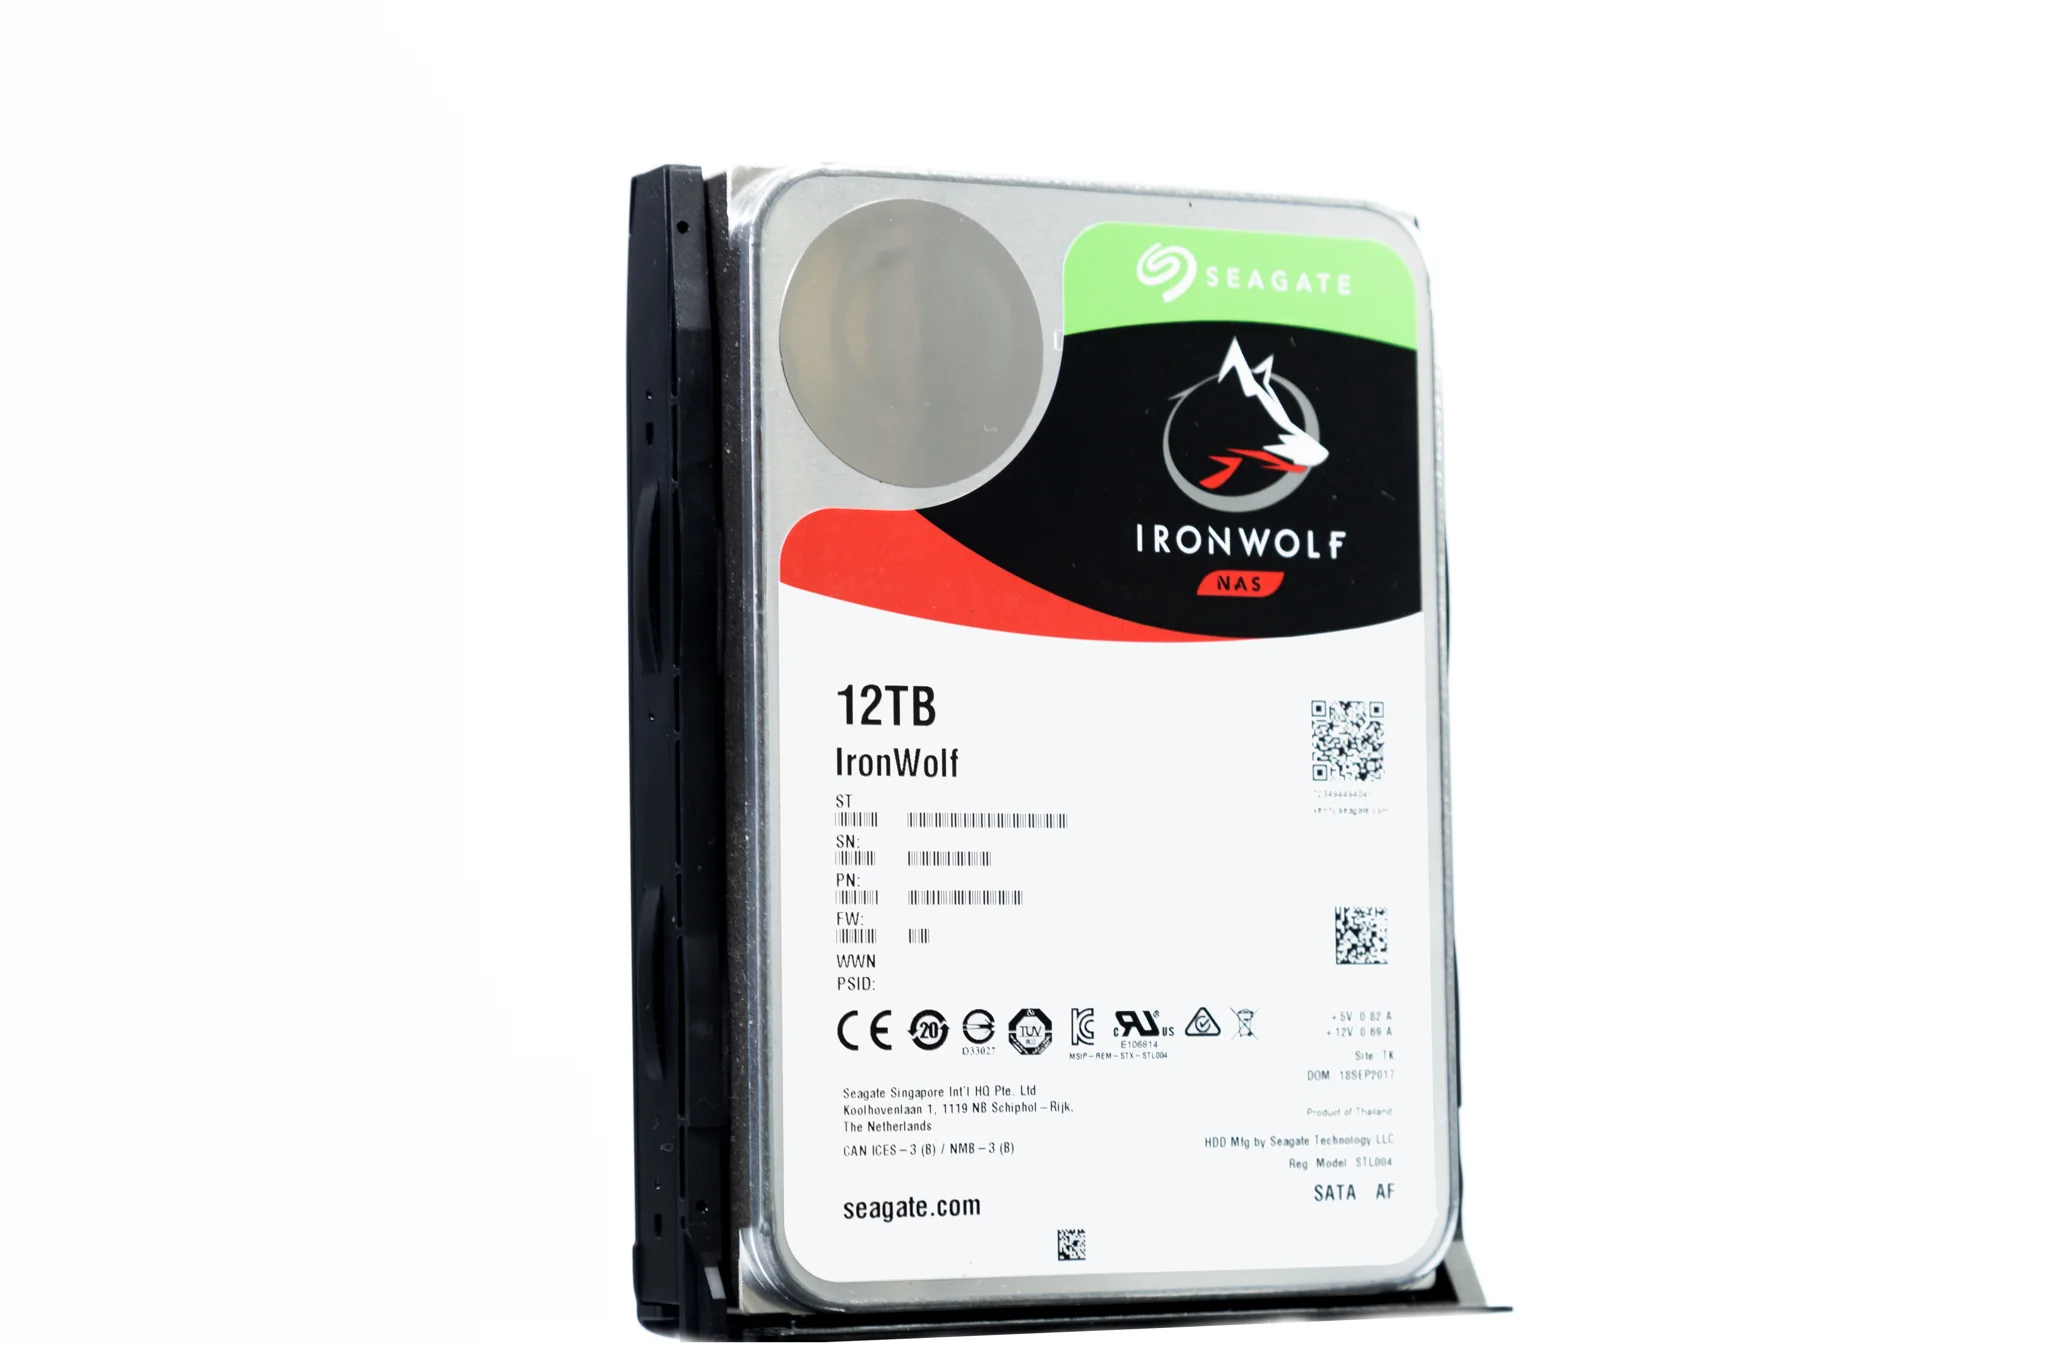
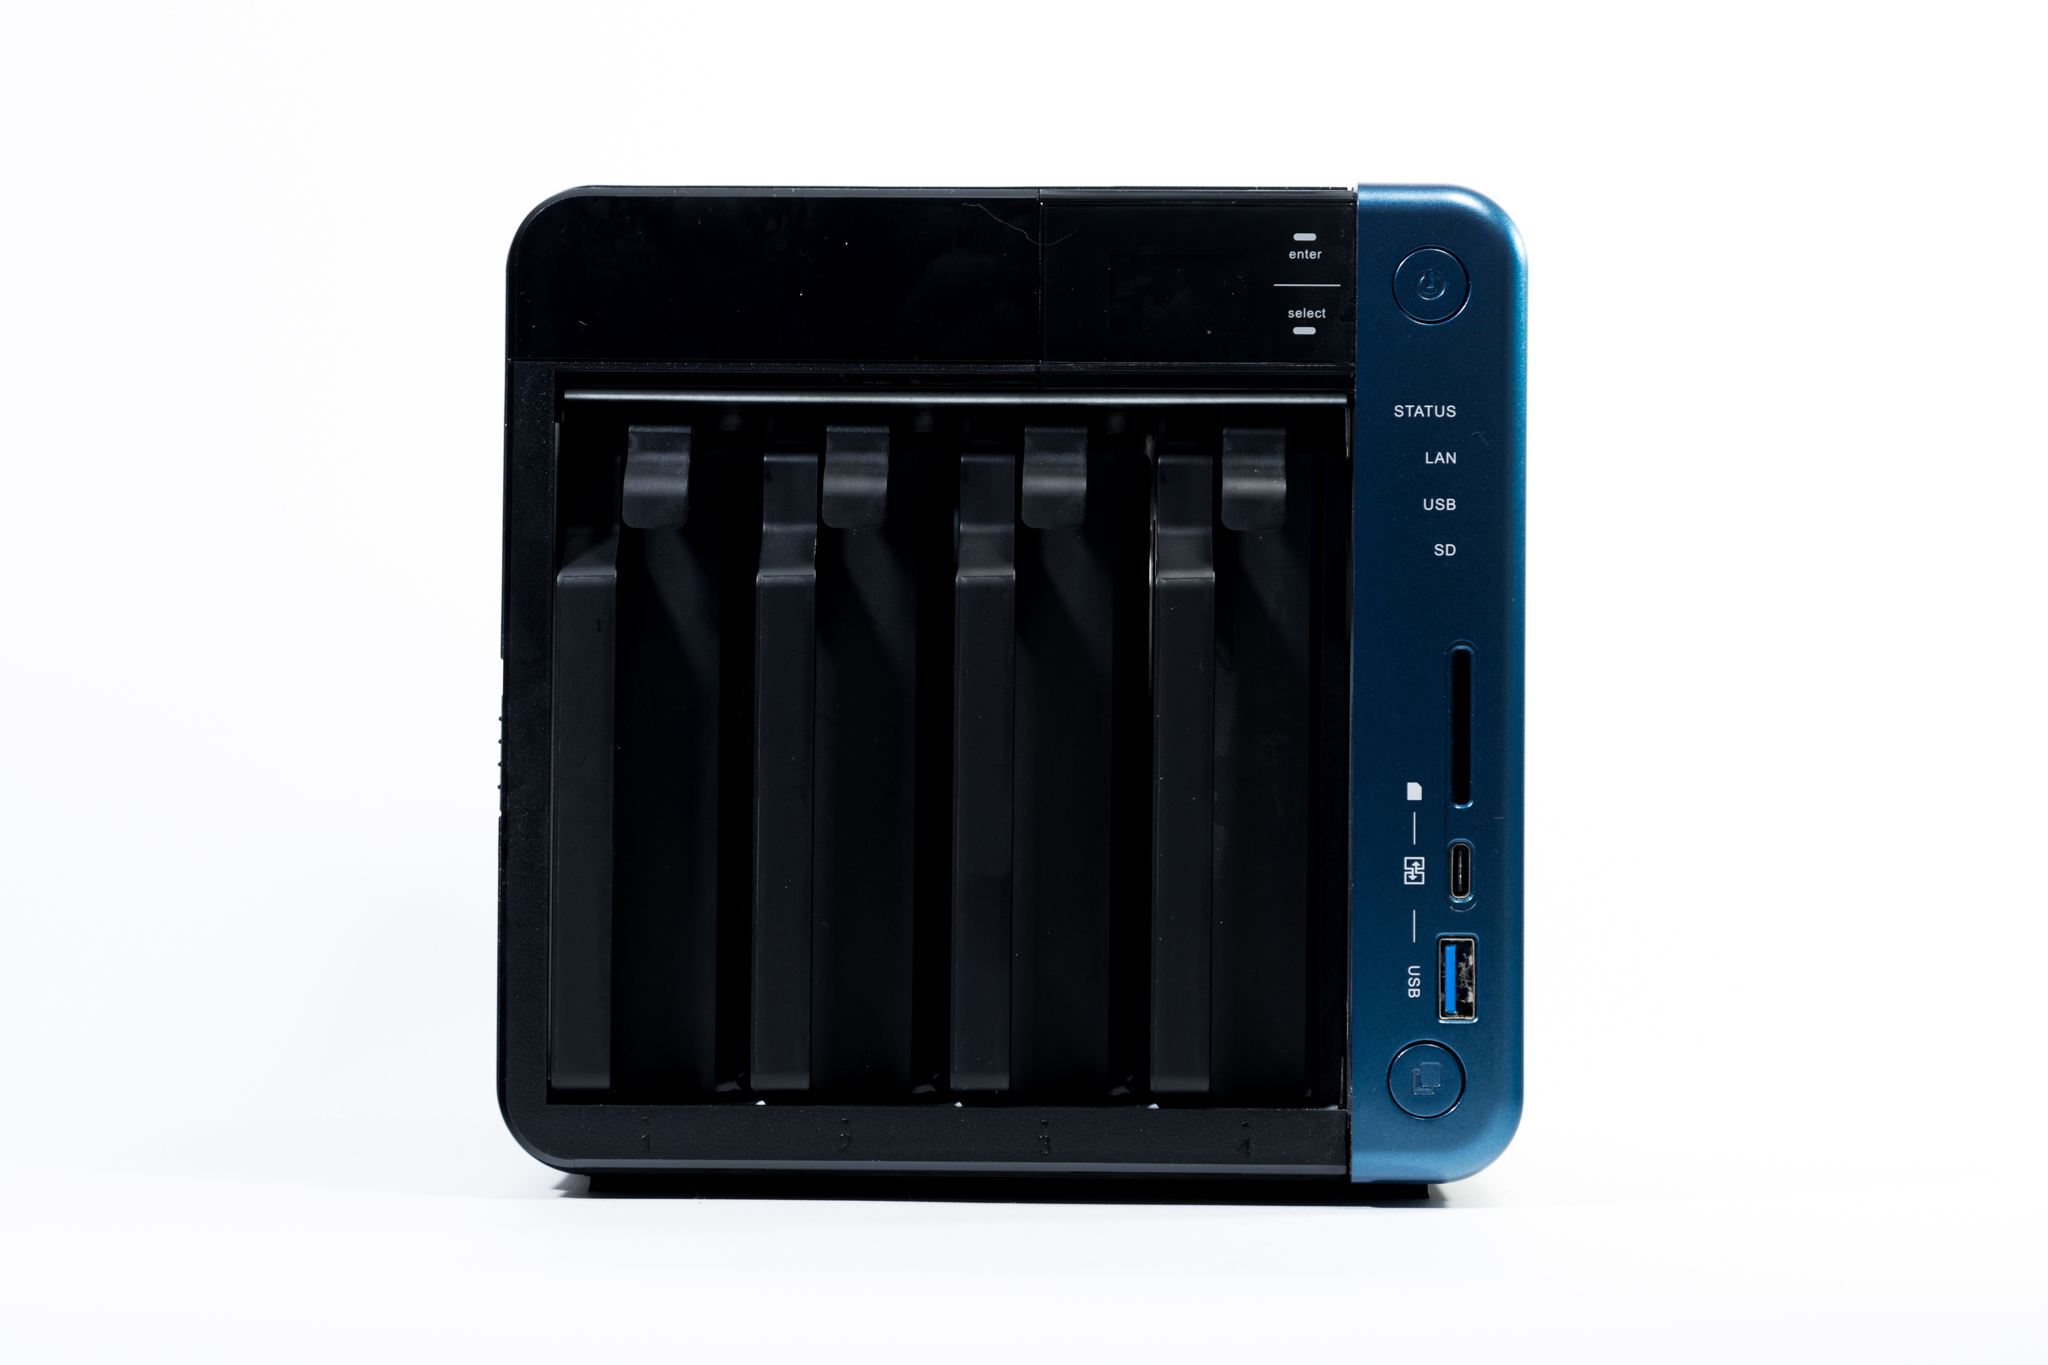
You've chosen what you want, you've hit the 'buy now' button and a few days later, the Postie drops off your shiny new toy to your house, what now? Well setting up a NAS can seem like a very daunting process, but in actual fact, it is quite simple, or at least, my experience was. I would be using the QNAP TS-453B and Seagate Ironwolf drives. Installation was simple and the whole setup process was both quicker and simplerthan I had imagined, you can see it here:
Using a NAS over time
So now to the juicy stuff, how have I actually found using a NAS? Well, in short, very good! I have been very fortunate not being in a position where I have had a disk fail and I put this down, in some part, to the quality of the Seagate Irownolf drives, they really are beasts! However, knowing that I have an additional layer of protection against drive failure really does offer a great piece of mind.
I had to alter my workflow slightly, as previously I had been moving data onto external hard drives and praying that they did not fail! The NAS takes away some of that concern, but as previously stated, it can not be classed as fully 'backed-up' until the data is in at least three places, including 'off-site'. So this has meant that I need to religiously save my most important data to an offsite location such as DropBox, Google Drive or an external drive kept somewhere else - and I still haven't quite cracked this one! As always, 'life' gets in the way and before you know it, you've gone a couple of months without making sure your data is protected against fire, theft, flooding etc.
However, all this aside, as a professional photographer & videographer, I really don't know how I ever lived without a NAS before. The features on the QNAP TS-435B are immense, the fact that you can create multiple accounts for different users, use it as 'cloud storage' for when you are away from home, use share links for accessing data for clients etc. Furthermore, it has Photo Station which makes storing images incredibly simple - show how versatile the system can be and this is before you even touch on the media centre features and the host of other capabilities that NAS's can offer.
Using the QNAP has proven to be a piece of cake. Once the initial setup was completed, managing my data became second nature. I only really use it as a mass storage option, even though it has many other features. Using it like a data vault means that I can move files from my Mac & PC to the NAS where the QNAP quickly & quietly takes care of the dirty work of duplicating the data across the two disks. Accessing files is quick and simple and there are a host of ways of doing so, whether you are at home, in the office or travelling. my most common approach is to use the intuitive files structure to access my 'archived' files, should someone order a print etc.
Final Thoughts
In short, I would class a good NAS setup and a well thought out data workflow as essential as the camera and lenses you use. Our responsibility as photographers does not end with capturing and editing the image. Whether you are a professional or an amateur, being able to protect your data and being able to understand where it is, how it is protected and how it will be stored for years to come is essential. The QNAP really is a 'do it all' kind of tool and when teamed up with high-quality disks such as the Ironwolf NAS rated disks, it allows me the piece-of-mind to be able to concentrate on the important stuff of planning shoots and delivering to clients, rather than worrying about the next drive disaster and what I would do if I lost it all!
For more information on the specifics products, please visit:
QNAP - Click HERE
Seagate - Click HERE
!Mo Straps - Camera Fashion!
Let's face it, Camera's can be a bit boring looking? They're mostly black, plastic boxes all, full of buttons and dials. So what do you do if you fancy adding a bit of bling to your camera? Well the range of straps from !Mo are a great starting point! The Hong Kong based company certainly have a very clear focus on fun and all of their products seem to have their own personalities. But are they just for show? I tried a couple on for size.
The first thing that really grabs you, apart from the colours, is the quality and attention to detail. The straps are handmade and the quality really shows. With three ranges of straps, Neoprene, Leather and Cotton Tape, there is something for everyone. The straps come well packaged, further attention to detail and as soon as you take them out of the bag, you can feel the quality of the materials in your hand.
I tried the 'Indian Blanket' and the 'Rustic Brown' - both of which were Neoprene straps with a comfortable padding and quality stitching. The straps featured a 'quick release' system to easily remove the strap from the camera and even swap the straps, depending on how you want your camera to look. The two main advantages of this are the versatility to change the appearance of your camera equipment (you might not want anything too 'bright' when shooting in certain areas) and the ease of removing the strap when shooting Long Exposures etc. when a strap could cause camera shake.
Installing the strap on my Bronica ETRS was very simple. The nylon strap connectors simply looped through the eyelets on the camera and attached reassuringly, so you know your camera isn't going anywhere! Using the straps on the Bronica was ideal, as it has a 'top-down' view for composing, so taking the weight off my arms was ideal, whilst having the freedom to move around and compose my image.
The straps are certainly very practical and were more than capable of holding my weighty 5D Mkiii & 70-200mm lens, yet bringing a much-needed dash of colour to my camera kit. Overall, I am very impressed with both the quality and the styling and would highly recommend the !Mo Straps for anyone looking to brighten up their gear whilst needing a strong & comfortable strap to hold their prized posessions!
For more about !Mo Straps and their full range of products, check out their website:
The Importance of Protecting your data - My Data Management Plan
I have spoken a lot recently about NAS & RAID and allsorts of other technical stuff to do with data storage, but what does it all mean and what is the point? Hopefully, this blog post will help explain why it is important to protect your data and a look at the best ways to do it.
Imagine losing everything…
For many of us Photographers & Videographers, our data is our most important asset, arguably even more important than our camera gear. I still sell prints of images I took four or five years ago so the idea of losing my files fills me with a crippling sense of anxiety. However, it’s not just as simple as losing a few photos or a Lightroom catalog. I have invoices, agreements, personal projects and many other important documents that, if they were to simply disappear, would grind my business to a halt. Yet the vast majority of us only ever decided to protect our data ‘after’ we have had a major catastrophe, so now is the time to get proactive!
What are the options?
Before we delve too deep into some of the methods available, it’s worth taking a step back and looking at the bigger picture. Most of us either work from home or an office but in almost all circumstances, we leave our precious data in one place. I, for instance, work from home and choose not too rent an additional office space as I have everything I need in a dedicated ‘office’ (spare room) at home. However, here is the first issue. All of my data is in one place. If I was to be burgled, flooded or if there were a fire, my data (hard drives) would literally go up in smoke, removing any possibility of recovering them.
With this in mind, it is important that we remember that many of the options that we will look at are not failsafes, they are not legitimate ‘back ups’ of your data. Only when the data is being stored in multiple safe locations (off site away from your home/office) and backed up on a regular basis can it be considered safe. To be honest, even then there are still risks involved.
Cloud Storage
If ‘offsite’ backup is a must, then it would be easy to think that cloud storage is a bit of a no-brainer. Though it certainly has an element safety, knowing that your data is ‘in the cloud’ and not vulnerable to such earthly things as fire and theft, the truth is, it’s not 100% safe. In a world of cyber crime, even large organisations such as the NHS have surcome to data being held at ransom.
The other downside to cloud storage is that most commonly, space is at a premium with even the more generous service only offering around 1tb of storage and there can be restrictions on the file types that can be stored. The other major issue is that depending on your internet connection, it can be painfully slow saving and accessing your data and if, like me, you have multiple terabytes of data, you’ve pretty much had it.
NAS & RAID
He we go with the technical stuff again. I will attempt to describe these in as basic terms of possible. One of the main threats that we have to our data is the chance of a mechanical error and losing a hard drive to a technical fault. Although there are services out there that can attempt to recover lost data, there is no guarantee. So a clever option is Network Attached Storage or NAS for short. NAS is a centralised storage device that can allow multiple users to access data view a network (or LAN). NAS’s are commonly made up of one or more hard drives which are referred to as a ‘Redundant Array of Independent Disks’ or RAID for short.
The purpose of RAID is to protect against loss of data by spreading or mirroring that data across multiple disks. We will look at a few common RAID options in a future post but see it as a carbon copier for your data. If you lose one disk, the other disks will have your precious data saved, ready to be restored to a new disk. However, the major downside of this is that although it protects against mechanical loss of data, it is still only stored in one place - so we still have the risk of fire/flood/theft etc.
The Blended Option.
I’m hoping I may have coined the phrase but a great solution for protecting against loss of data is to ‘blend’ all of the options available to you. So in essence, you would have a NAS setup in your home or office, where multiple users could access and store data. The NAS would have an appropriate RAID setup to protect against mechanical loss. The most important data would then be copied to a cloud service that automatically updates on a regular basis, to add in an additional layer of protection.
Taking things one step further, for those that are looking for the ultimate in protection, it would be possible to have another RAIDed NAS system kept off site (maybe at a friends home or office) that ‘backs up’ data so if there were a fire in one location - all data should be saved somewhere else. Now, this would be an extremely costly measure and a simpler option may be to simply rotate a group of hard drives and once a month - mirror the backup disks with your working disks and then store them off site. It’s worth noting at this point though that even by going to these extremes, there are still other potential risks such as file corruption, so before investing it really is advisable to do as much research as possible, to find the best option for you.
My Data Management Workflow
I’m not an expert, I just know what works for me, but you may find something useful in the way I manage data. Seeing as the majority of my ‘data’ are image or video files, the first thing I do is make sure I have plenty of fast CF/SD cards and if I’m shooting really important work, I will write to two cards at once, you know, just in case.
When I get the data home, I make sure that I import the RAW files to Lightroom immediately. Before I go out on a new shoot, I always format the memory card in the camera, by importing the images immediately to Lightroom, I ensure that I won’t ‘accidentally’ delete all the files from a previous shoot. I then save the images into a ‘working’ folder structure on either my MacBook or PC. By doing this, I am using the internal hard drive of the computer (both MacBook and PC have SSD drives for improved performance) for editing, as trying to edit direct from the NAS is possible, but not as efficient as using the internal SSD.
Once the edits are complete, I export the completed images to a DropBox folder as medium res Jpeg files and for images I know that I will print, I export the Tiff/PSD files to a ‘print’ folder. At this point, I have a copy of the file on my working hard drive and an output file in DropBox. The next step is moving the working folder in Lightroom from my internal SSD to the NAS. Lightroom does an excellent job of folder management, meaning I don’t need to go into Finder/My Computer and start copy & pasting folders to move them. I have the NAS set up as an ‘Archive’ folder in Lightroom and can simply move the project I am working on from the SSD to the Archive by dragging & dropping.
Once the data is on the NAS, I am using a RAID 1 setup which mirrors the data from one disk to another meaning that if a disk fails - I can still recover from the working disk. The final step (and the most crucial in terms of protecting against fire/theft etc) is taking a regular copy of the most important projects and leaving them on an encrypted external Hard drive, with a friend, so they are stored off site. Now this final step is not the best method as it does not protect all data and there are other inherent risks (losing the disk in transport, finding someone you trust enough etc!) but it is better than nothing!
All of this may seem a little bit excessive but when faced with the prospect of losing years worth of valuable data, it suddenly becomes quite appealing. The truth is, once it’s set up, it’s actually remarkably easy to manage and the biggest difficult is forming the new habits to make sure you are treating your data with the respect it deserves. I would certainly suggest looking at a NAS setup at a minimum but also consider how you can store your data in multiple locations. I’m pretty certain that this won’t be the end of my data management journey but for now, I feel a lot happier knowing that my data is in safe hands.
REVIEW: Rogue FlashBender 2 Portable Lighting Kit
The absolute most fundamental part of Photography is light. Put incredibly simple, Photography is just capturing light. However, sometimes (well, all the most of the time) it doesn't want to play ball. It can be too dark, going in the wrong direction, not the right colour temperature. So what if we were able to manipulate the light we use and take back control? Well the Rogue FlashBender 2 Portable lighting Kit allows us to do exactly that, take back control of the light and get our desired look and feel for our images.
Now obviously, flash photography has been around for decades and pretty much as soon as flash was invented, people started to manipulate the flash by 'modifying' the light source either by using methods of partially obstructing the light or systems to alter the colour and feel of it. Fast forward many, many years and this kind of manipulation of light is common place and done by many of those working with flash. The FlashBender 2 kit builds on the popularity of it's predecessor (Read my review of the FlashBender 2 XL HERE)and goes a long way to empower flash photographers with an arsenal of new modifiers and notably, coloured gels - but more about those later.
The kit is designed for those using Speedlites - portable flash guns that are far quicker and easier to set up and use than large studio lights. Just like Speedlites, the FlashBender 2 kit is very simple to use and portable enough that you can practically carry it with you all of the time, adding very little weight to your portable setup. The kit consists of:
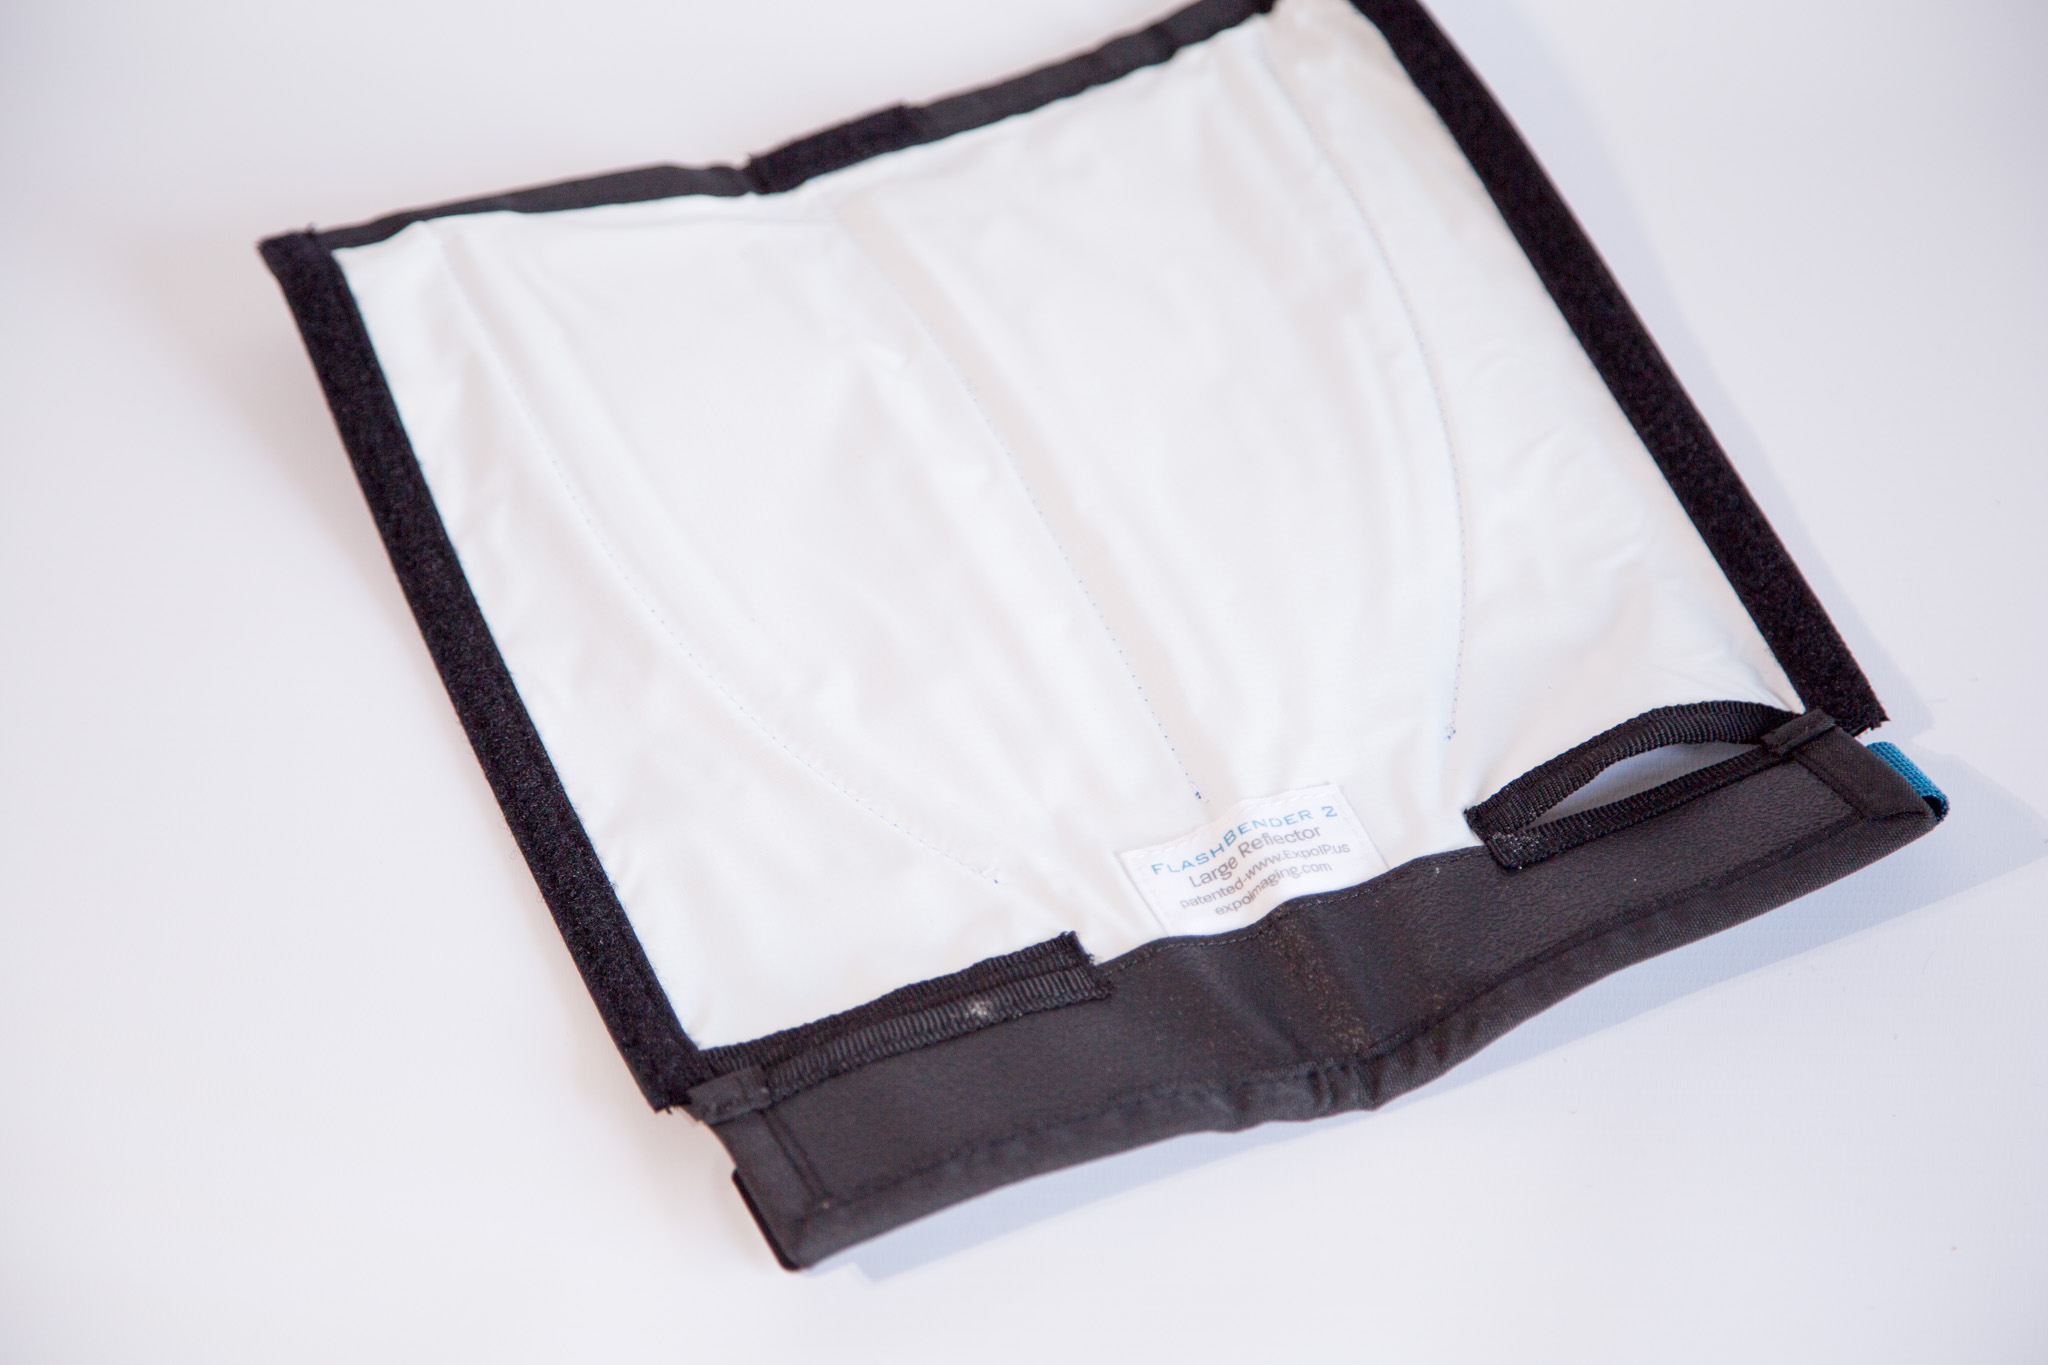
FlashBender Large Reflector
FlashBender Small Reflector
FlashBender 3-in-1 Grid
Large Diffusion Panel
Small Diffusion Panel
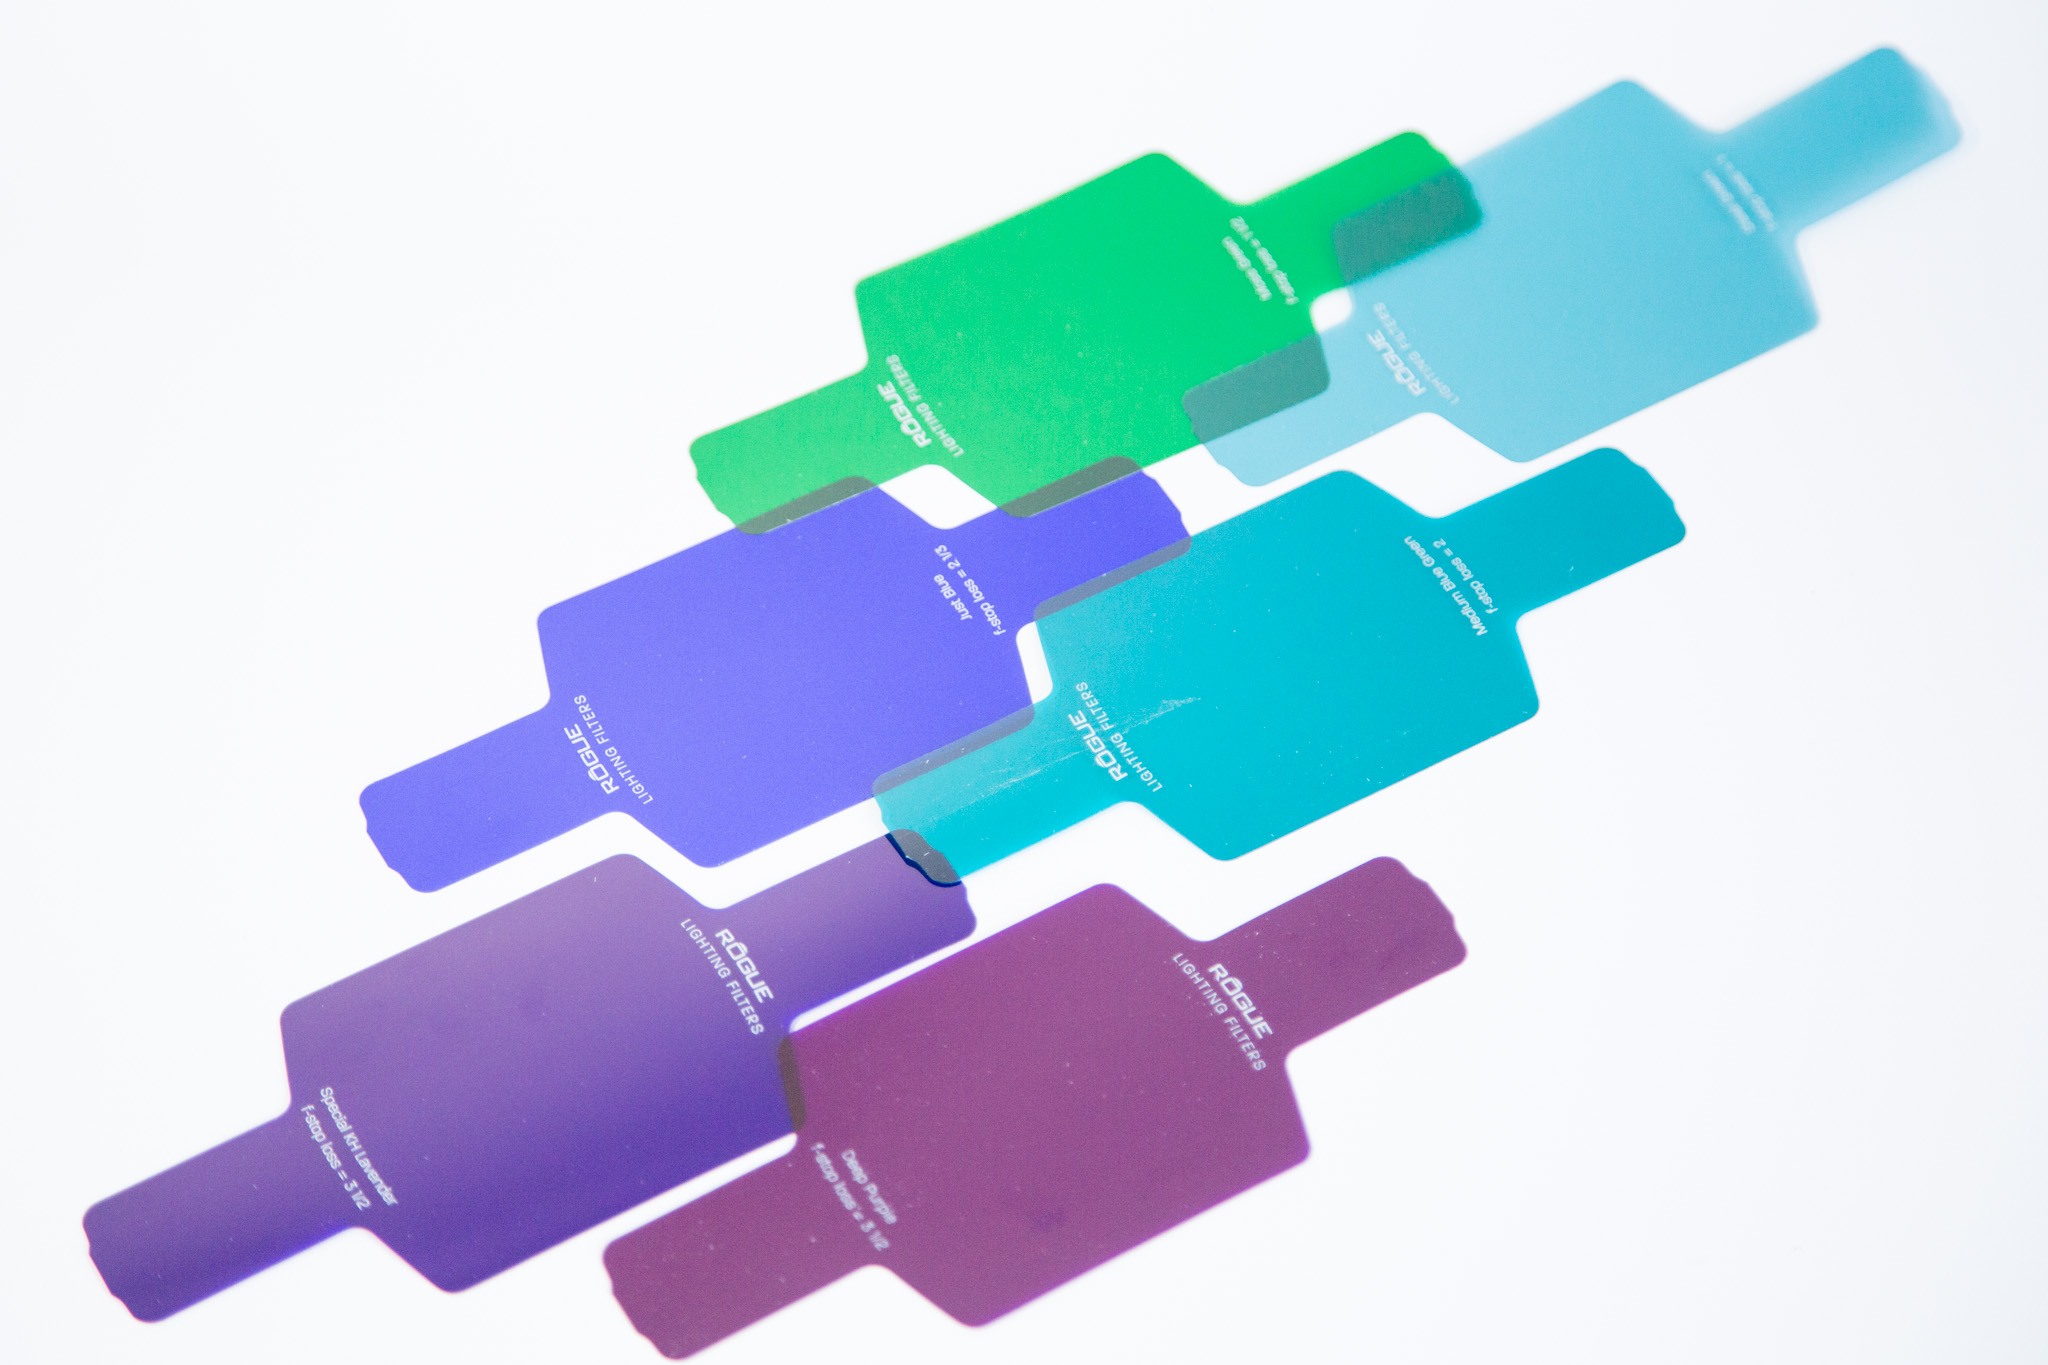
Rogue Grid Gels Combo Filter Kit (20 Colours)
Rogue Flash Gels Filter Kit (20 Colours)
Travel Bag.
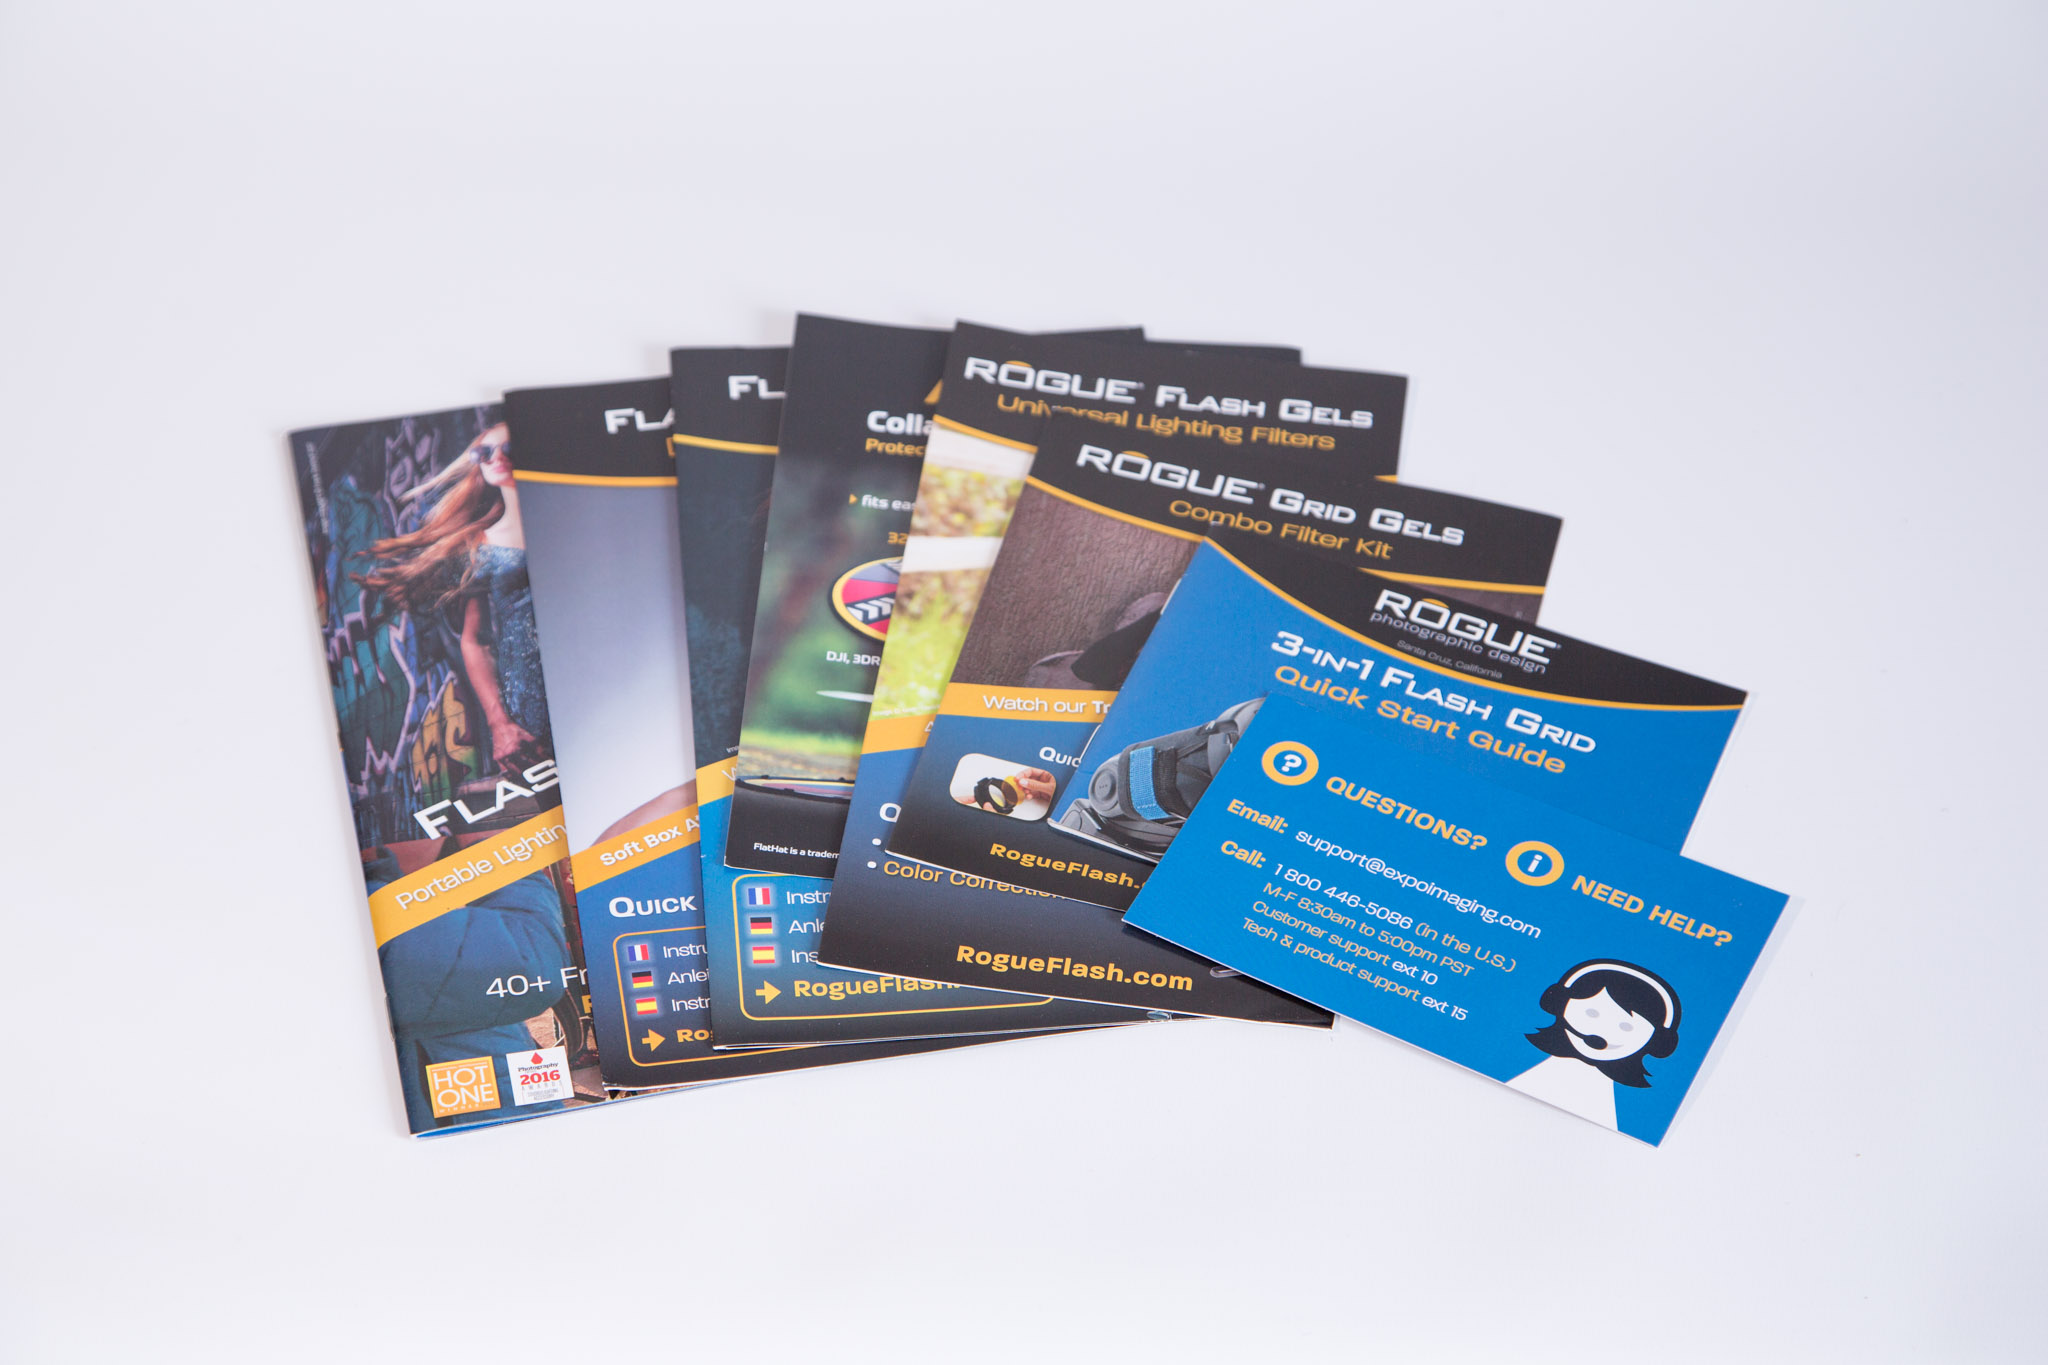
As mention, the travel bag takes up very little room and if you are selective over what parts of the kit you take with you, you will barely notice any additional weight. The reflectors and diffusion panels all fold down so are easily transportable and the gels will slide nicely into a supplied filter pouch, to keep them safe. Rogue have really thought of everything with this kit and have conveniently supplied a few rubber attachment rings to secure the gels to the Speedlite or modifier and even provide some pretty comprehensive literature for advice on how to use the kit - definetly a bonus for those new to modifiying light sources.
Using the modifiers couldn't be simpler. The modifiers attach by a belt that wraps around the light and secures via velcro. The high quality, yet ultra-lightweight materials mean you're never battling with additional weight and although the larger diffusion panel is a fair size, they are all easy to handle without feeling cumbersome. For those using off-camera flash, in windy conditions it is always advisable to weigh your light and stand down, but just be conscious that it may catch the wind slightly easier. The bendable inner poles allow you to manipulate the panel to direct the light as you desire. This is a particularly useful feature when attempting to isolate a subject from a background as the panel can effectively be used as a snoot to direct the light onto your subject. Before you know if, you'll be exploring the possibilities of directing light and adding a crucial new element to your photography.
Having a range of differing sized reflectors is also a bonus, as in certain situations, the smaller panels may be a better option. Bouncing the light also allows you to difuse the harshness of the light source and although many Speedlites allow you to alter the intensity of the light, being able to 'bounce' the light allows you to soften the effect of it, giving a much more pleasing look.
Using the Kit
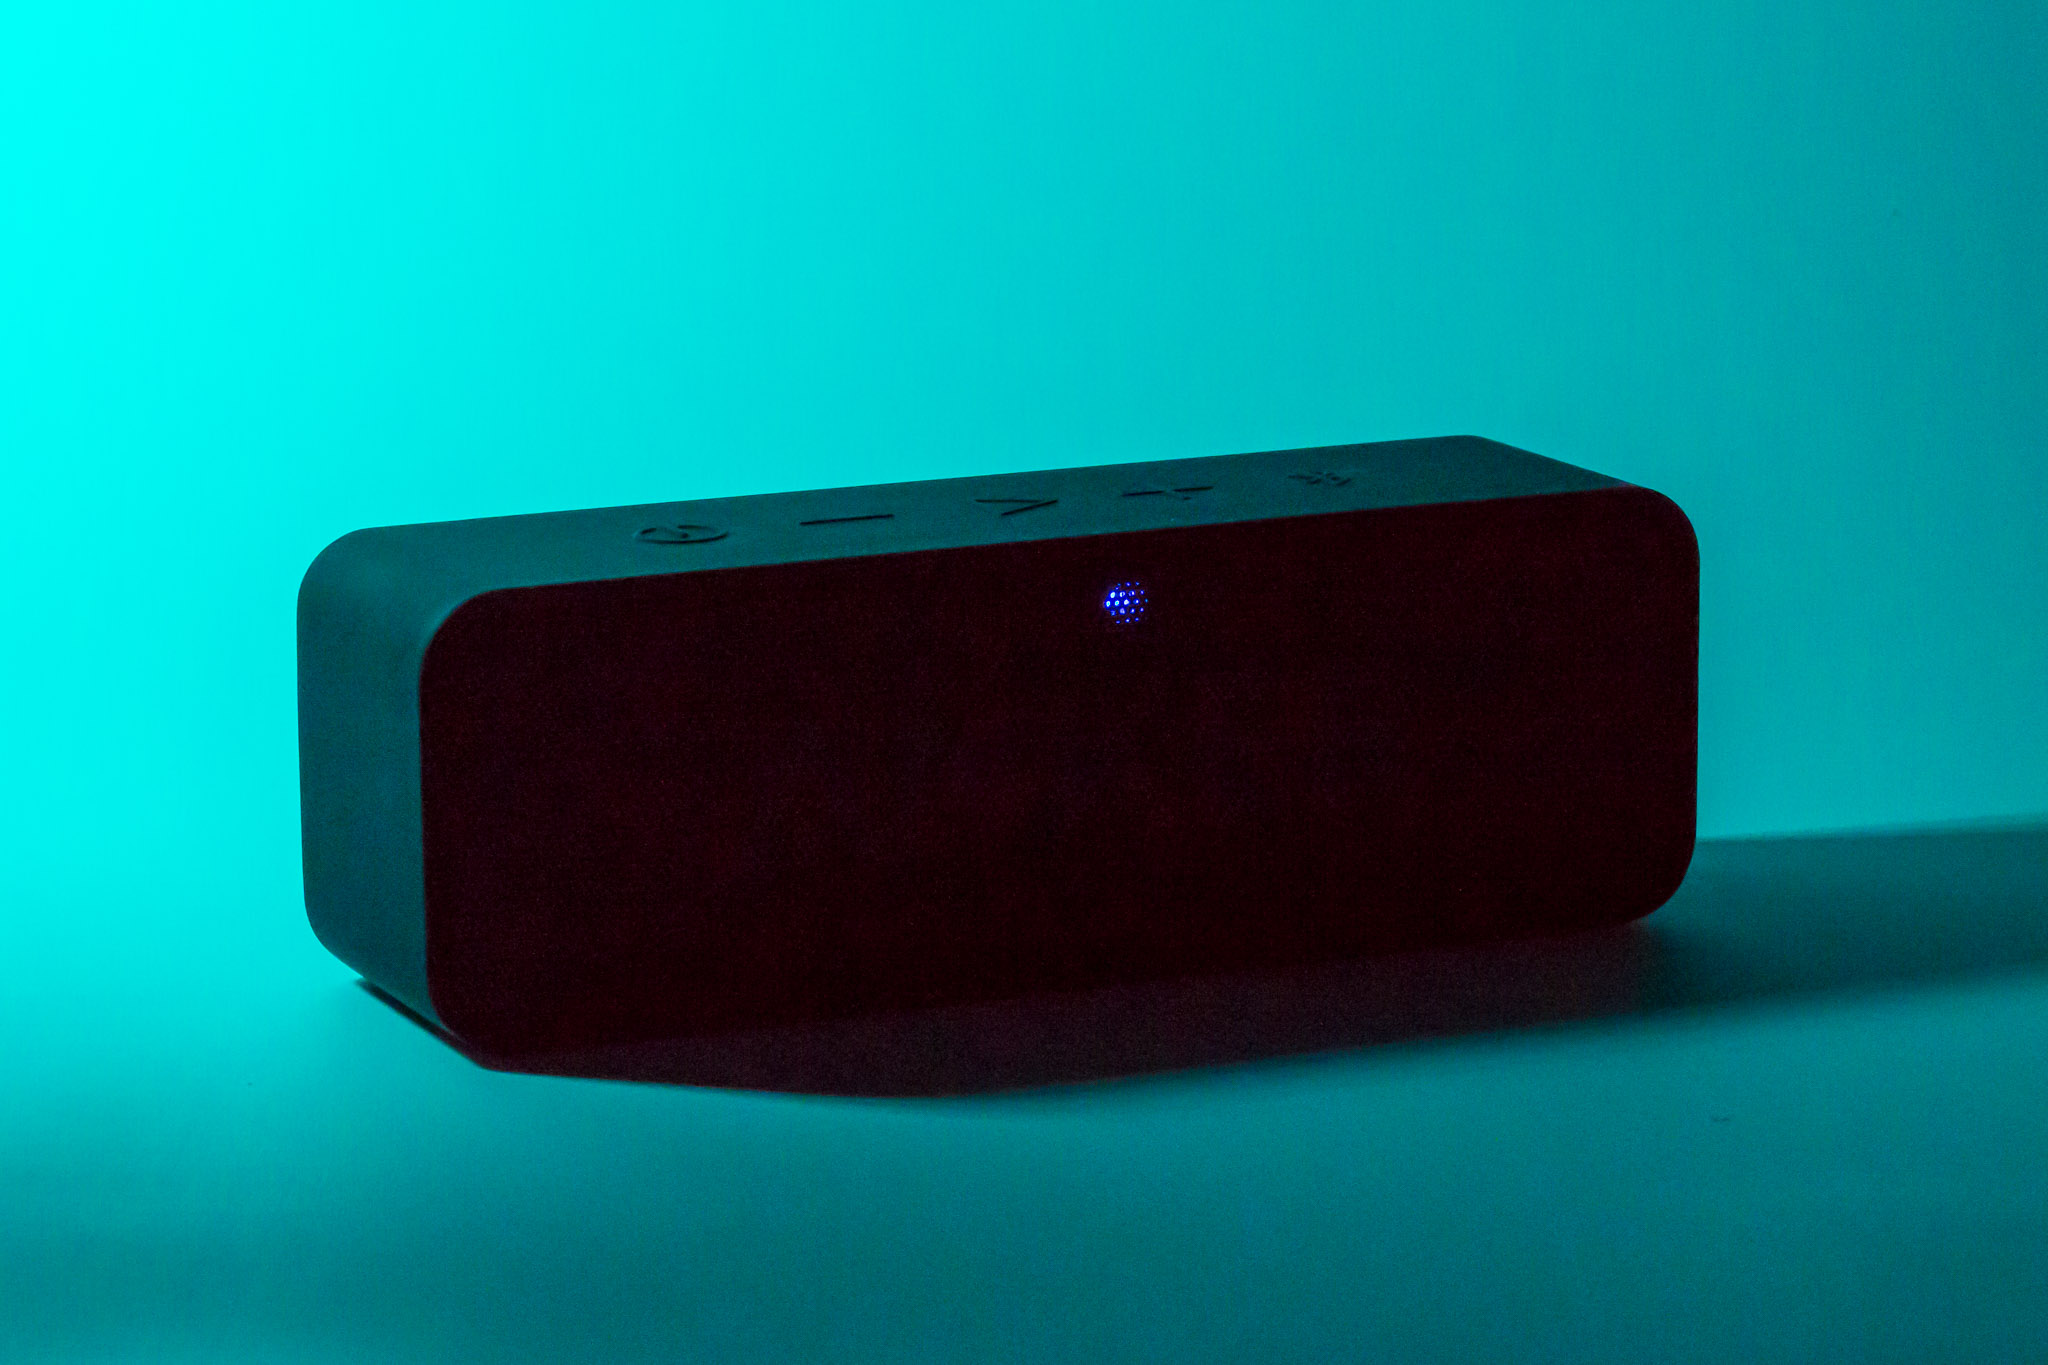
I decided I wanted to put the kit through it's paces and decided to do a very quick, improvised product shoot at a friends house. We grabbed his wireless speaker and and through a sheet of white paper up as a backdrop. We set a couple of lights up and set about seeing how interesting we could make the shots. We got a base exposure just using the lights and then broke out the gels. I was immediately impressed by how simple they were to attach to the lights and even though it's advisable to be careful with them, they don't feel like they are going to rip or tear while you are using them, which is reassuring.
It was great having a range of colours to use and I can certainly see the benefit of using gels to balance colour tempratures in certain situations. However, we wanted to experiment a little and found that the teal and purple gels gave a really interesting look. There is no doubt that with more time and a little patience, you could get some really astounding results. However, what most impressed me was the portability and the speed to set up the kit. It really is designed to be portable and could really help bring your creative side out.
Conclusion
At around £165, the kit is an investment but one that should cover all of your flash modification needs for many years to come. The build quality is excellent and the thought and care taken by Rogue to supply everything you could need to get you going is fantastic. The kit is an excellent addition to any photographers gear bag and for those looking to unleash their creative side and take back control of their lighting conditions, well you need look no further.
For more details and how to purchase, please click HERE (not affiliated).
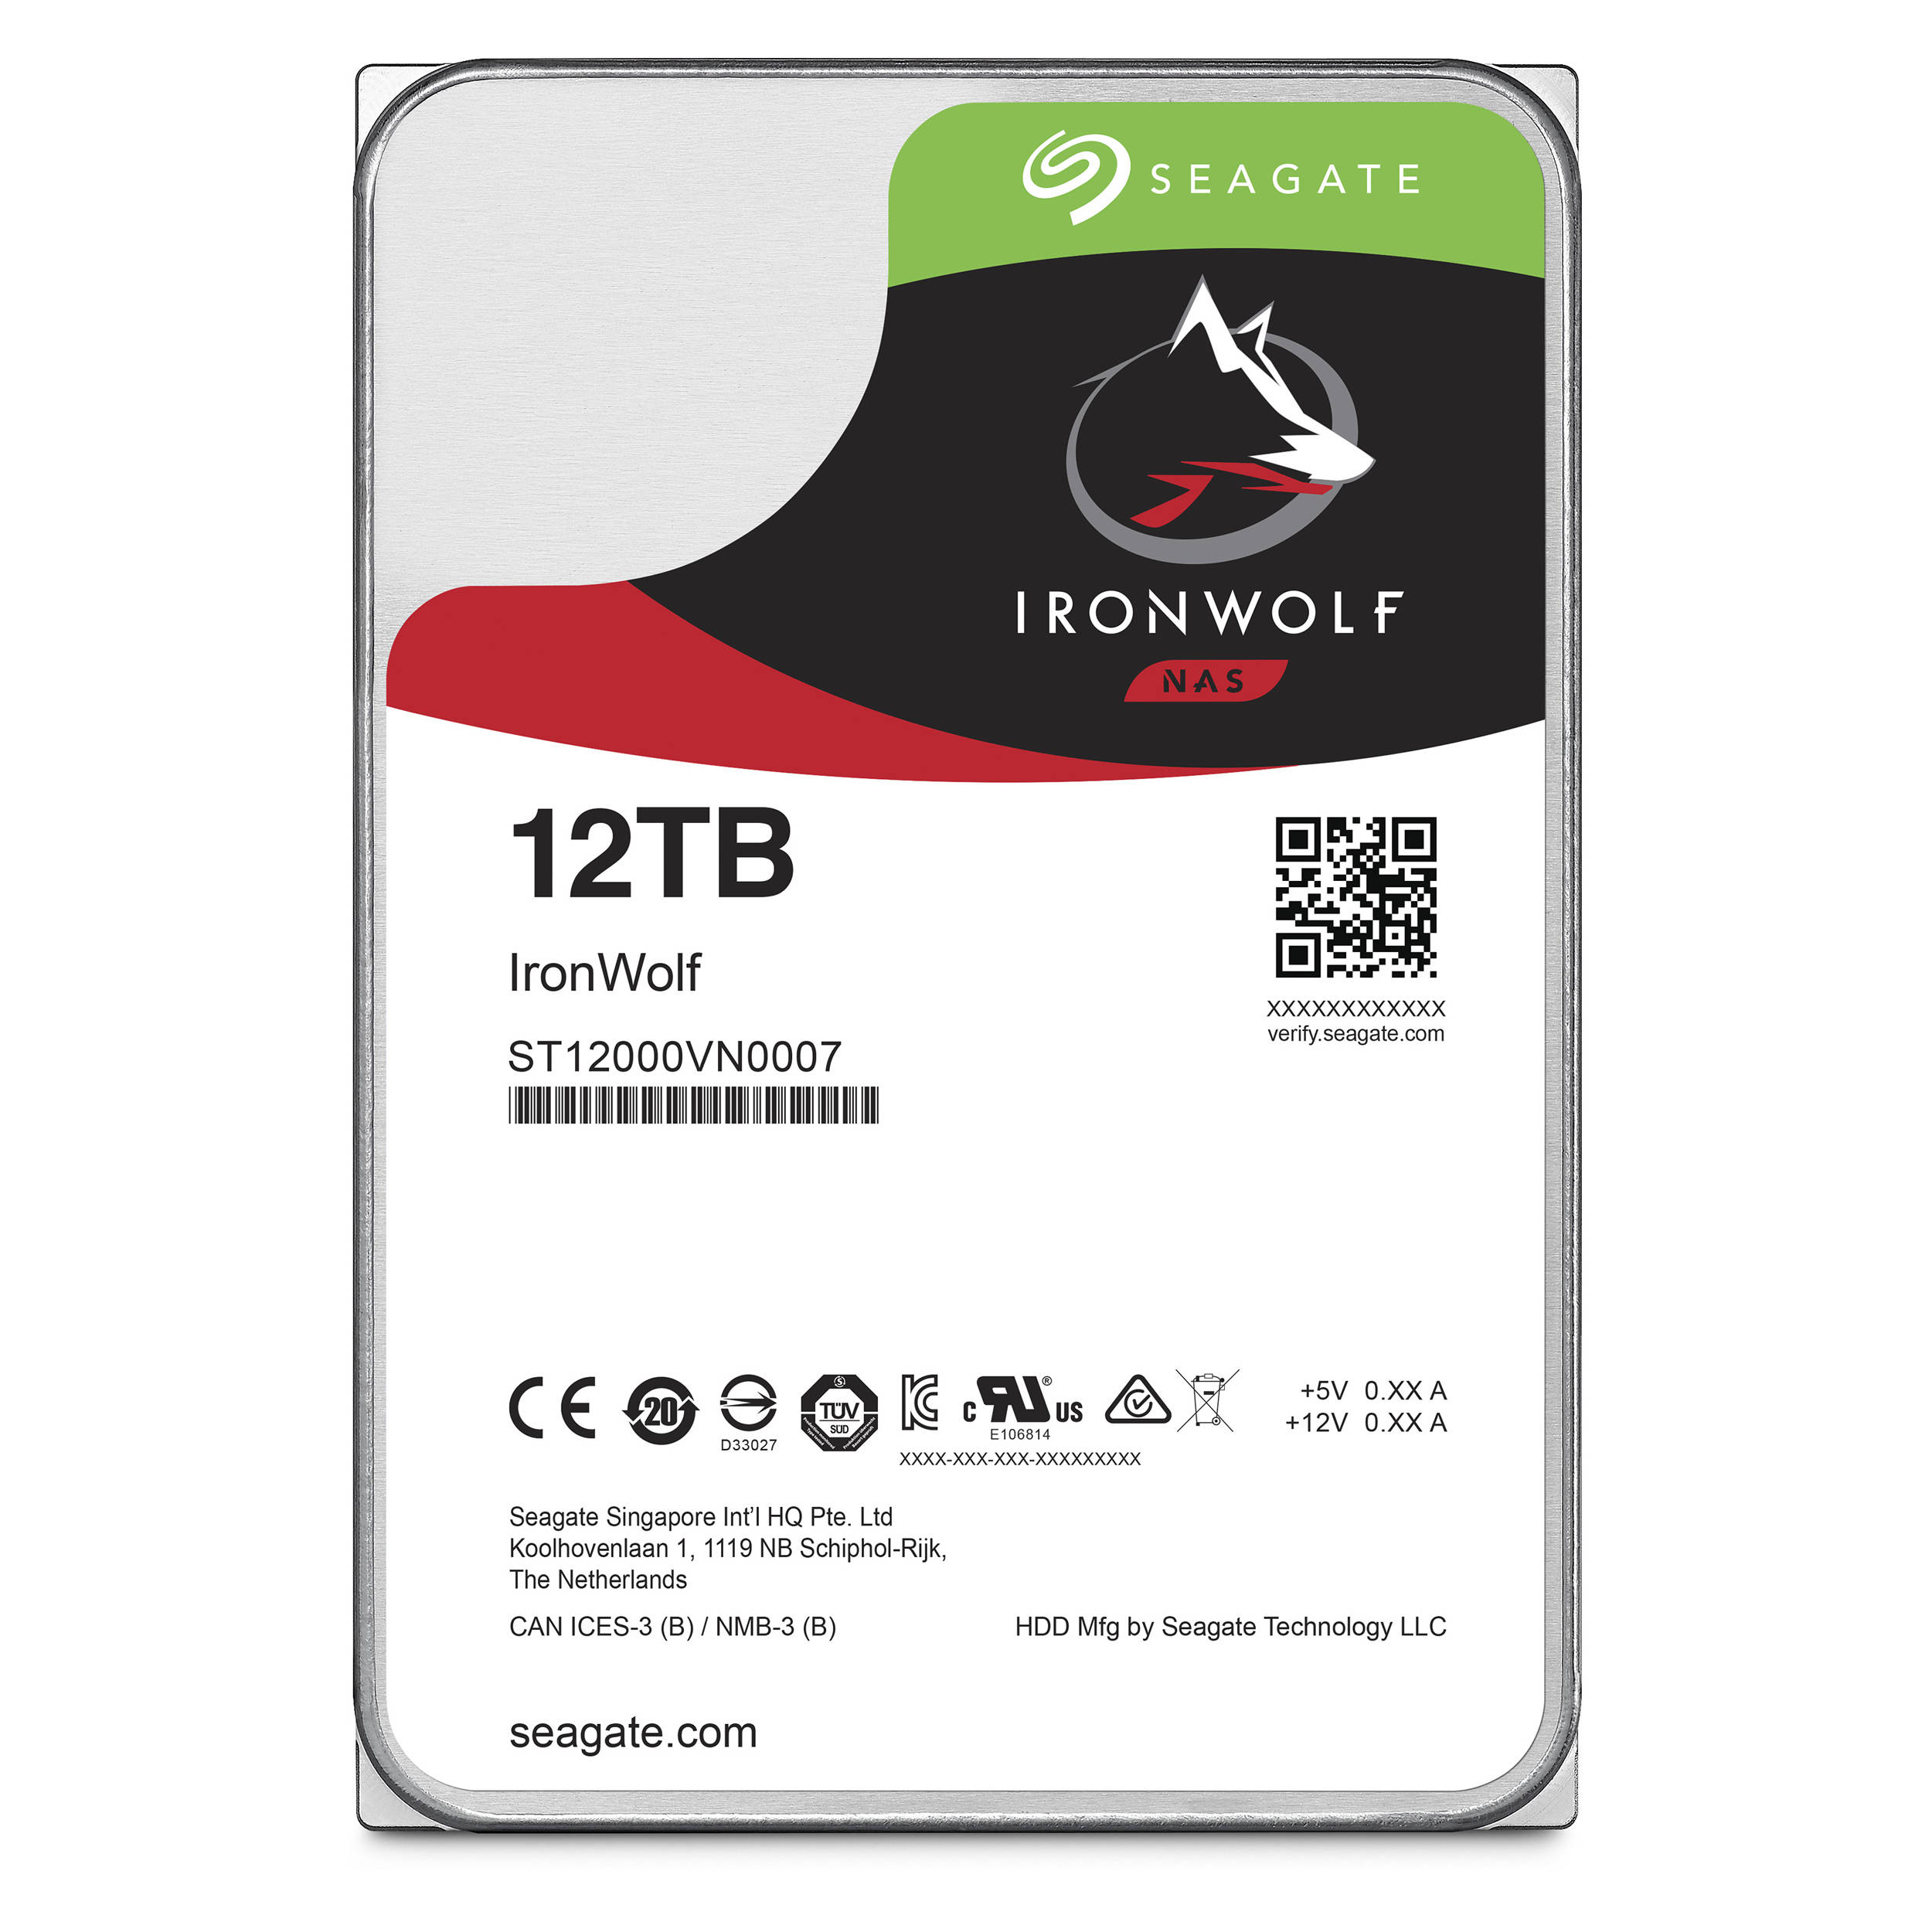
Choosing the right Hard Drives - Seagate Ironwolf 12tb NAS drives
As a photographer, there are parts of my setup that I could not tell you how they work, I just know (and most of the time ‘hope’ with all fingers & toes crossed!) that they do ‘just work’. Hard drives are very much in the ‘close my eyes and ‘hope’ they work category. However, when I setup my new ‘Network Attached Storage’ (NAS for short), I knew that I had to do a little more research as standard hard drives simply wouldn’t cut it.
So first things first, what is a NAS and what planet do they come from?? Very, very simply put, NAS is just a way of attempting to protect your data against loss from hard disk failure by copying data across multiple disks. The premise being that if one disk fails, the data is either ‘mirrored’ on another disk or by using some extremely complex computer wizardry, re-built by the other disks, restoring the data lost from the failed disk. The difference in how your data is protected depends on what ‘RAID’ setup you choose. RAID, or Redundant Array of Independent Disks as it’s catchily titled) can be a bit difficult to get your head around at first, so I’ll save the complex stuff for another blog post.
So why do you need different drives with NAS? The first and main difference is that in general, NAS requires higher capacity drives as you are essentially storing ‘all’ of your data and depending on your RAID setup, this will commonly require multiple drives. I chose the simplest option of RAID 1 - which means that data will be mirrored from one disk to another, meaning I would need two disks of equal capacity. However, before diving straight in and buying the largest drives you can find, it’s always worth doing a little prep work.
I started by looking at exactly ‘what’ I wanted to protect. I use two seperate computers, a Macbook Pro for the majority of my day-to-day work and a PC for bulkier editing and long-term storage. Fortunately, most NAS setups will allow you to store data from different platforms. Next I looked at the most important things that needed protecting. Well, quite simply it is my image library - which comprises of some 70,000 photos and you can throw around 50 video projects on top of that. Finally, there were some day-to-day documents relating to my business and a handful of ‘holiday snaps’ and things that I would like protecting. All of this data soon added up and I knew that I was looking at disks in the Terabytes!
The next thing to consider is the performance of the disks. With my NAS setup (which I will cover in an additional blog post) I knew that I wouldn’t be editing directly from the storage device. I would be saving new images to my MacBooks internal SSD - editing what I needed, exporting client photos to DropBox and then moving the completed projects to an ‘Archive’ - which in this case would be the NAS. This meant that I could reduce the files held on my ‘working’ computer and add an element of protection by storing the files (& Lightroom catalog) on the NAS. I also knew that I would need to access that data 24 hours a day - so the NAS would always be on - additional strain on the required hard drives.
Taking all this into account, I knew that I had to choose ‘NAS’ rated drives. These drives are design for much longer run times and have more protection against vibrations, reducing the risk of mechanical failure. As I did my research, I kept coming across Seagate, who certainly have a great reputation in this market and in particular, their ‘Ironwolf’ range of disks. Apart from having a really cool name, these disks also looked like they packed a decent punch, with excellent benchmarking results for both read & write performance and power management - which were all concerns I had about choosing the right disks.
The next big question was ‘what size disks?’ - when it comes to size, it’s a bit of a personal question and I always believe bigger is better. However, in this case, it was completely justified. I knew that I had around 6tb of essential data that I needed protecting. Considering that doing photo and video work, I will be adding around 2tb a year minimum, I needed to find disks large enough to give me a couple of years worth of storage before having to upgrade. My options were becoming slim and I kept coming across the same answer, ‘Ironwolf 12tb’ - it looked like we have a winner.
QNAP TS-453-B NAS
Fast forward a few months and the disks are in the NAS and I am very pleased to say, performing as desired. These are not cheap hard drives, in fact they are very expensive, but you are getting a lot of ‘bang for your buck’ I could have also plumped for more, smaller drives, but choosing RAID and disks is quite a personal choice and this felt like the best setup for me at the time.
In conclusion, I am really impressed by these disks. They are a huge capacity and in terms of performance, they haven’t missed a beat. They are speedy enough to get quick access to your data and run quietly and efficiently. As stated at the beginning, this really isn’t my area of expertise but what I can say is that I feel comfortable leaving the hardware to do the hard work and live safe in the knowledge that my data has an added layer of protection against mechanical failure.
Check back soon as I will be writing a new post about how I manage my data and my workflow from start to finish.
For more information about Seagate Drives, click HERE
REVIEW: BenQ SW271 - 27" IPS LED Monitor - 4K UltraHD
Professional and Amateur photographers alike are aware of the importance of accurate colours in your images. Whether it's print or on screen, the colours need to be exactly how we wish to portray them and the only way to achieve this is by starting with a good quality monitor. Fortunately, BenQ has been producing some outstanding monitors in recent years and giving the big boys a run for their money! So how would the SW271 stack up? Keep reading to find out...
The SW271 is a 27 inch, 16:9 (3840x2169 pixels), 4K UHD monitor packing some seriously high-end features, such as:
99% Adobe RGB Colour Space with IPS technology
27 Inch 4K UHS resolution
High Dynamic Range (HDR)
Hardware Calibration with Palette Master Element Software
USB-C™ for transmitting data and video signal with one cable
10 Bit colour depth (If using HDMI 2.0/DisplayPort & an appropriate GPU)
Hot key puck
Built in Colour Calibration
Shade Supplied
Build Quality, Size & Connectivity
As a user of the SW271's big brother, the SW320 - I'm well aware that for many rooms, the SW320 can be a bit 'too' bulky, it's certainly no shrinking violet. So I was pleased to see that the SW271 keeps BenQ's simple yet stylish design theme but with slimmer bezels and a more lightweight and maneuverable feel than it's hefty relative. The matte grey plastic feels good quality and the metal stand articulates well and feels lightweight to move, but reassuringly sturdy.
BenQ clearly put a lot of thought into their design and even though it may not have some of the gimmicks of other monitors such as flashy LED's, BenQ manage to make an attractively minimalist monitor without it looking boring. Furthermore, it feels like a quality product and worth the cost as even simple things like the quality of the buttons, with their satisfying 'click' when pressed, that remind you that this is not a cheap product.
The SW271 fills a very nice hole in the size range, meeting the ever important 4k demands with a beautifully clear screen that is more than capable of giving editing software such as Lightroom, Photoshop, and Final Cut some much-needed breathing space. The 27inch panel can easily be flipped into a vertical orientation and the need cable tidy aperture on the stand keeps everything where it needs to be.
Talking of cables, connectivity should not be an issue with the SW271 with two HDMI 2.0 ports, a DisplayPort input, two USB Gen1 Ports and a USB XXXXXXXXXXXXXXXX
Performance
So the big question, is how does it perform? Well straight out of the box, this thing is a beast. BenQ calibrates all of their high-end monitors in the factory and for added reassurance, you get a calibration report in the box, boasting some very impressive figures. The 4k UHD is clearly targetted at those who require attention to fine detail either when viewing and editing photos or video. The monitor certainly delivers on that front and clean and crisp with good contrast. The 27-inch size makes it a pleasure to work on and gives you plenty of space on the screen to make sure that editing tools are not eating into valuable display space.
Colour accuracy is superb and with hardware calibration, achieving accurate colours is a breeze. Moving between colour spaces (RGB, AdobeRGB, black & white, Rec. 709, DICOM, DCI-P3, or HDR10) is a doddle with the 'Hot Key Puck' (which is just one of BenQ's really well thought out features) or the really easily navagated menu system. The supplied shade and really usable connectivity show that BenQ understand the needs of photo and video editors.
Conclusion
Straight out of the box, the SW271 is clearly a high-end product, built with Photographers & Videographers clearly in mind. The build quality is excellent and feels like a reassuringly sturdy monitor, without being too 'heavy' looking thanks to the thin bezels and clean design. It is feature rich and added bonuses such as the supplied shade, SD Card reader and BenQ's clever 'Hot Key Puck' should not be overlooked. It also ships with all the necessary leads and cables to get you started, straight out of the box.
Most importantly though, it packs a punch, providing the kind of quality that I have come to expect from it's bigger (and pricier) brother, the SW320. The 4k is certainly welcome and can be a real benefit for photo editing but it really comes into its own when video editing. More importantly, the wide colour gamut and Hardware calibration go a long way in terms of giving you confidence in your colour reproduction (though it is still necessary to regularly calibrate your monitor/printer etc. to ensure accuracy). Details look great on this monitor and I never found any of the darker colours to look muddy and gives you confidence in your editing.
There is no getting away from the fact that the monitor cannot be classed as 'budget friendly'. However, compared to similarly specced monitors, it actually starts to look like a great option. The sheer size is great to work with and will definitely benefit those that need to focus on finer details. One minor downside is the lack of a powered USB-C that would be a nice touch. However, additions such as the Hot Key Puck and the supplied shade, show you that BenQ mean business and have put a lot of thought into their target market. All in all, it's a great monitor and should be on the consideration list for any Pro/Amateur togs & videographers out there.
For more information about the monitor and how to purchase (not affiliated) please click HERE
WATCH THE REVIEW BELOW:
