VIDEO: The Loupedeck CT for Photographer & Videographers

The Loupedeck CT is genuinely perfect for Photographers and Videographers looking to improve their editing workflow. It support apps such as Lightroom, Photoshop, Ableton, Premier Pro Final Cut and more - it really is a great tool, but it has one massive drawback! Would you stump up for the Loupedeck CT?
❤️ - Don’t forget to Subscribe for more - https://www.youtube.com/rossjukesphot...
🎥 - You may also like...
📸 - Fuji X100F Review - https://youtu.be/Rze_FwWZjG0
📸 - Weebill S Honest First Impressions - https://youtu.be/EuWGpxOfJc8
📸 - The EOS-R - Have I made a mistake? - https://youtu.be/S7ICyugt4PE
VIDEO: LowePro Protactic 450 AW II - Still the BEST Camera Bag in 2019?

LowePro Protatctic 450 AW II could well still be the BEST camera bag of 2019 but in faces increasing challenges as a host of new camera bags for photographers and videographers hits the market, including one from the legend that is Peter McKinnon!
You can learn more at https://www.lowepro.com/uk-en/protactic-bp-450-aw-ii-black-lp37177-pww/
or Buy one at: https://amzn.to/32P7NFi
❤️ - Don’t forget to Subscribe for more - https://www.youtube.com/rossjukesphotography?sub_confirmation=1
VIDEO: DataColor Spyder X Elite - BEST Monitor Calibrator

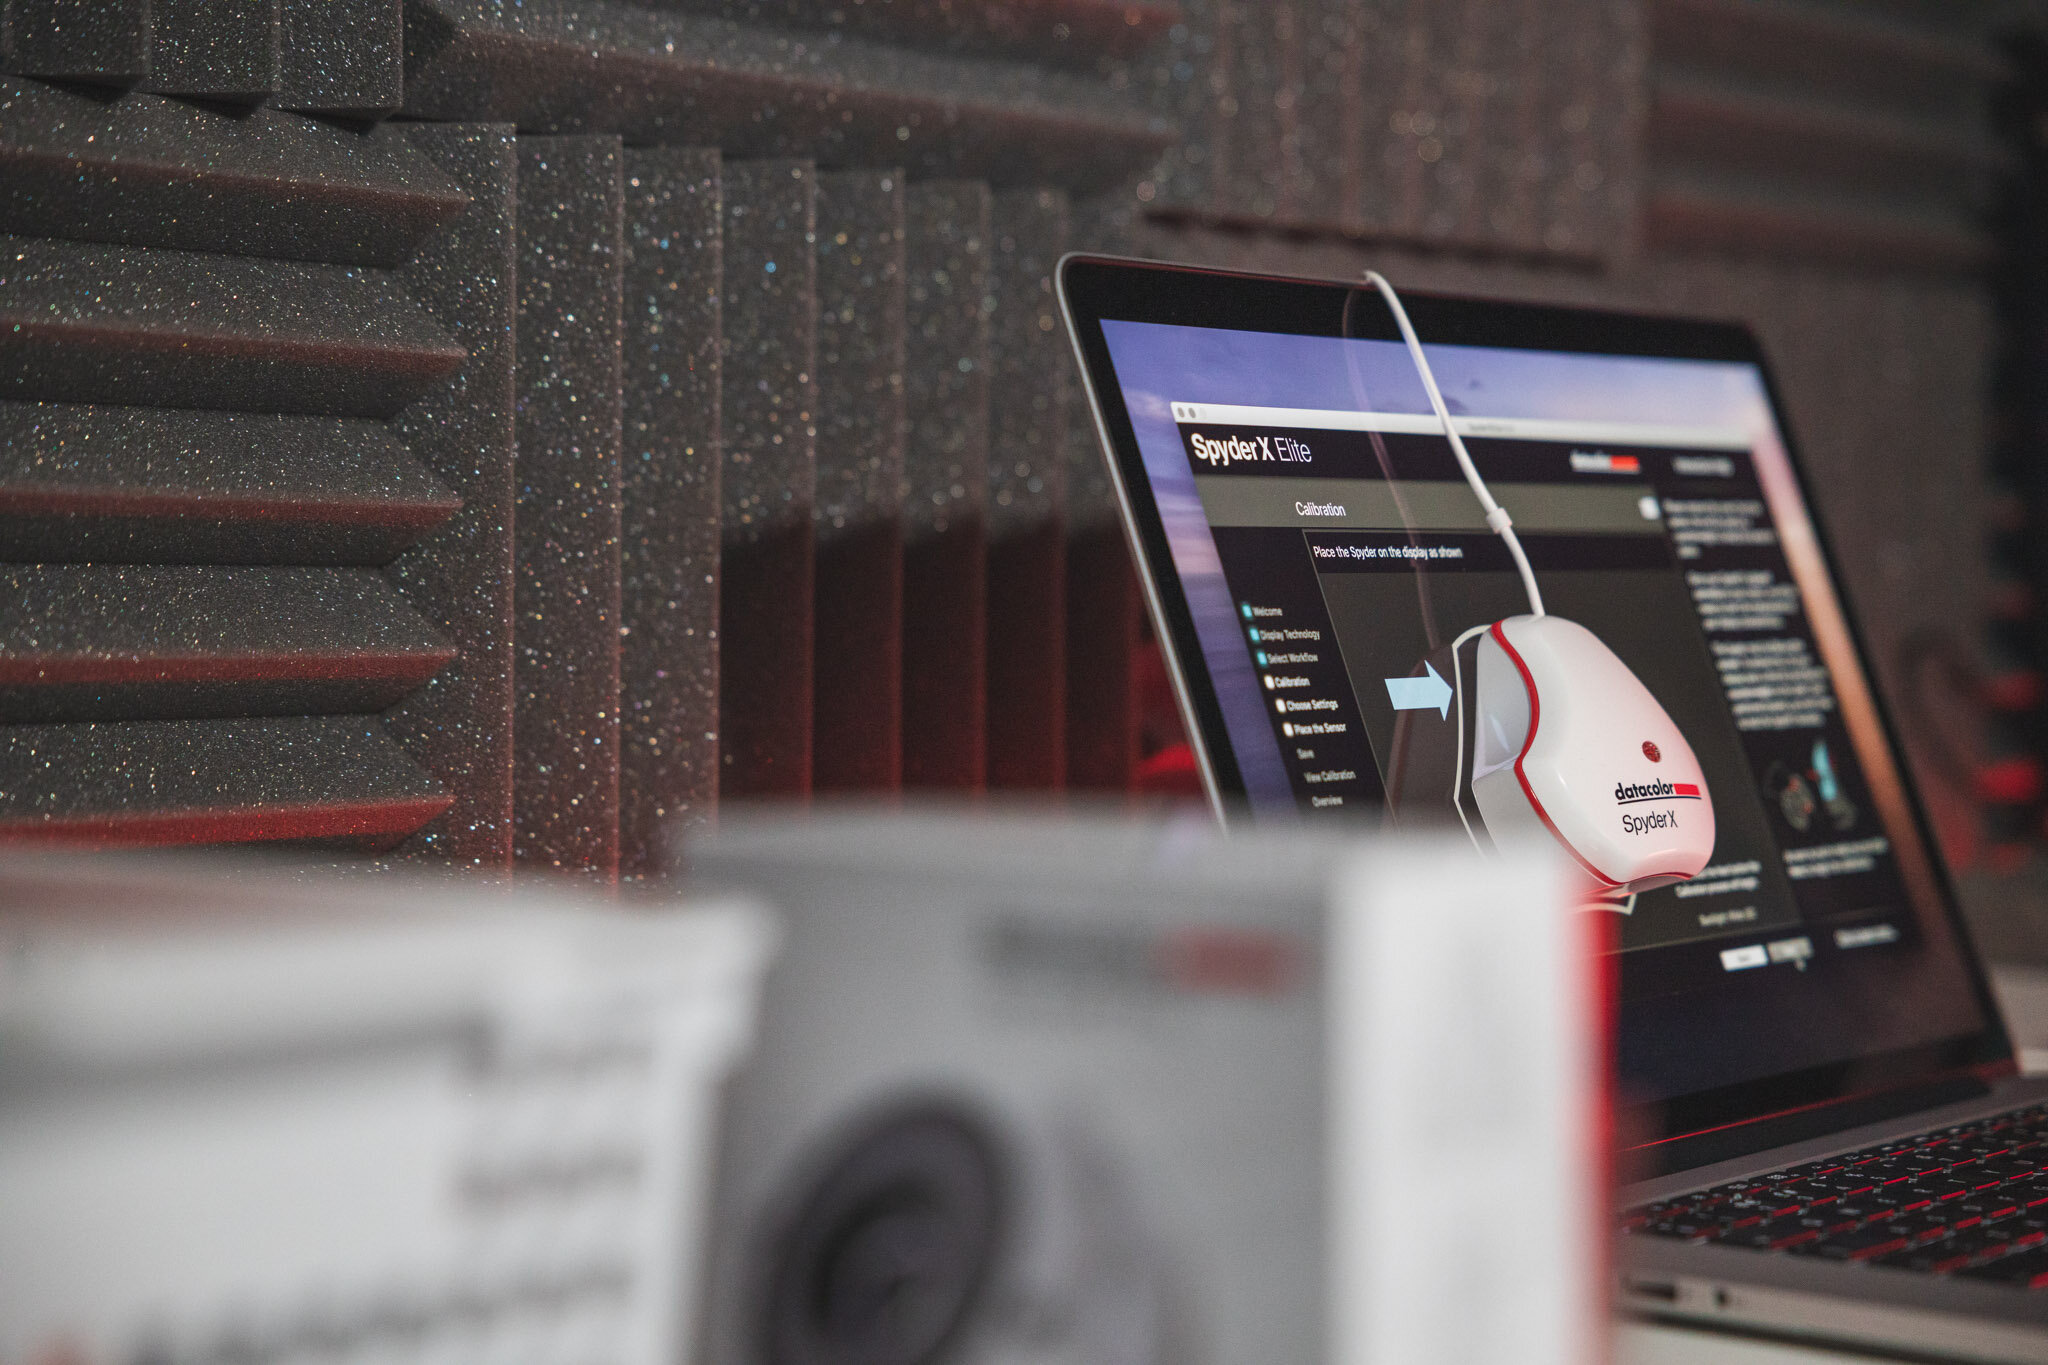
Having a perfectly calibrated monitor is critical for photography & videography. Find out what I thought of the Spyder X Elite and see how to easily & correctly calibrate your monitor. Is the Spyder X Monitor Calibrator the best of 2019?
Buy the Spyder X Elite here: https://amzn.to/2NkJQRK
Read more in my Blog Post - https://www.rossjukesphoto.co.uk/blogfeed//review-datacolor-spyder-x-elite-monitor-calibrator
VIDEO: Zhiyun Weebill S - HONEST first Impressions!

As a Photographer and Videographer, I am always looking for ways of improving my output and having the right tools for the job is always important. The Zhiyun Weebill S is a new gimbal that features improved motors to help keep your footage steady. Take a look at the video to see my honest first impressions.
VIDEO: Burnout Killing your creativity? This is how to deal with it!

It is all too common for us creatives that from time to time, everything just get’s a little bit too much and we end up exhausted! This is Burnout and it is very dangerous for creative people! Not only does it stifle our creativity, but that loss of passion can lead to even worse things such as turning work away, becoming withdrawn and even depression.
This video looks at how creative people, such as Photographers and Videographers can cope with Burnout and turn it around into something positive!
Don’t forget to hit ‘Subscribe’ while you are there.
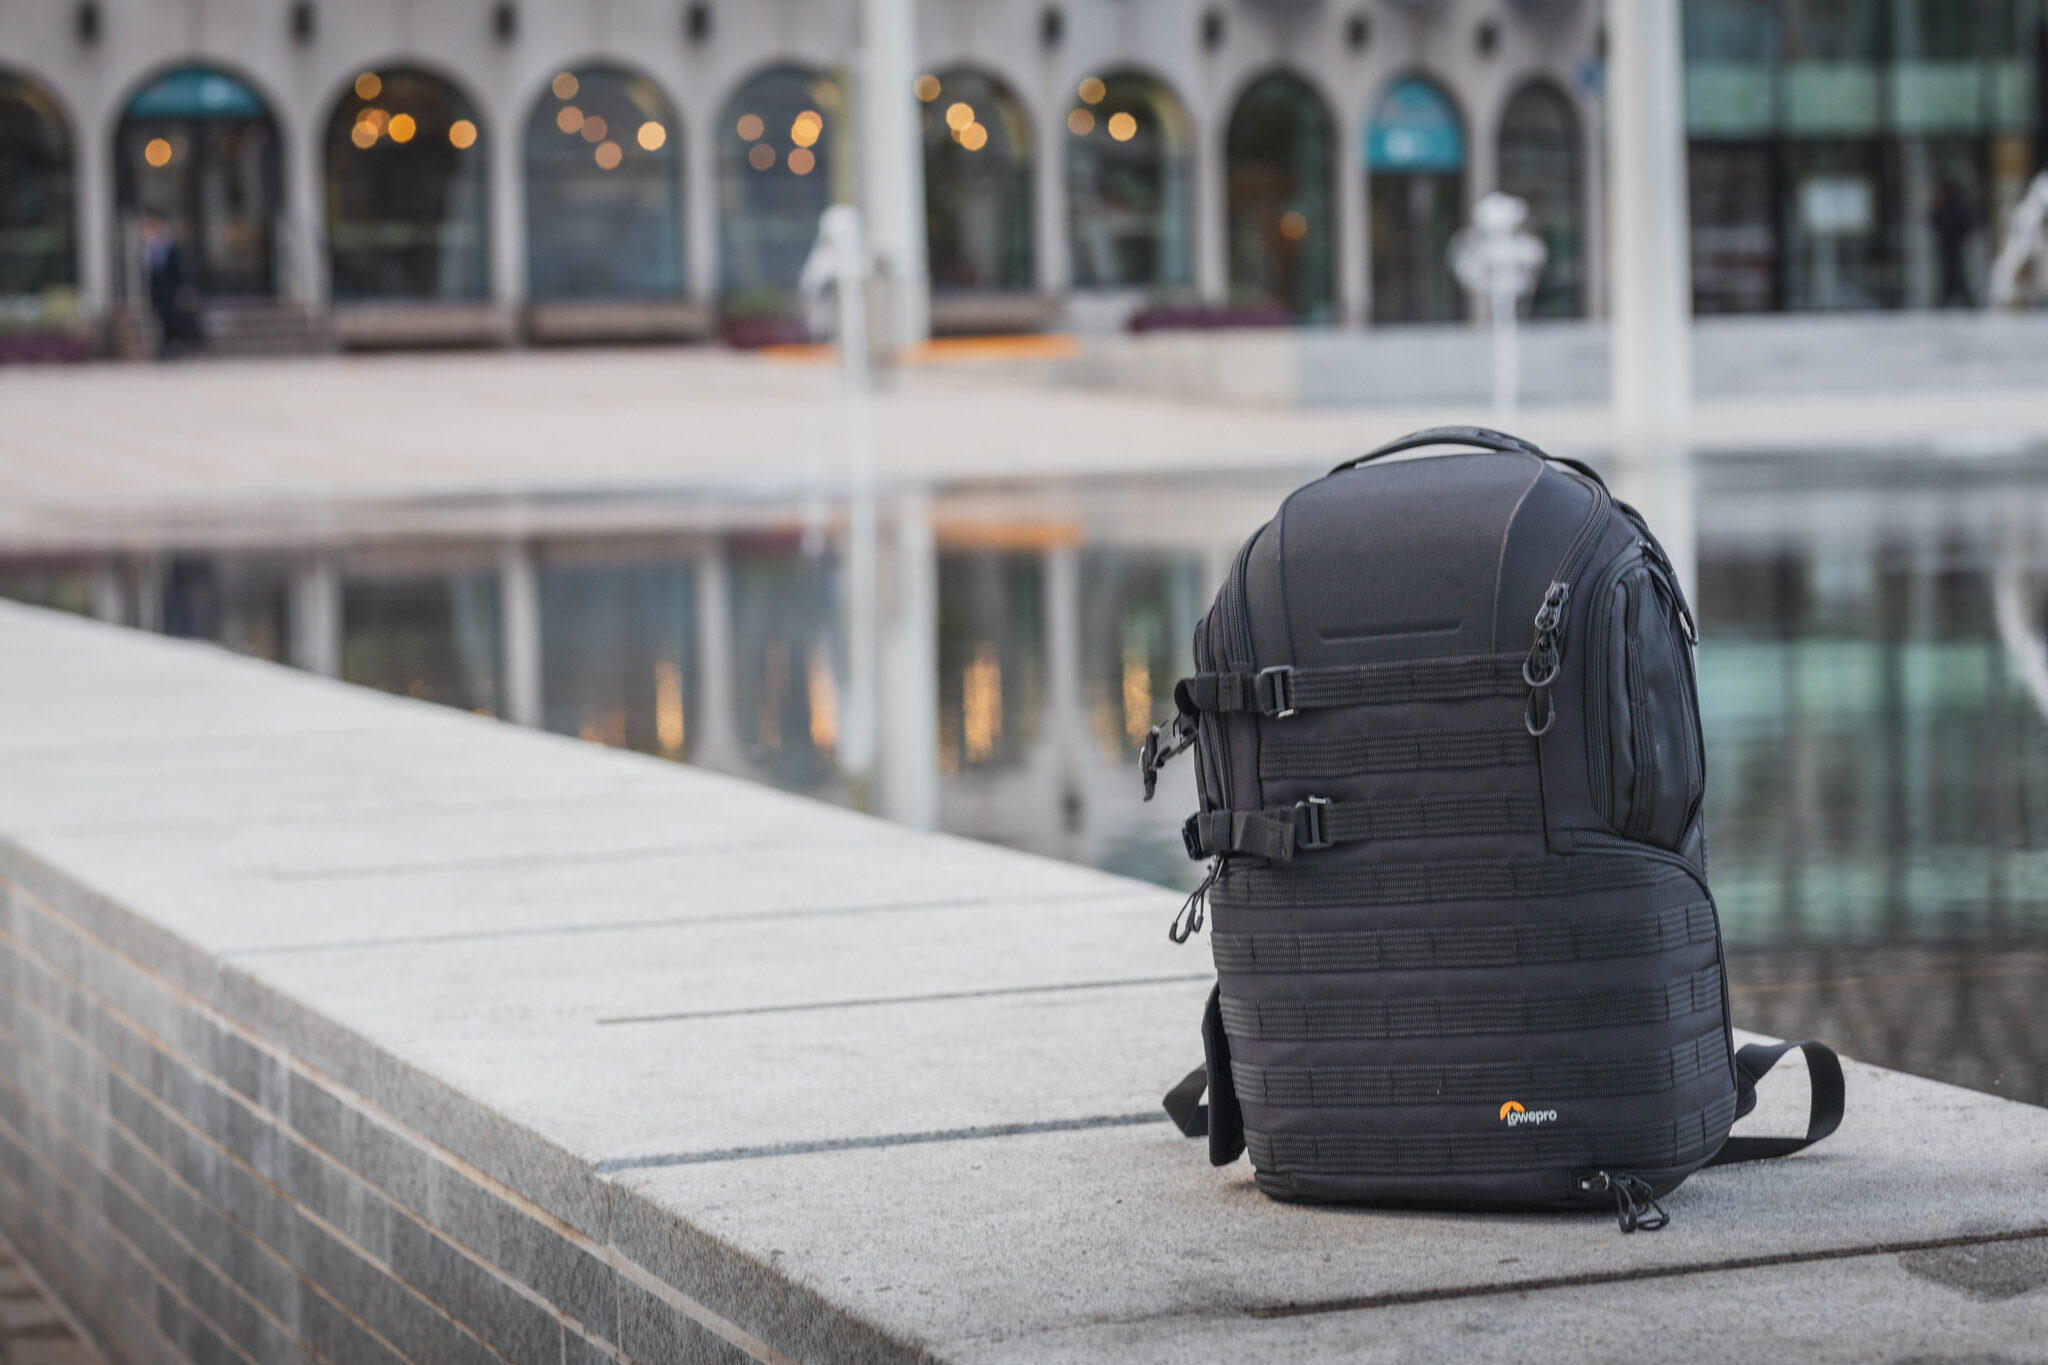
REVIEW: LowePro 'ProTactic' 450 AW II

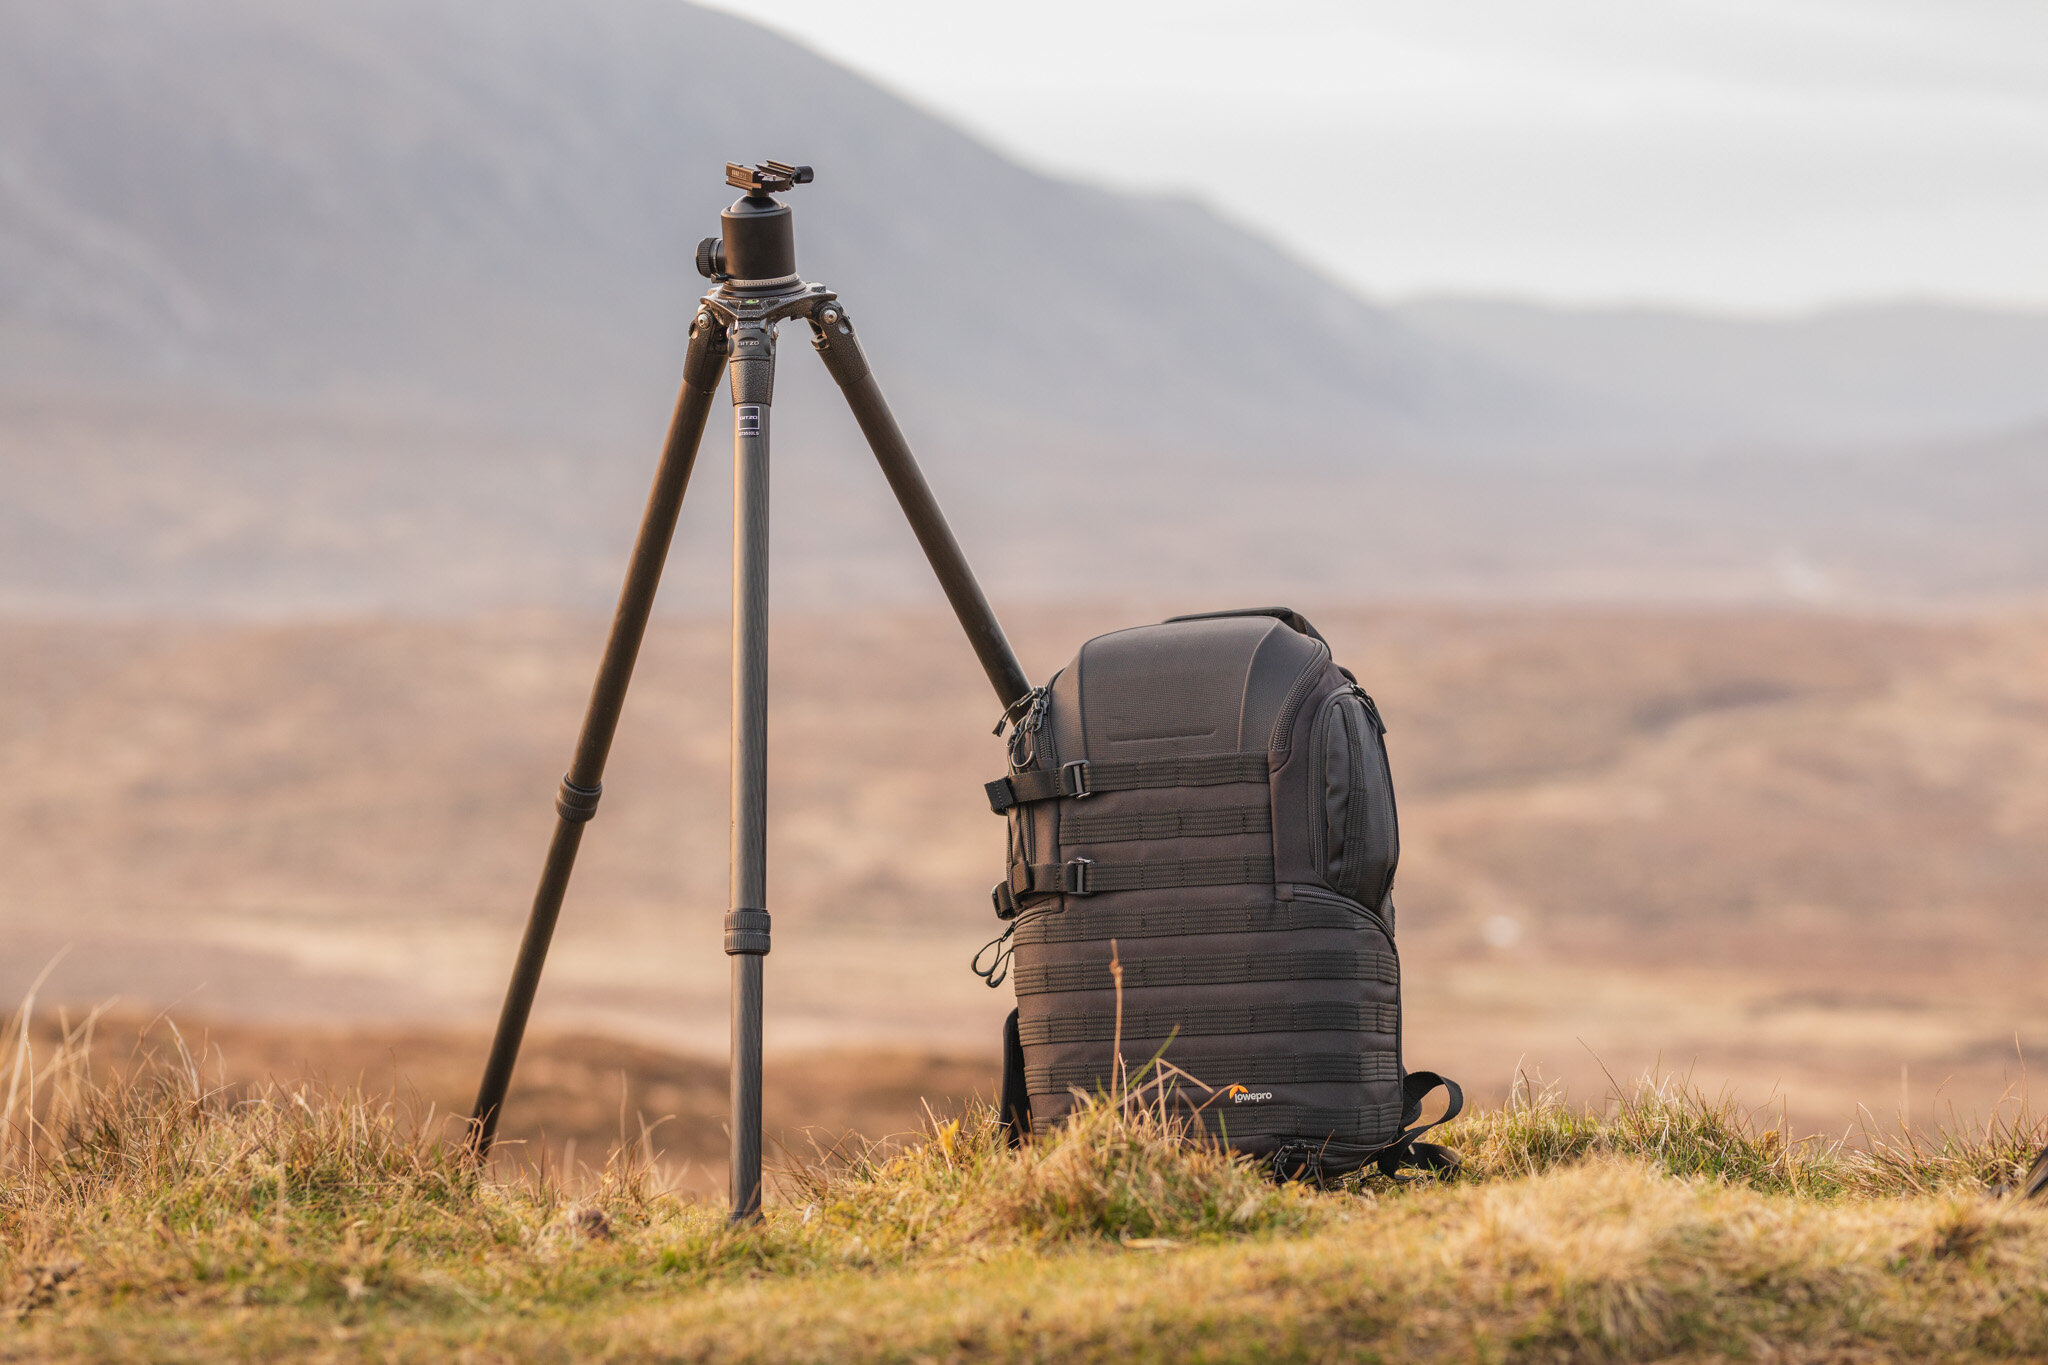
For a long time now, I’ve been on the hunt for a camera bag that can carry everything I need for my commercial work. It also needs to offer great protection, be versatile and look good - and The LowePro ProTactic 450 AW II certainly seems to meet a lot of those requirements, but will it be perfect? Read on to find out…
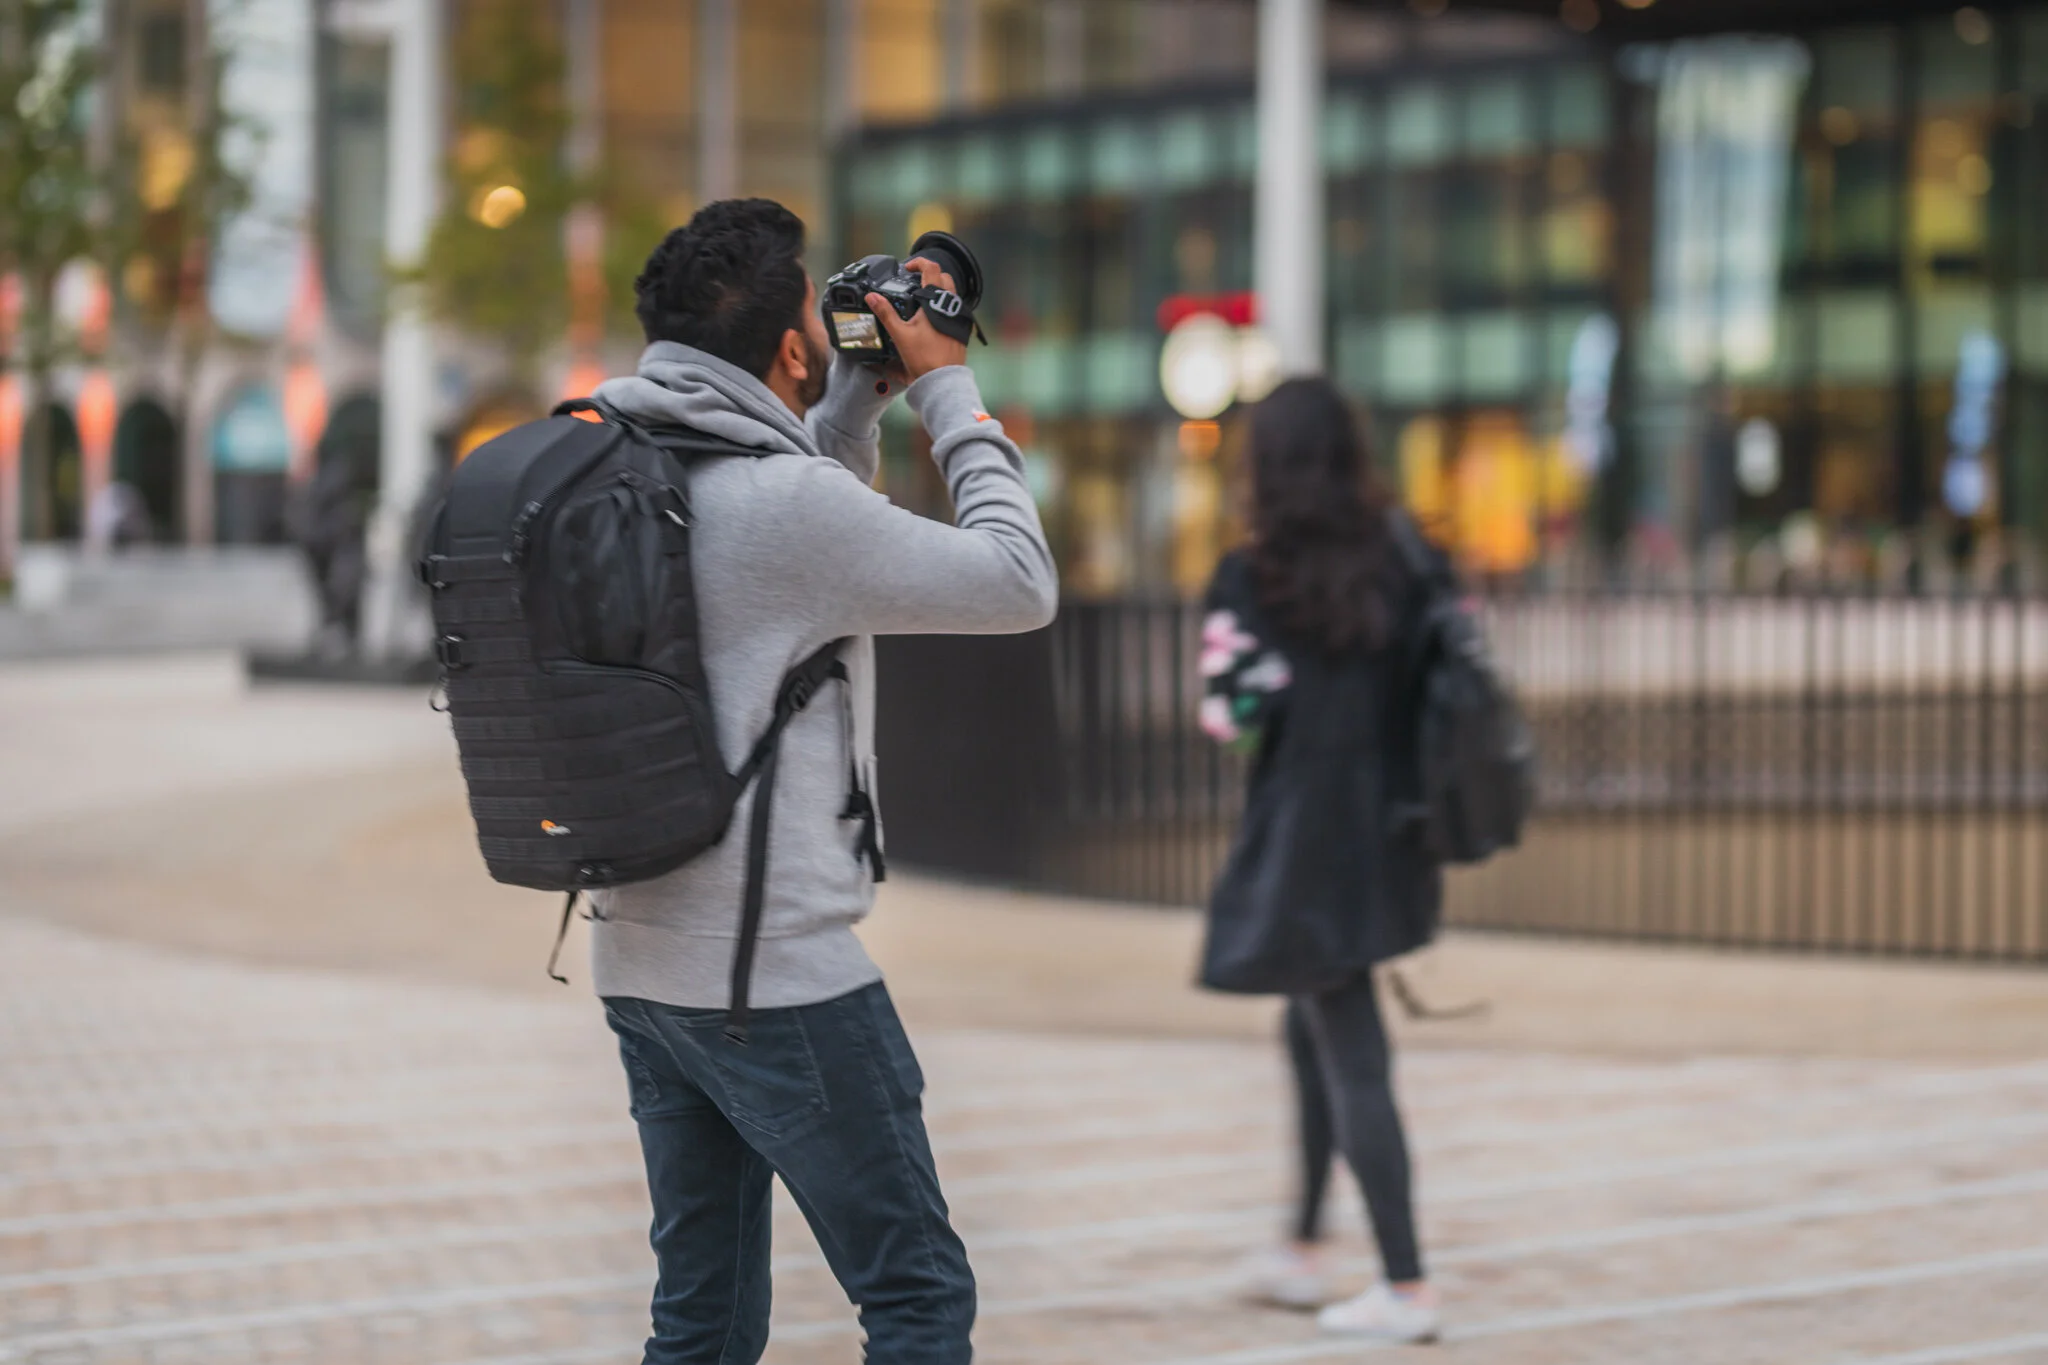
As you will see from the various images, I do a lot of travelling with my equipment and also shoot a variety of Urban and traditional Landscape photography, so the bag needs to be able to stand up to various challenges. Due to this, I was looking for something that could handle everything nature could throw at it, yet be discreet and stylish enough that it wouldn’t look out of place walking through the city streets.

Build Quality
I’ve purchased LowPro products in the past so I can say confidently that I have always been a fan of their build quality. However, the ‘450 II’ seems to take this to another level. With significant improvements over it’s already popular predecessor including upgraded zippers, more armoured protection and overall improvements in the build quality. The 450 II looks almost indistinguishable from the last version. However, there is increased padding in all of the key areas and some improvements to the exterior webbing etc.


The bag is surprisingly lightweight considering it’s the size and load capacity. More importantly, ‘FormShell’ technology adds critical protection to key areas without adding significant weight. The versatile exterior webbing is well constructed and I had no issues with hanging modular components on the exterior. The ‘All Weather’ element also does it’s bit. On several occasions since using the bag, I’ve been caught out in severe weather conditions and to this day, I haven’t found any kind of water ingress.
Features
It probably goes without saying that the main feature of the bag is obviously, well, it’s a bag! It’s designed to carry camera gear and it does that job incredibly well. The main compartment can pretty easily fit two DSLR’s - a few lens and a variety of accessories. More importantly, you can fit a DSLR with a 70-200mm lens attached! The bag is also surprisingly ‘deep’ - my little Eos-R seems to disappear into the bag and with a little bit of clever packing, this allows more storage space as you can ‘stack’ items.

The ‘Craddlefit’ interior segments allow you to fully customise the interior to suit your needs. This is ideal if you want to make use of the top or side access panels and one great use I found for this was leaving the 70-200mm lens on one body to be accessed through the top and a another body with a shorter lens in one of the side compartments - meaning I always knew where to go to grab what I needed in a hurry! The ‘smart’ interior segments even have little pouches in them which make for ideal places to keep memory cards, lens cloths etc.
However, the clever interior features don’t stop there! There is a 15” laptop pouch situated on the back panel of the bag (nearest your back) which comfortable took my MacBook pro and even has a couple of additional zipped pouches which I found great for storing external hard-drives etc. Obviously carrying a laptop eats into the interior space a bit but I still found I could carry two DSLR’s, a couple of lens and accessories even with the ‘computer’ parts filled.


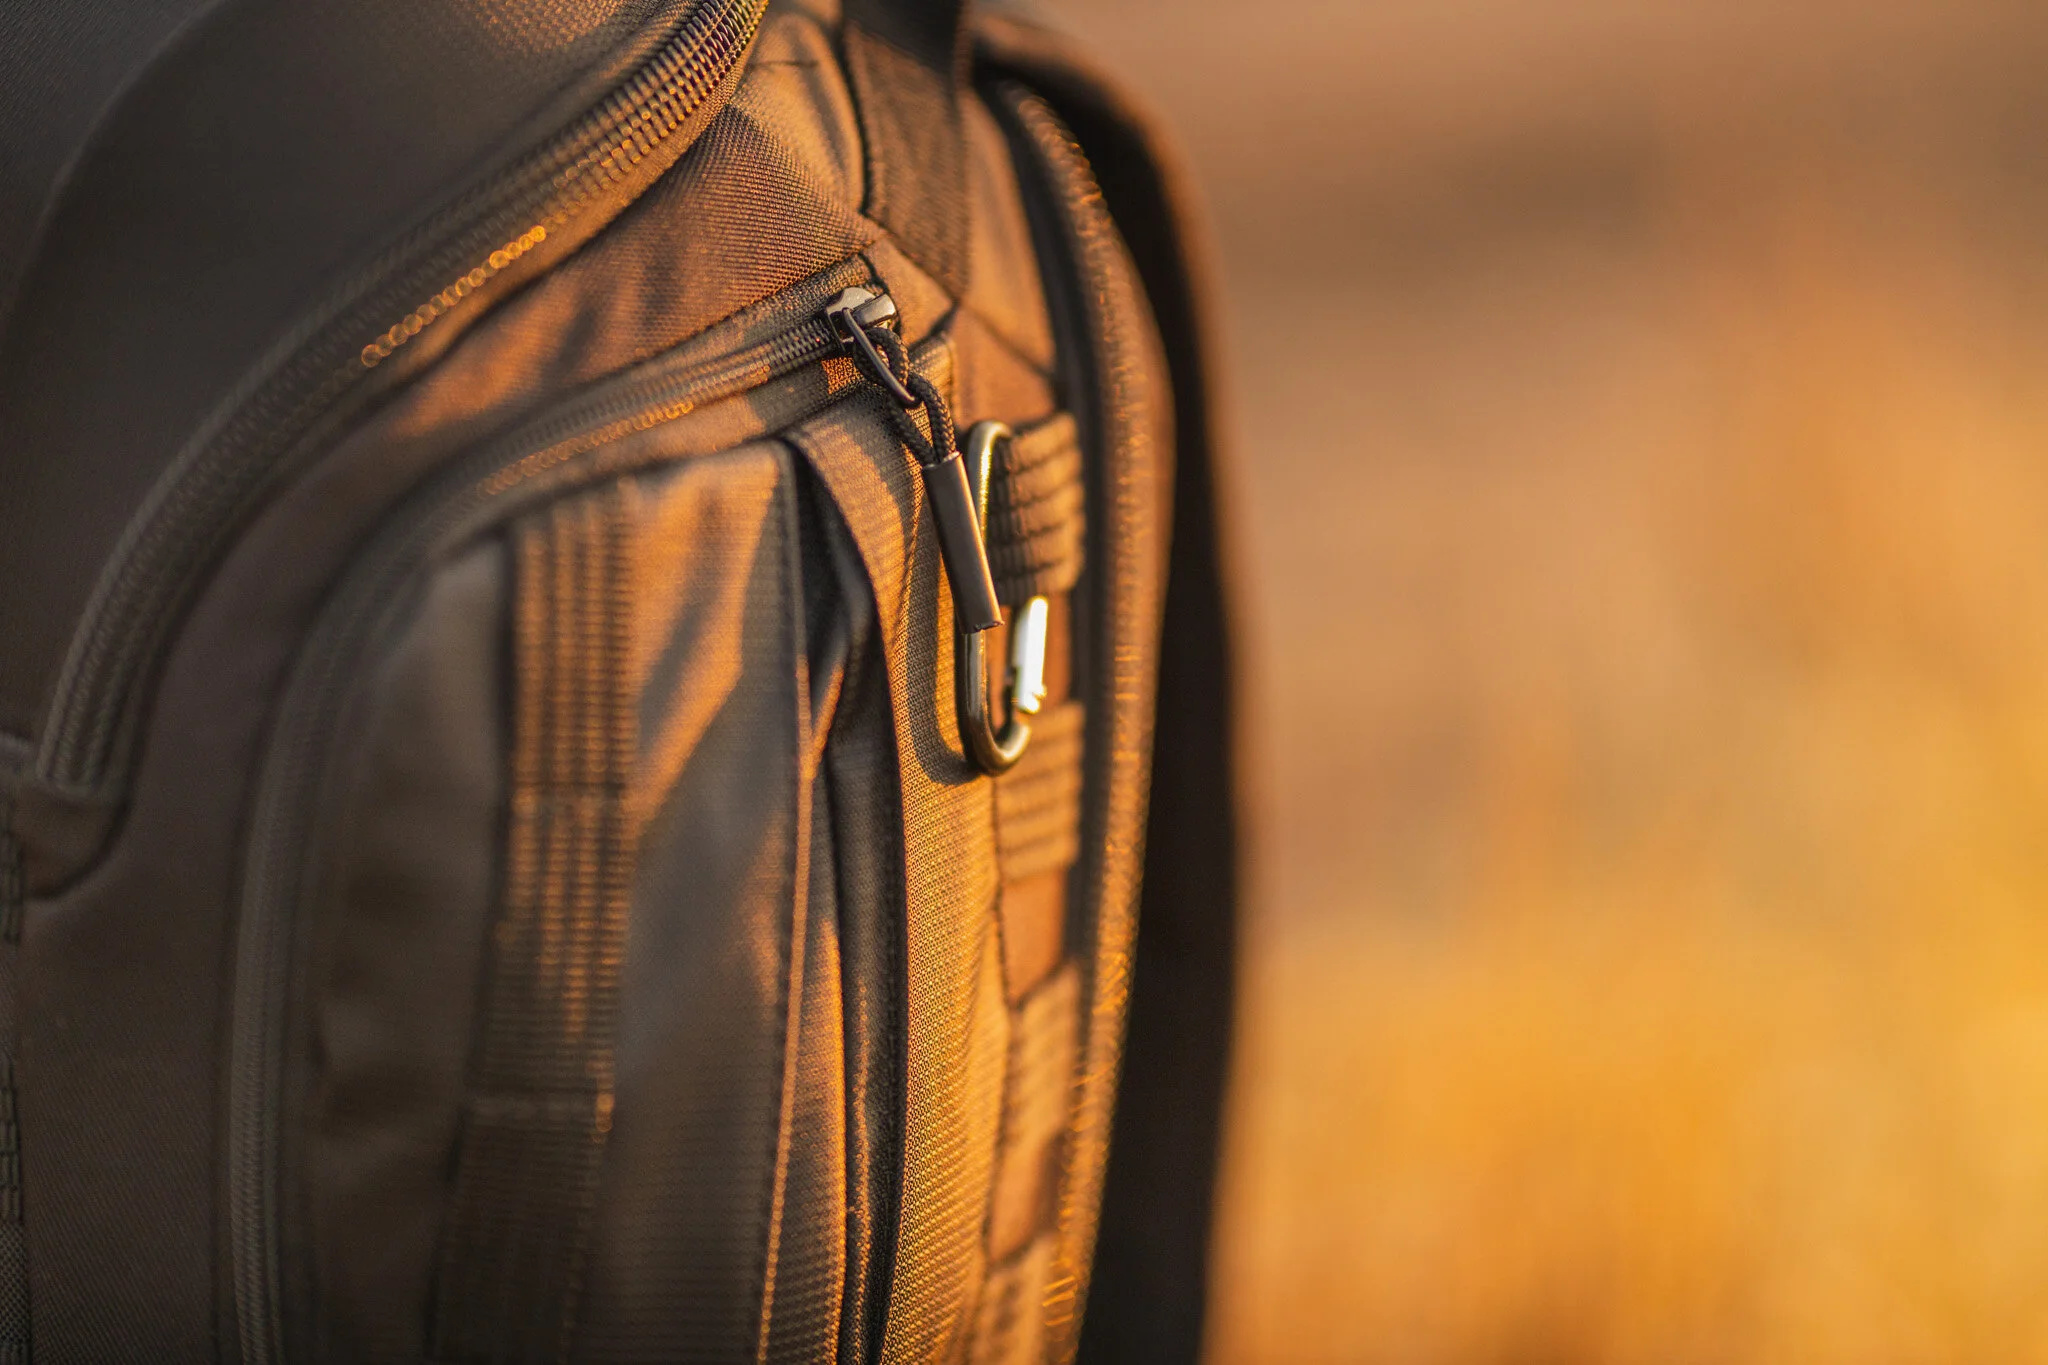
Moving to the exterior, the most important features are the straps and I can say with confidence that I found them to be very comfortable and never have they felt like they were ‘cutting’ into my shoulders, even when fully loaded. There is also a detachable waste strap that is equally high quality - However, I removed this through personal choice as I rarely have the need to use a waste strap. One feature that I did find myself using was the chest clip - which effectively clips the two shoulder straps together across your chest so that the straps don’t slip off your shoulders. I found this perfect as if you are walking over long distances or up steep hills etc. bags can slip - not with the chest strap clipped in! It also helps distribute the weight and stops you from feeling too fatigued over long distances - very nice.
There are two pouches on the top sides of the bag which I found perfect for ‘accessories’ including spare memory cards and a multi-tool etc. The pockets can expand to a fairly decent size but are mainly for smaller items. One of the obvious ‘stand out’ features of the exterior is the webbing, which means that the bag can have numerous it’s ‘strapped’ to the exterior and I personally found that I kept LED lights, my gimbal and a monopod on the exterior and always felt confident that they weren’t going to fall off! On the sides, there is a tripod holder and space for a water bottle and thanks to the new ‘Sliplock’ accessories - the exterior is just as versatile as the interior.
Conclusion
Without a shadow of a doubt, this is a fantastic bag. I love how deep the bag is and the protection that it gives my beloved gear. Maybe not the most important feature but the looks are really impressive too. The bag looks stealth and doesn’t scream ‘steal me’ - well not to the untrained eye at least! The comfort of the bag is top-notch and the durability is pretty much class-leading.

You really have to go a long way to find any negatives but obviously, it is a fairly ‘premium’ product and therefore, carries a premium price tag. However, I would argue that it should easily last you 5-10 years so it’s more of an investment. One thing I would love to see is a more versatile ‘pouch’ like compartment but LowePro does offer the ‘Whistler’ bag which has this area covered, so this may be something to consider.
Overall, I couldn’t really be much happier with this bag and think it is a great choice for anyone looking for a professional-grade camera bag that is also versatile, comfortable, durable and stylish!
Find out more and purchase at: LowePro
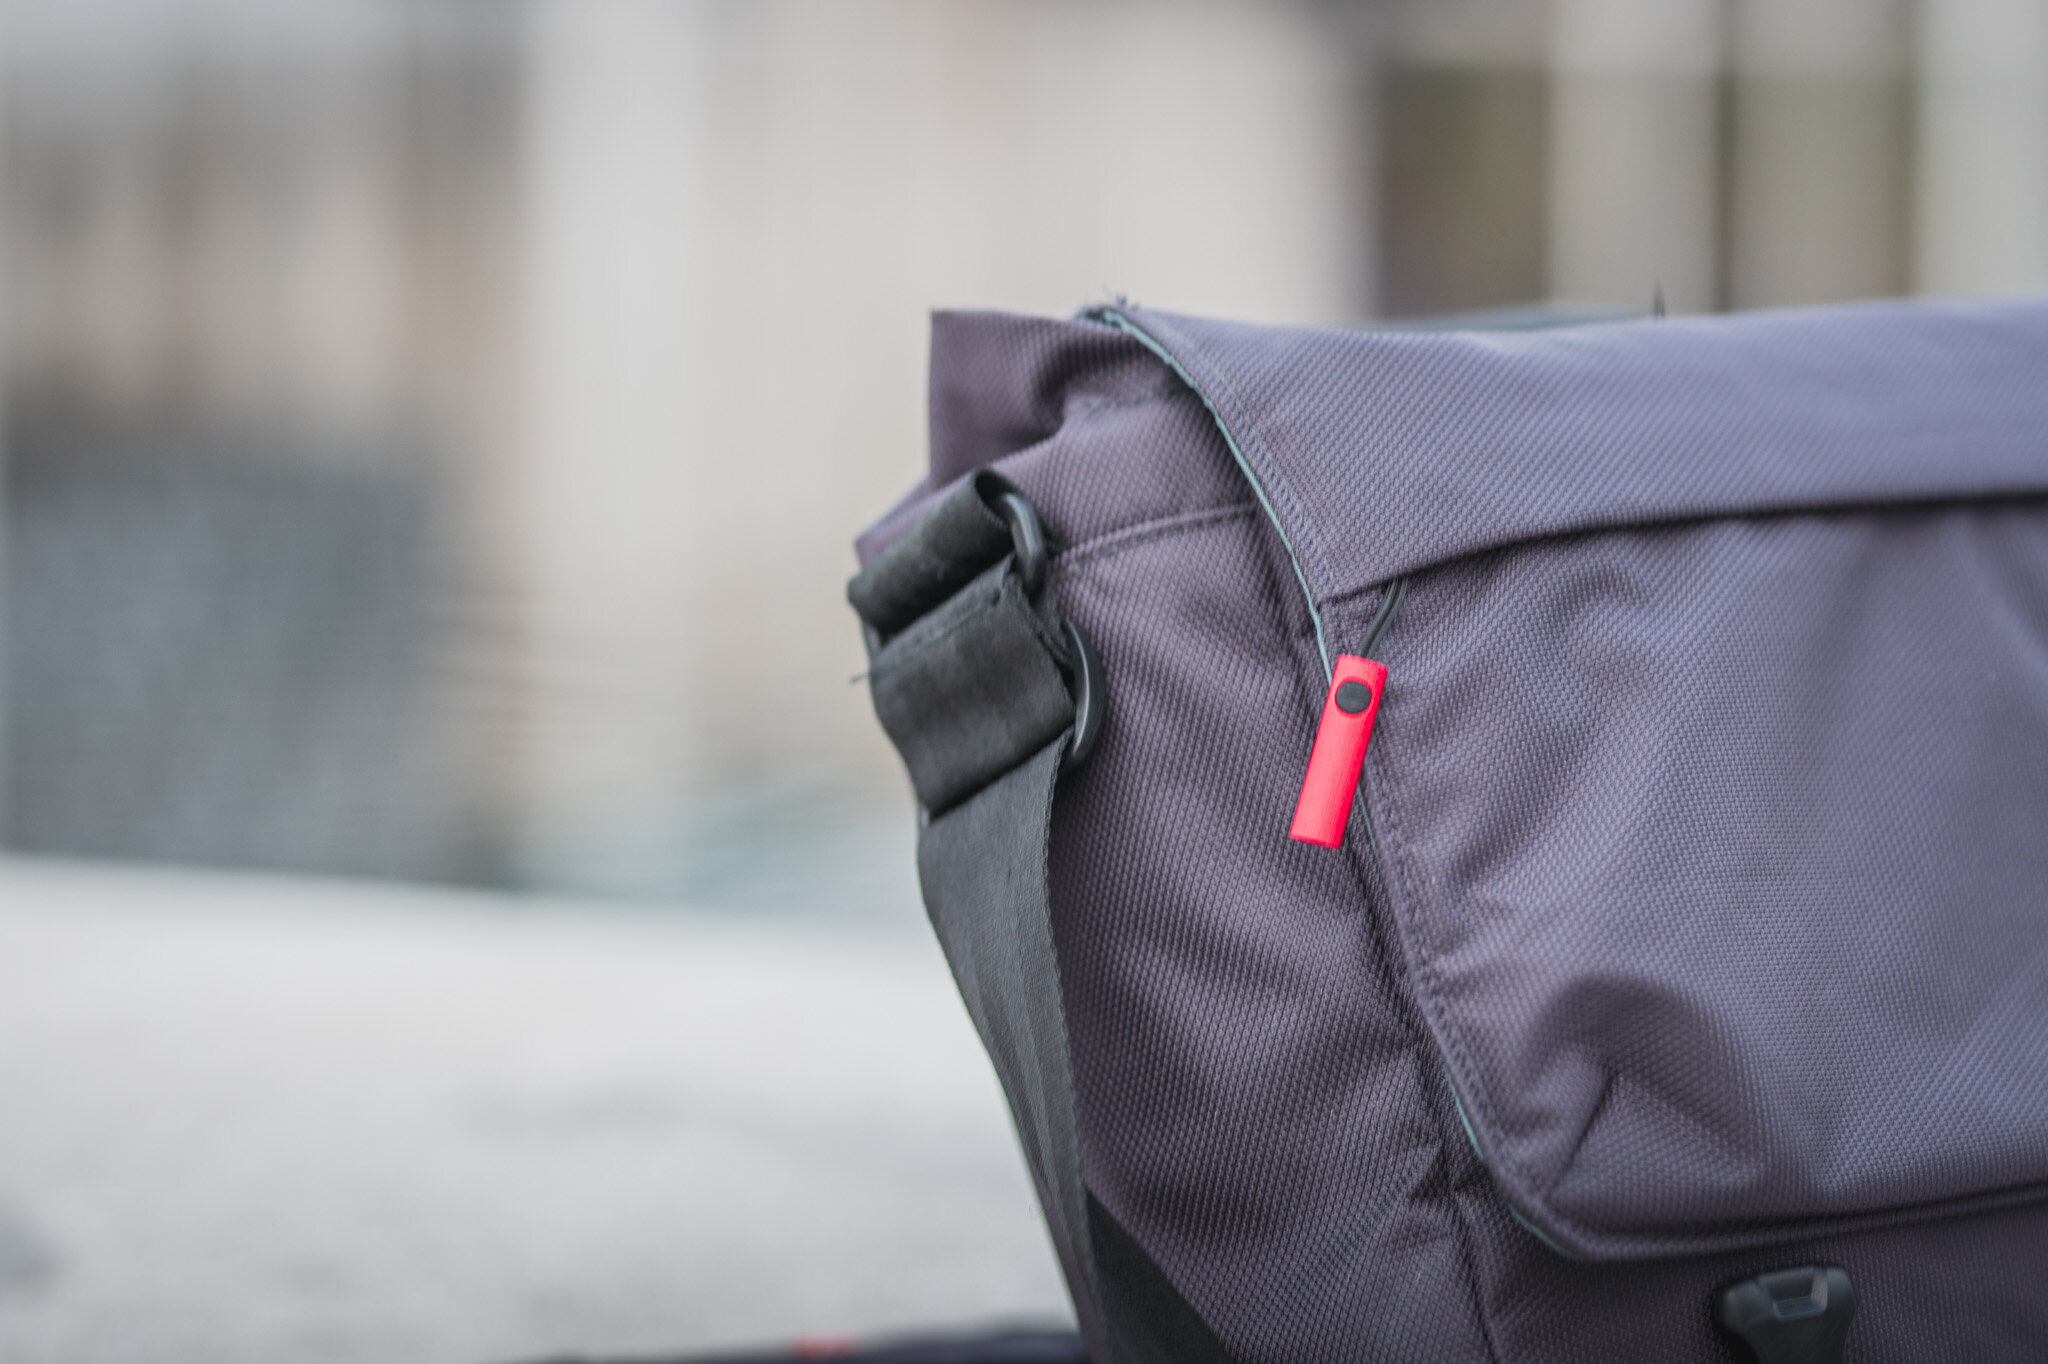
REVIEW: Manfrotto 'Manhattan - Speedy 10' Messenger Bag

Choosing the right camera bag for your needs can feel like a bit of a pain to be honest. Not only do you have to commit to which kind of ‘style’ you want, whether it’s a back pack, messenger bag or all out camping-hiking hybrid monstrosity! But also, you then have to worry about how well your expensive gear will be protected, does it shout ‘steal me!’ is it water proof! Well, if you’re in the market for something a bit more comfortable, discreet and stylish, I may have just the thing for you…
The big decision…
Probably the most important choice to make when purchasing a new bag is what ‘style’ of bag you need. The two main things I do are corporate shoots, which need a lot of gear and lighting etc. The second is typical ‘street’ and landscape kind of work. For these, I need very different bags. For the corporate work I need something with a lot of space, practicality and comfortable to wear for many hours. For my street work, I need something small, lightweight and discreet, and that is where this bag comes in.
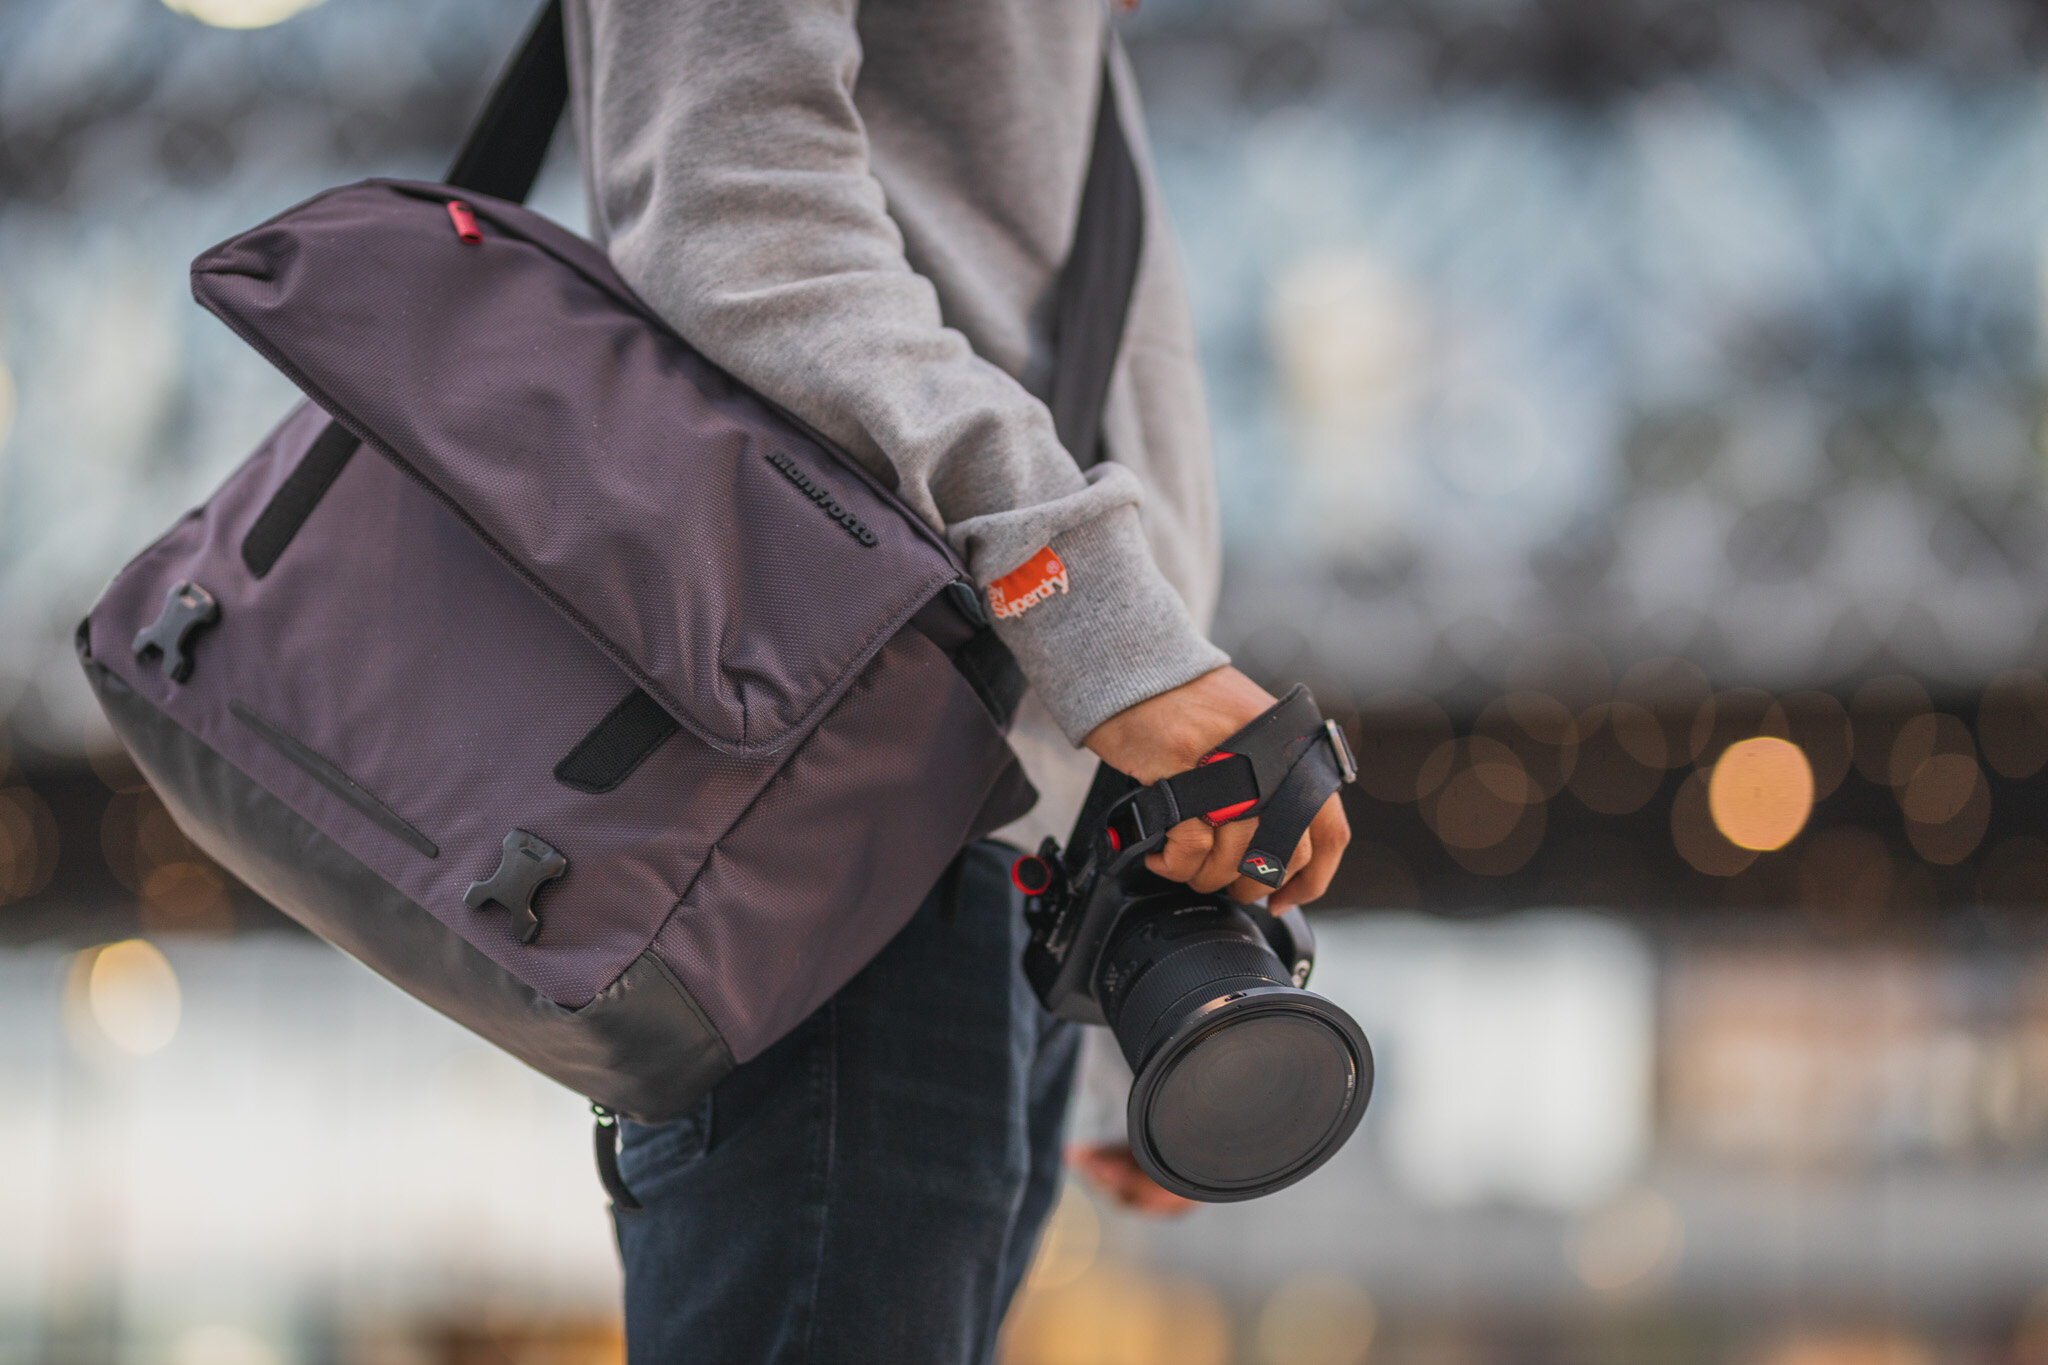
The ‘Speedy 10’ is a messenger style bag that works perfectly as an ;every day carry’. It is discreet enough that it doesn’t 'look too much like it’s filled with expensive camera gear. However, it is stylish enough that you will feel comfortable going to a corporate meeting or walking into a bar/restaurant with this bag - it really does work for all scenarios.


Comfort and Practicality…
As you can see from the pictures, the Speedy 10 has a main compartment for a camera and two lenses. However, the adjustable inner compartment offers enough flexibility that you can pretty much fit any camera body/lens combo that you need. It is also spacious enough that you can easily fit a 70-200mm lens and even has a laptop compartment that I found particularly useful for my iPad Pro.The padded lining and zipped compartment offer a good amount of protection and the water resistant out layer offers a bit of piece-of-mind if you are caught in a sudden downpour.

In terms of comfort, the bag is an absolute pleasure to use. The padded strap and easy access to all pockets/zips etc. make the bag almost ‘disappear’ as you never find yourself struggling with awkward clasps etc. This is particularly useful as the last thing you want is to be fighting with your bag whilst trying to get to your camera and then missing a shot! The bag in general is well thought out and little touches like the water resistant base are simple ideas but critical when you are carrying thousands of pounds worth of gear around with you.

Discreet yet Stylish…
As a photographer that shoots mainly in the city centre, I can’t state enough that you do not want to advertise the fact that you are lumping around really expensive camera gear. This bag looks like it could easily be another ‘work’ bag and doesn’t scream ‘camera gear’ at your local thief! Yet, the bag is stylish enough that you wouldn’t feel out of place walking into a fancy bar and just as importantly, it also doesn’t shout ‘photo-nerd’ so embarrassment levels are kept to a minimum!

Final Thoughts…
I’m a big fan of this bag and can really recommend it after months of using it. If you a re looking for a messenger style bag that ‘does it all’ - you really don’t need to look much further than this. In terms of ‘downside’ - I guess at around £80 it is more on the ‘expensive’ side - However, with a bit of internet hunting, you’ll find much better deals out there. Overall, the bag is great and is well worth considering if you are in the market for a new bag.

Find out more and buy here - Manfrotto
DxO PhotoLab 3: The future of photo editing software?

The photography market moves quickly and innovation is at the heart of it. One company that is driving that change is DXO and with their latest offering - DxO PhotoLab 3 - they certainly mean business. The new software is feature rich and hosts a range of innovative updates.
Learning a new piece of software is always intimidating. However, DxO make it really simple as the layout is very intuitive and with two main working areas - ‘Photo Library’ & ‘Customise’ - it’s pretty easy to guess what each one does! The depth and the power of the tools on offer in PhotoLab 3 is pretty easy to understate - it certainly has you well catered for! Once again, all of the tools and controls are self-explanatory by their nature and allow you take full control over your edits.


So how did I find using the software and will I be switching from Lightroom? The software is fantastic and I really like the speed and the range of tools on offer! The optical corrections seems spot on, which is great as I am slowly moving over to the new Canon ‘RF’ glass. One of the clear highlights for me was the ‘U Point’ Local adjustment tools - they are super accurate and make local adjustments really simple and effective - a real joy to use.
The colour management tools are also excellent and for someone like me, that likes to really tweak colours, it has me well covered! The DxO ‘Smart Lighting’ tool is also very impressive. I usually like to take complete manual control over my editing but it was certainly fun to see the software do some of the ‘heavy lifting’ in terms of brightening dark patches etc.

So will I be switching from Lightroom - Honestly, if it wasn’t for the hundreds of thousands of images in multiple Lightroom catalogues, I would switch in a heartbeat! The DxO software just feels faster and more, well, modern. If I was starting out again or looking to improve on my software experience from a photography point-of-view, I really don’t think you can go fdar wrong with PhotoLab 3, go find out more at the link below!
VIDEO & REVIEW: DataColor Spyder X Elite - Monitor Calibrator

Buying a new Monitor Calibrator doesn’t have a particularly sexy ring to it - it’s probably not something that you are going to shout about all over social media. However, I honestly believe that it is one of the most important pieces of kit that a Photographer/Videographer can own.
Picture the scene, you’ve just landed your first gig with a huge international client, the shoot went well and you send the images off to their internal design house only to get laughed out of a job because the colours were ‘all over the place’! I know, I’ve been there and it’s not a place I want to go back to! Step in the ‘monitor calibrator’ - for the uninitiated, it is a device that reads varying hues, colours, tines etc. from your monitor and via the power of software, creates a new preset for your monitor that is absolutely spot on - no more laughy clients!


The Device
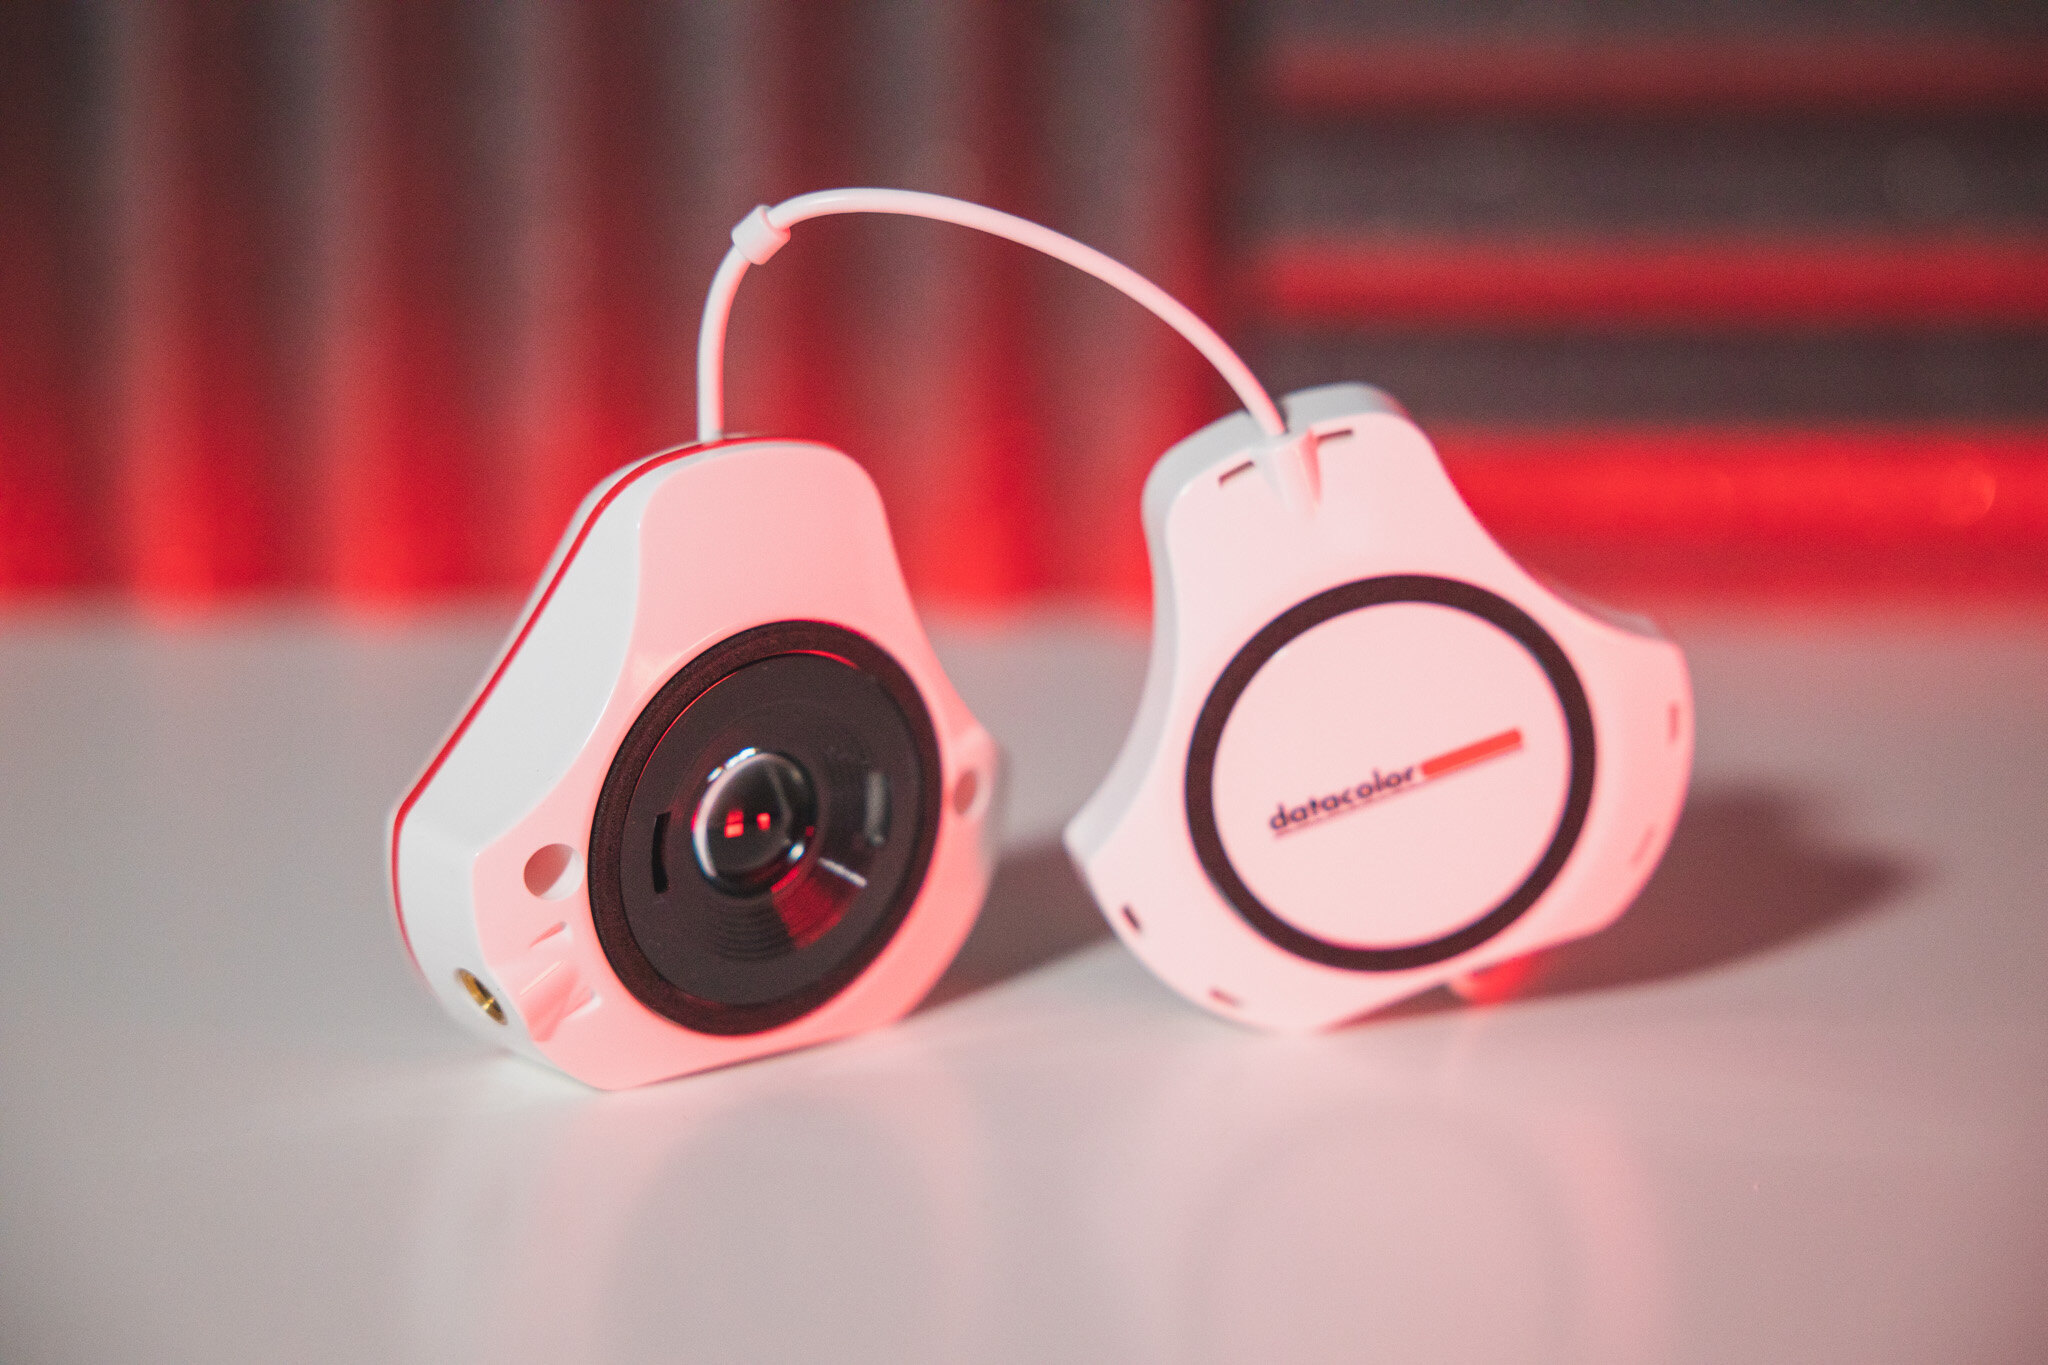
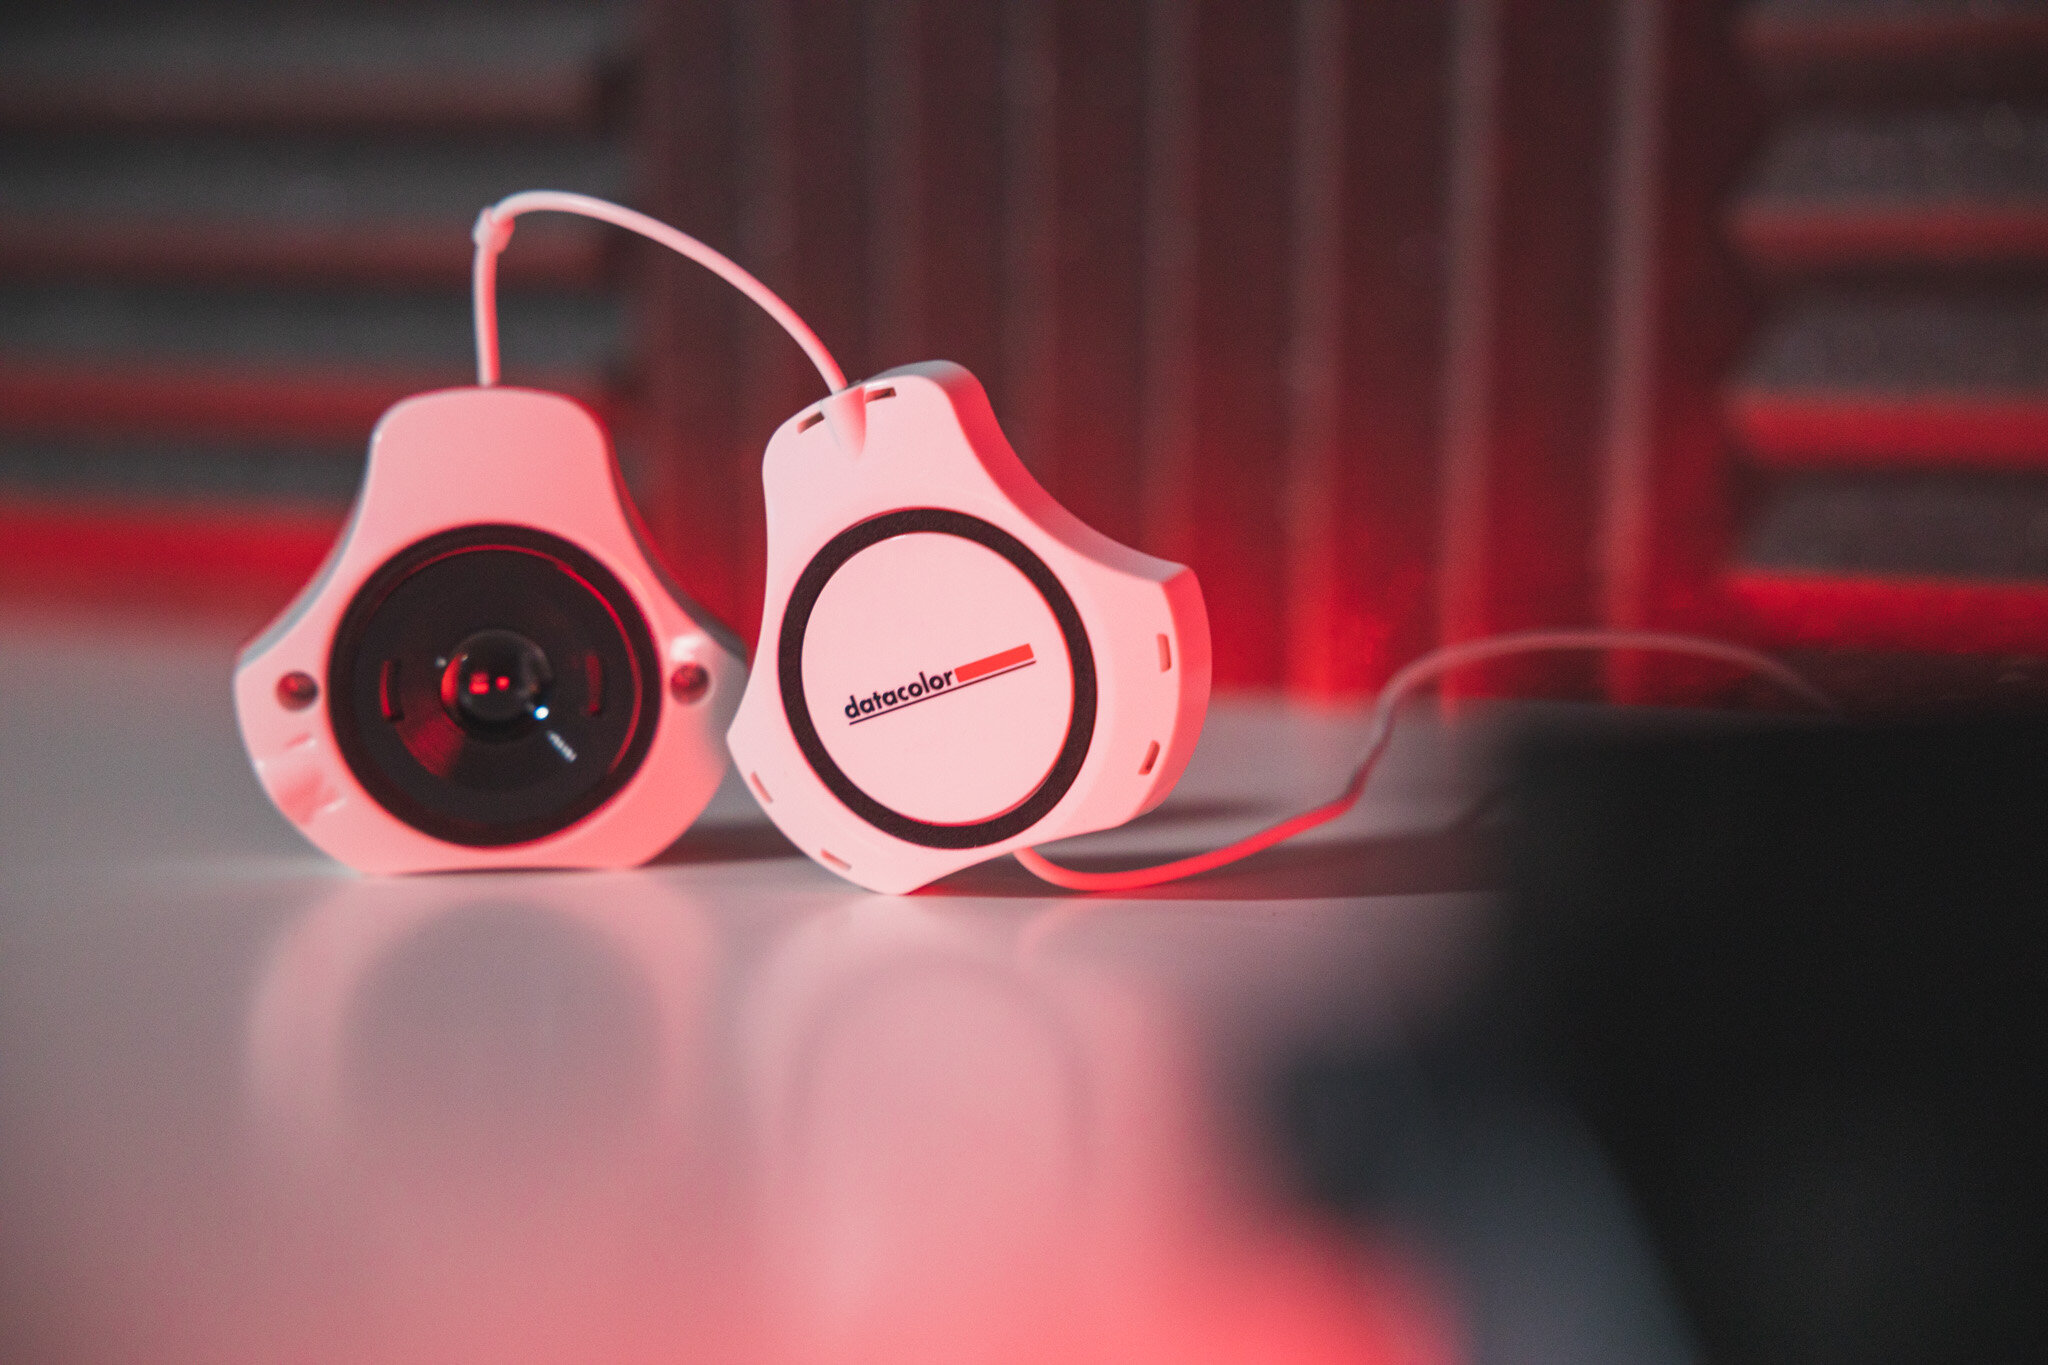
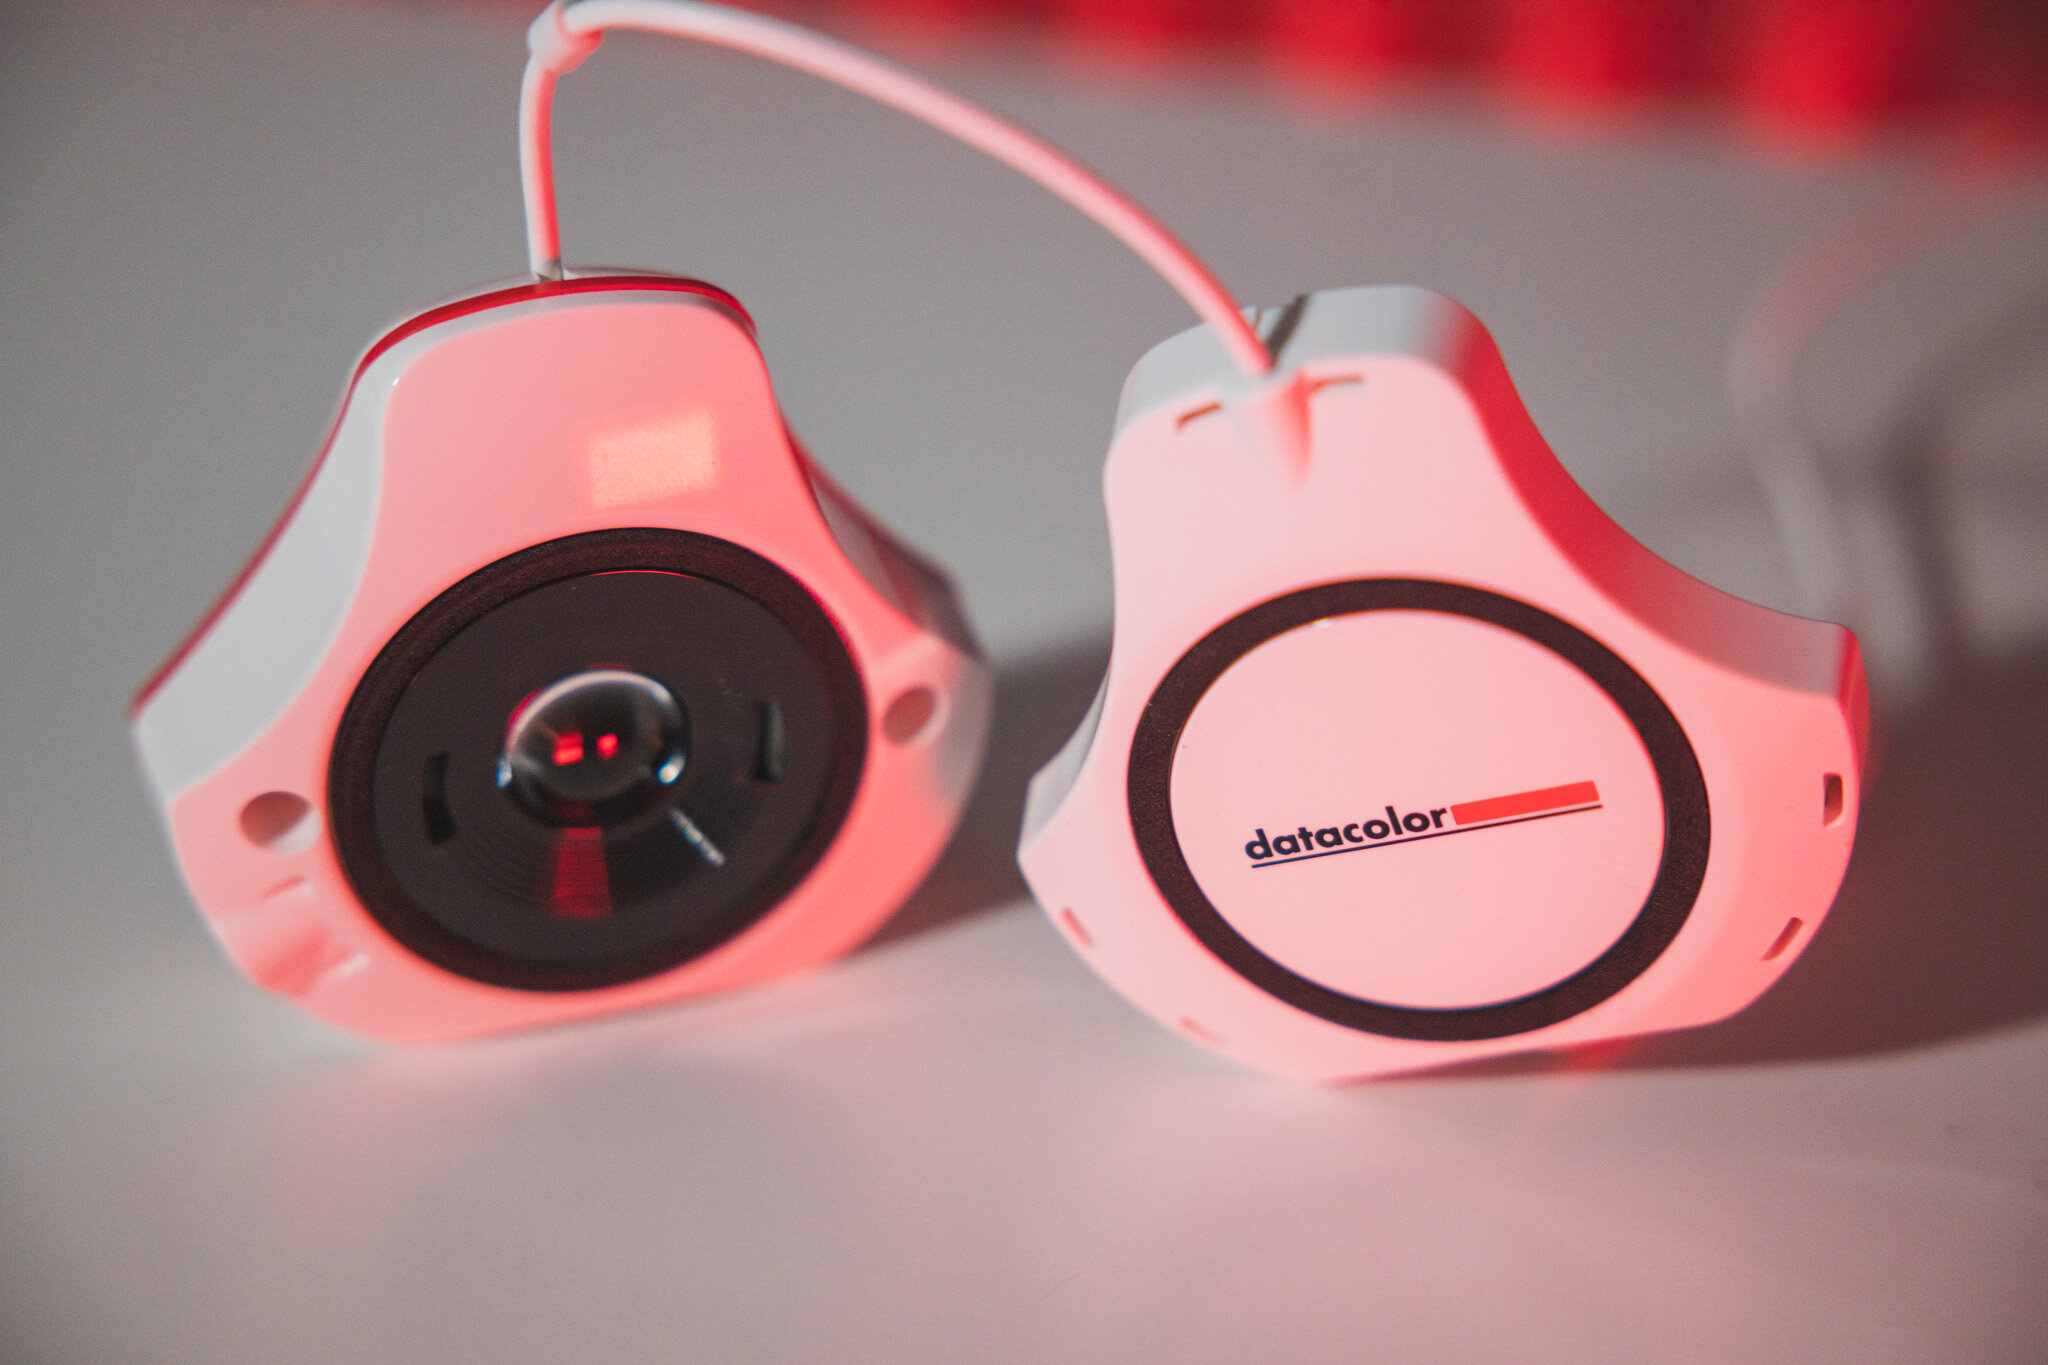
DataColor isn’t exactly new to this game, so you’d expect them to know how to build a decent device. I’m pleased to say, they certainly have! To anybody that has previously used a Spyder - the design will feel familiar. However, the beauty in the device lies in its speed, it is significantly faster than previous iterations which means there are now even fewer excuses for an uncalibrated monitor!
The unit is well made and feels like a quality product. I’m a fan of the white design with the red accent and as it is designed to sit by a monitor and take ambient light readings, it’s good that DataColor has taken their time with the design. The packaging is well made and the device comes with everything you need from a hardware point of view.


The Software
The hardware is only half the battle. DataColor’s software is really where the package comes into its own. I was using the ‘Elite’ version but having been a DataColor user for a number of years and I have always found their software to be intuitive and simple to follow - and there are no changes in that department!
The software is feature-packed and can cover everything from a basic calibration to a full, in-depth calibration, studio match for matching multiple monitors and can even calibrate other items such as projectors.
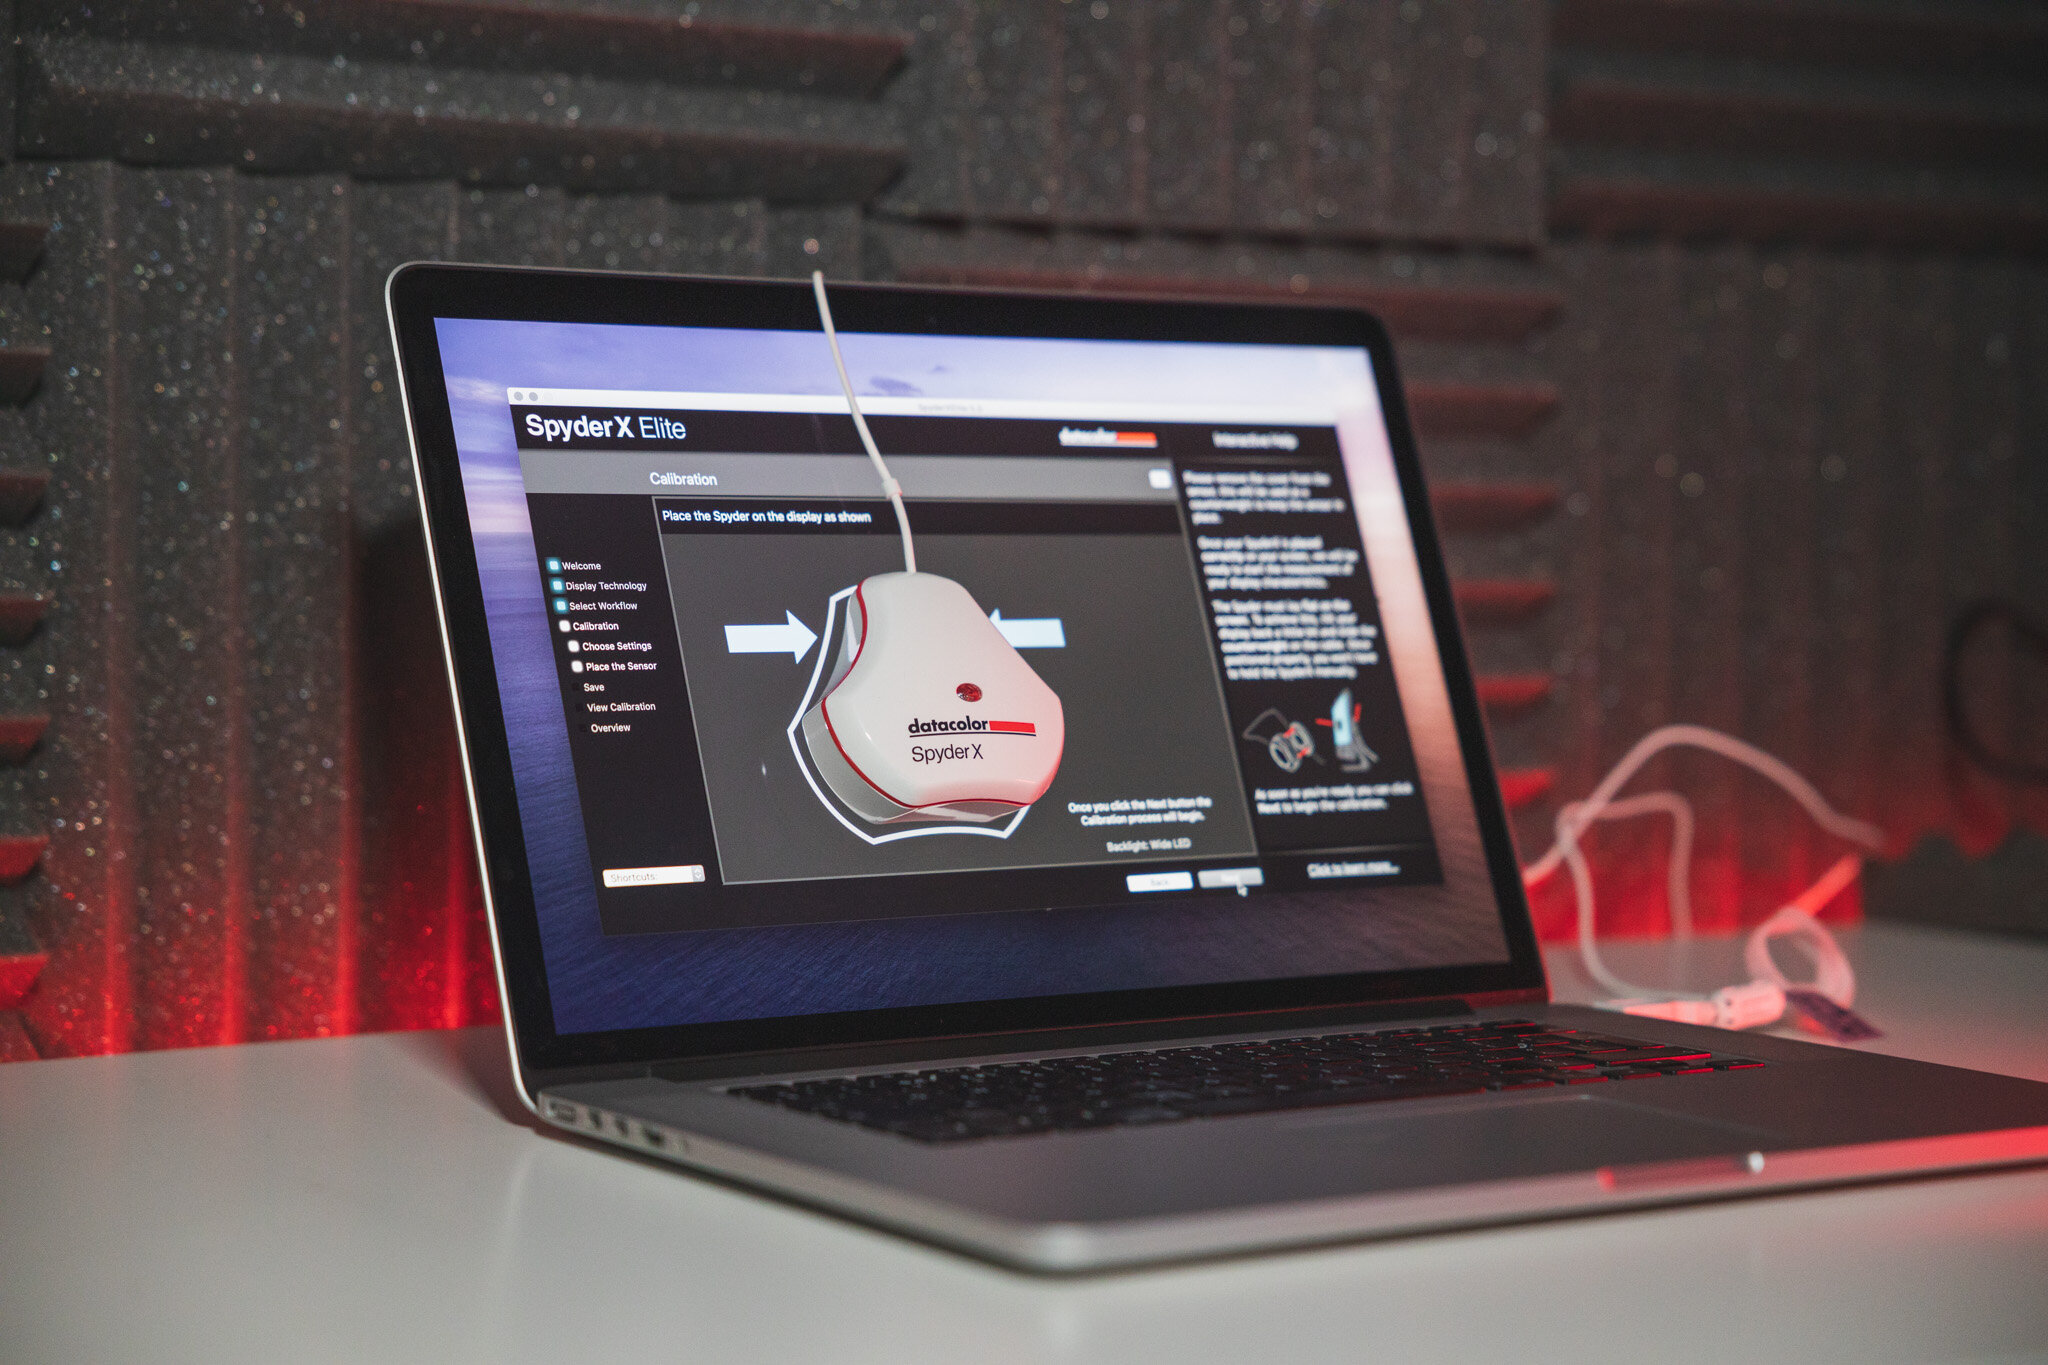
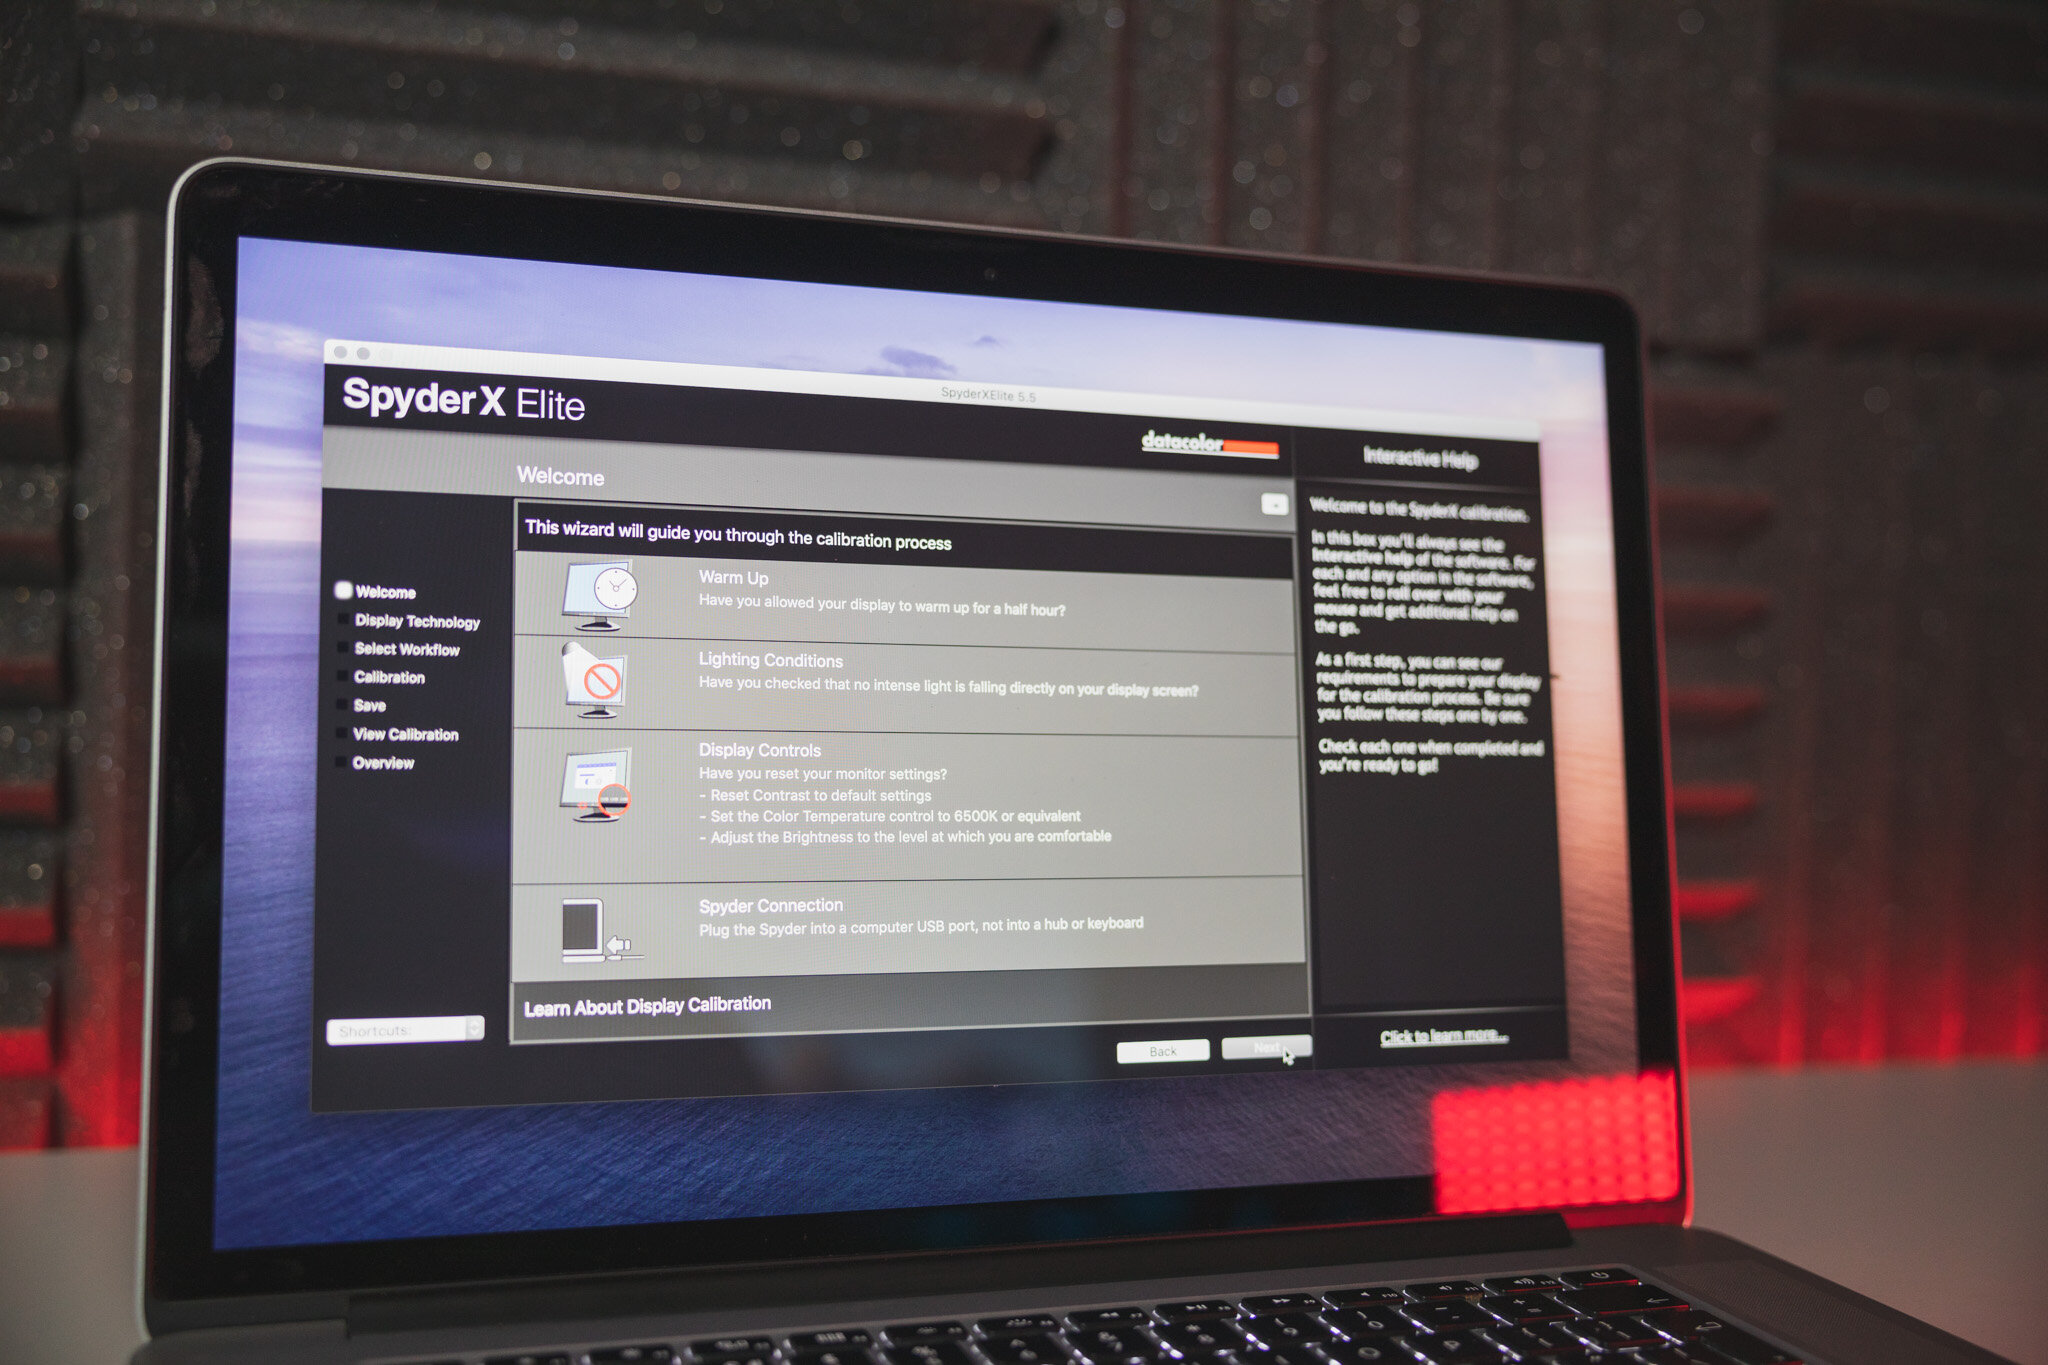
Using the software is so simple, I genuinely believe a child could do it. The software, even in ‘full’ calibration mode, has a simple walkthrough and regular prompts to explain what you need to do with both the software and the hardware. The on-screen prompts not only tell you when and where to place the calibrator - but it will also check you make and model of your monitor and to ask what controls you have over brightness and colour temperature.
Once you have followed the steps and the monitor has run its calibration process, you will be able to save a preset based on that current update. You will then be presented with a report based on the range of colour gamut the monitor has achieved - which is always useful. Finally, you get the option to see the difference the current calibration has made - which I personally find really useful.


The tip of the iceberg
To say that the Spyder X Elite can do more is an understatement! Depending on your needs, the options for calibration and the reporting that you receive at the end can go into way more detail. However, for the majority of us - the full calibration is simple yet deep enough to get great results.
The final verdict
The Spyder X Elite offers such a well-rounded set of calibration tools that there really is no excuse to have an un-calibrated monitor. It is not cheap at around £250 (prices will vary). However, I honestly think that if you are producing professional work for paying clients, it is essential that you are ensuring that you have highly accurate colours.
The improved speeds and ease of use make it a joy to use and calibrating your monitor is no longer an arduous task. Overall, I highly recommend the Spyder X Elite and believe it would make a great cornerstone of any amateur and professionals workflow.
Find out more at the DataColor website.