
VIDEO: My Favourite Cameras That I have Used in 2024!
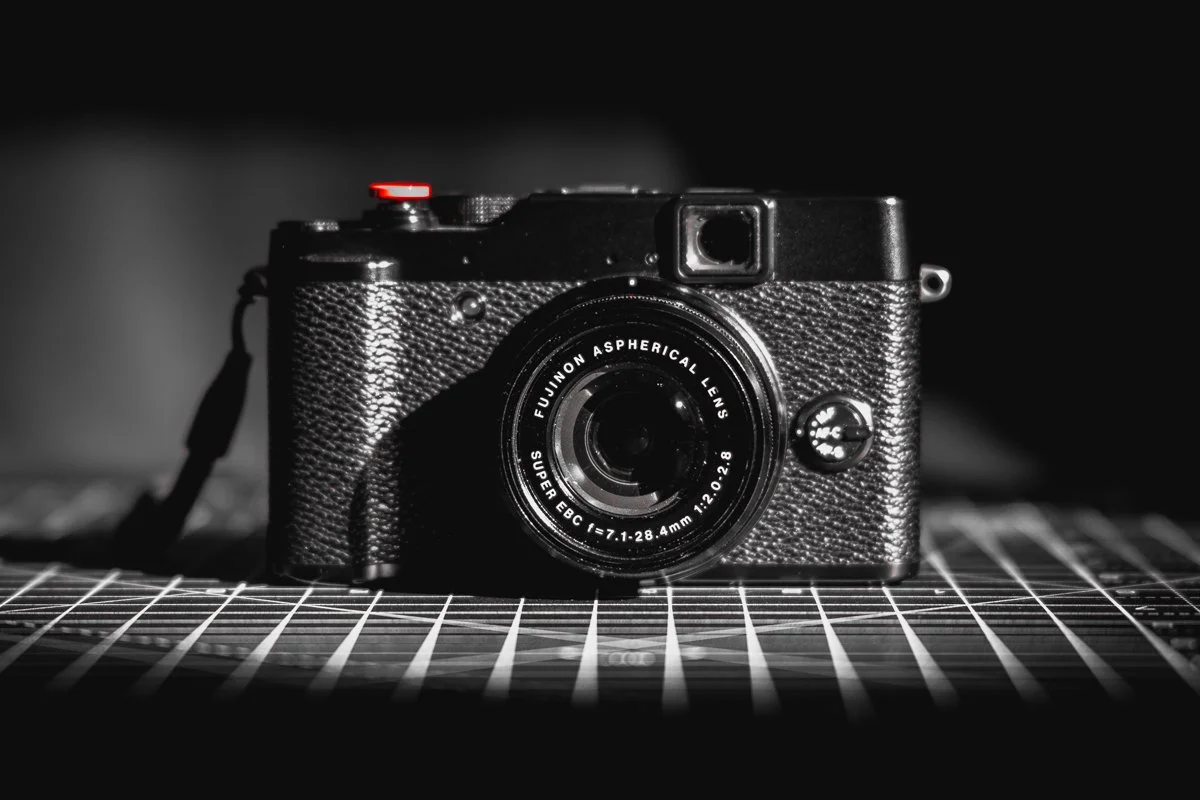
I love using different cameras and whether they are film or digital, photo or video focussed - every one of them brings something unique. I thought I would share my favourite cameras that I have used throughout 2024 and there may be a few in there that surprise you. Take a look at the video and let me know in the comments what your favourite camera of 2024 has been!
I love using different cameras and whether they are film or digital, photo or video focussed - every one of them brings something unique. I thought I would share my favourite cameras that I have used throughout 2024 and there may be a few in there that surprise you. Take a look at the video and let me know in the comments what your favourite camera of 2024 has been!

Posts you might also like…


About the Author - Ross Jukes is a professional Photographer and Videographer with over a decade of experience. Working in both Digital and Analogue formats, Ross has worked with international clients, had his worked published numerous times and exhibited his work extensively. With a passion for all things photographic, Ross combines his experience, enthusiasm and dedication to his art form to create engaging and educational content for the photographic community.
Disclaimer: All links to Amazon UK/US are affiliated links - you will still pay the same price but I will receive a small commission. All information provided in this blog is intended either for educational or entertainment purposes and is accurate to the best knowledge of the author. However, further research/professional advice should be sort before making purchases/implementing any advice given and no responsibility is taken by the author or parties mentioned here within.

REVIEW - Manfrotto Pro Light Cineloader Small - Big Things come in Small Packages!
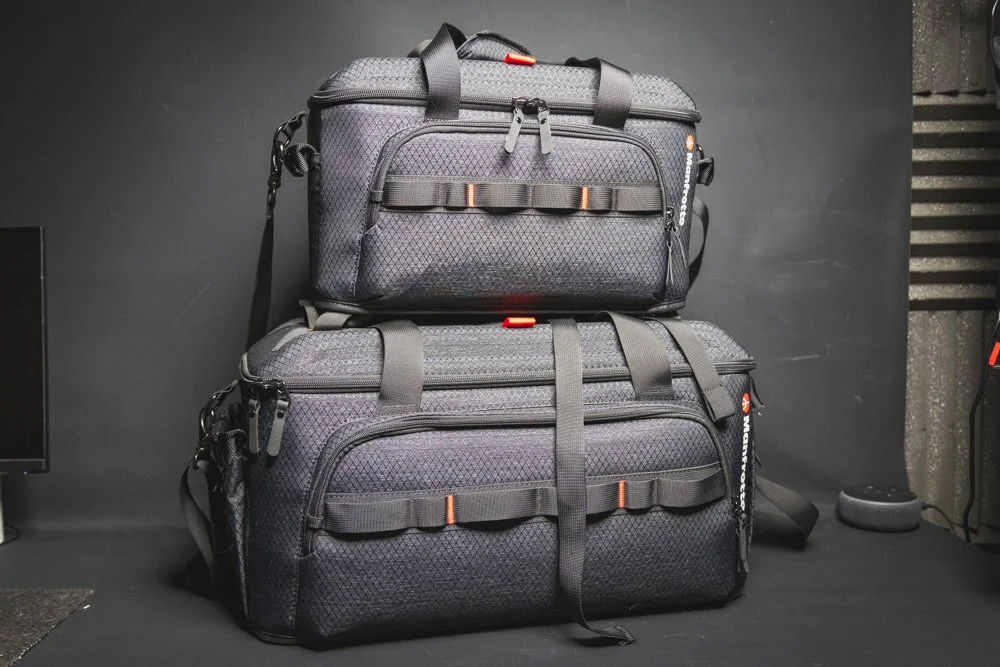
I have previously reviewed the Pro Light Cineloader Medium and it’s fair to say that I absolutely loved it! So when Manfrotto reached out to me and asked if I would like to try the Small version, it was an instant yes! I would highly recommend reading my review of the medium as the small is almost exactly the same, just smaller… It boasts the same excellent build quality, thoughtful design and offers a great level of protection for your gear - but let’s take a closer look, I’ll keep it brief.
I have previously reviewed the Pro Light Cineloader Medium and it’s fair to say that I absolutely loved it! So when Manfrotto reached out to me and asked if I would like to try the Small version, it was an instant yes! I would highly recommend reading my review of the medium as the small is almost exactly the same, just smaller… It boasts the same excellent build quality, thoughtful design and offers a great level of protection for your gear - but let’s take a closer look, I’ll keep it brief.

PLEASE NOTE: I WAS SENT THIS ITEM FOR REVIEW BUT NO OTHER PAYMENT OR CONTROL WAS EXCHANGED FOR PUBLISHING THIS UNBIASED REVIEW
As mentioned, I’ll try not to repeat myself too much from the review of the medium version of the Cineloader but it’s fair to say it’s smaller sibling is no less of a quality product. In many respects, I’ve actually found the small version more useful as commonly, I just want to transport a rigged out camera and don’t need all of the additional space that the medium offers. More so, it fits on top of a Pelicase perfectly with the additional loop and that has become my go too setup - Cineloader for the camera, Pelicase for all of the additional items.

Build and Features
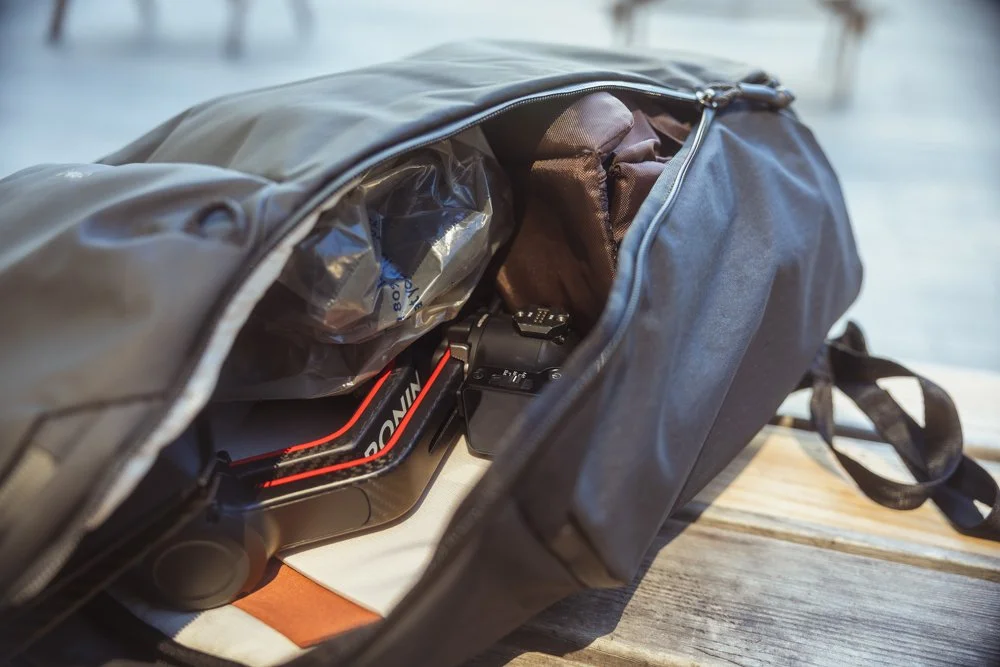
The build quality is excellent with a good, solid structure to the bag which gives you extra confidence that your precious gear will be protected. This is something that I have tested out the ‘hard’ way when I dropped my bags down a set of stairs! The Cineloader did a wonderful job of protecting the camera and apart from wiping a bit of dust from the water repellent exterior, everything was fine - apart from my embarrassment levels which were distinctly peaked!

There is a single larger compartment in the interior with ‘M-Guard’ dividers that feature heavily in the medium bag also present here. The dividers help the versatility of the bag but personally I have been using the bag without them, preferring to just have the main compartment for the built out camera rig. The straps, zips and padding are all equally as well constructed as on the medium version and Manfrotto have certainly not skimped in any way on the smaller version.
Source: ProAV TV via YouTube
Usability and Versatility
What the small version lacks in terms of size compared to the larger options, I think it makes up for its portability and usability. The small is the perfect size for small and medium cinema rigs and it makes it the perfect option for just throwing a camera in the bag and running out of the door. Not having to break a camera down to transport it really is the biggest feature of the Cineloader bags once you’ve used one, it’s pretty difficult to go back to the ‘old’ way of doing things.

Apart from the trolley loop setup which has become my preferred way of transporting the bag, the included shoulder strap is more than comfortable enough and makes carrying the bag for long periods of time easy. External pockets also add to the versatility of the bag and on many occasions, if it’s just capturing b-roll or a simple setup, I just take the small with a few batteries in the pockets and a tripod strapped to the top with the included tripod loops - good job Manfrotto.
Final Thoughts
It’s very difficult not to just repeat everything that I have said in my review of the Pro Light Cineloader Medium as it really is only the size that is different. However, I do find that having both sizes offers a lot of benefits for different styles of working. The medium certainly has its benefits for larger jobs when you might be carrying multiple cameras and all of the additional items that are needed such as audio, lighting etc.
However, the small bag is a joy to use when you simply need to travel light and I love combining it with a Pelicase and having my perfect ‘solo shooter’ setup. You will probably have noticed that I haven’t mentioned any negatives and that is because I really can’t find any. Even the price, usually around £150-£170 is a good price for a product of this quality. The bigger question is does this fit your needs? If you regularly carry a rigged out camera, or even cameras with longer lenses - it’s difficult to see how this wouldn’t be a great addition!
Posts you might also like…
About the Author - Ross Jukes is a professional Photographer and Videographer with over a decade of experience. Working in both Digital and Analogue formats, Ross has worked with international clients, had his worked published numerous times and exhibited his work extensively. With a passion for all things photographic, Ross combines his experience, enthusiasm and dedication to his art form to create engaging and educational content for the photographic community.
Disclaimer: All links to Amazon UK/US are affiliated links - you will still pay the same price but I will receive a small commission. All information provided in this blog is intended either for educational or entertainment purposes and is accurate to the best knowledge of the author. However, further research/professional advice should be sort before making purchases/implementing any advice given and no responsibility is taken by the author or parties mentioned here within.

Five Pieces of Photo & Video Gear That I Would Love to Try in 2025!
As 2024 draws to a close, it’s time to start planning for the next twelve months and I thought it might be good to share my thoughts on some gear that I would love to get my hands on in 2025! It would be really easy just to list off a load of dream cameras and lenses but that’s not really what this is about. Each of these items would help make a significant difference in either my workflow or the quality of my final output and let’s face it, that’s what all of this is really about.
As 2024 draws to a close, it’s time to start planning for the next twelve months and I thought it might be good to share my thoughts on some gear that I would love to get my hands on in 2025! It would be really easy just to list off a load of dream cameras and lenses but that’s not really what this is about. Each of these items would help make a significant difference in either my workflow or the quality of my final output and let’s face it, that’s what all of this is really about.
There are some pretty ambitious items on the list that may be out of reach. There are also some pretty surprising items as they don’t seem particularly exciting at first glance. There is no getting away from the fact that if I actually want to round up all of these items, a little win on the lottery would probably be needed (more likely the case that I’ll be overwhelming eBay with old camera gear!). But sometimes, it’s nice to have some lofty aspirations to keep you motivated on those cold, early January mornings! Let’s take a look at the list…

1) Canon C400
This one might be a bit of a stretch as it’s well outside of my budget, but the Canon C400 sure looks like an amazing camera. I recently broke the HDMI out on my Canon R5C and this has got me thinking about whether now would be a good time to ‘upgrade’ my main video camera. For anyone that has been following Canon’s latest offerings, you might think that the C80 is the obvious replacement but there are a couple of limitations with that camera. Notably, only having SD cards and the slightly peculiar body shape really put me off.
Source - CVP Via YouTube
The Canon C400 seems to offer everything I would ever need - more so in fact, so much more that it would be a borderline waste on me. However, that’s where the opportunity lies! Being able to grow into a camera system and push yourself on more challenging shoots is exceptionally beneficial. Plus, it has triple base ISO and solid autofocus, two things that I really would rely on judging by the varying nature of the work I carry out. My biggest challenge would be making the financial side of things work but sometimes, you have to push yourself and this may just be one of those times, we’ll see.

2) Zhiyun Molus G300
I’ve been a big fan of the Zhiyun range of lights for a while now and own a few. However, I always find myself just wanting that little bit more power in my bag. I use the G200 on a regular basis and it has been great and I absolutely love the form factor, but I worry about walking into a situation where 200w just isn't enough. I’m learning to light ‘spaces’ more than faces and with this in mind, I like the idea of having a few 200w+ lights that can help bring the overall ambiance of a scene up and having a 300w as a key light sounds like a good balance.
It’s difficult to say whether this is a good or bad option as there are certainly more powerful lights out there. However, I constantly have to think about portability and how I will travel with lights and this is where the G300 seems to be best in class - power vs portability! I can see this light working really well in my setup and is (in the world of lighting) even pretty reasonably priced. I will be holding out for some January Sales and hoping to add this to the kit bag.

3) Lighting Diffusion
OK, so this may seem like an obscure choice when talking about things that you can’t wait to try, but hear me out. In 2025, I want to move slightly more into corporate interviews and maybe even documentary style work, so lighting will be essential. With this in mind, learning how to diffuse light and create really pleasing and natural looking lighting is essential. Up-steps diffusion and with so much to choose from, it might be difficult knowing where to start.
Manfrotto offer a fantastic looking range of scrims and diffusion which certainly seem to have most bases covered. I could go down the ‘budget’ route of trying Muslin and even shower curtains! I’m just not sure how that looks when turning up to a commercial client's premises armed with what looks like a bag full of decorators dust sheets! It’s certainly an area that I am looking forward to experimenting with and hopefully upping the quality of my video production.

4) EIZO FlexScan FLT Monitor
I admit it, I get excited about some pretty unusual gear choices and upgrading my monitor setup is certainly on the cards in 2025! I was casually looking at EIZO’s lineup who are relied upon by many professional photographers & videographers and stumbled across the FlexScan FLT - A lightweight monitor with some pretty impressive stats but not just in the area you may think, but in its eco-credentials! This might be the perfect second monitor! It is literally a Class-A power efficiency monitor made from 95% recycled plastics, happy days!


Even though I was initially looking at replacing my main working monitor which is what led me to EIZO in the first place - I’m suddenly really drawn to the idea of having a secondary working monitor and with power efficiency and eco-credentials like this, it seems like a no-brainer. I will be trying to get my hands on one of these to see how it can help my workflow but it has also set my mind racing about where else I can be looking at more sustainable options and that can’t be a bad thing!

5) General Audio Gear
One area that I would probably like to focus on making some serious upgrades is my audio gear. I have already invested in this area quite a bit but the more work I do, the more I realise just how important it is to be able to capture good quality audio in a range of circumstances. Nothing panics me more than forgetting to set audio levels correctly or a mic being badly placed and even though 32-bit float audio is a lifesaver, there are always areas for improvement.
Source - Curtis Judd Via YouTube
One particular area that I am keen to improve is the quality of the Lav mics that I use and getting better at placing and hiding a mic. In a dream situation, the Sanken COS 11D’s look like amazing options. It’s not super-necessary for a lot of the style of work that I do but showing an appreciation for subtle improvements in the quality of output is what elevates you above your competition. It’s the kind of area that many people might look to save a few quid but actually, nailing audio might just be one of the most important steps in the video process.
Rounding Up…
I love this time of year and not because of the Whiskey and Mince Pies (I’m quite partial to one of those!) but because it offers an opportunity to take stock of where you are and plan out where you want to be. Making lists like this might feel fanciful and more of an elaborate shopping list to show off to your fellow photographers/videographers - but I actually think it’s a really useful exercise in seeing how you can grow and become a better professional in your area of production.
I may not accrue all of the items on this list (I’m looking at you Canon C400! ££££) but by consciously looking for the gaps in your current gear and how you can make your workflow faster, easier and better quality - it’s not just good for you but also your clients and the quality of your final output. I’m really keen to hear what areas you are looking to upgrade in 2025 and what’s on your kit wish list? Leave a comment below and thanks for reading.
Posts you might also like…
About the Author - Ross Jukes is a professional Photographer and Videographer with over a decade of experience. Working in both Digital and Analogue formats, Ross has worked with international clients, had his worked published numerous times and exhibited his work extensively. With a passion for all things photographic, Ross combines his experience, enthusiasm and dedication to his art form to create engaging and educational content for the photographic community.
Disclaimer: All links to Amazon UK/US are affiliated links - you will still pay the same price but I will receive a small commission. All information provided in this blog is intended either for educational or entertainment purposes and is accurate to the best knowledge of the author. However, further research/professional advice should be sort before making purchases/implementing any advice given and no responsibility is taken by the author or parties mentioned here within.

Belroy Traveller 26L - The Perfect Travel Companion for Photographers
The Bellroy Venture Travel Pack 26L is a versatile and thoughtfully designed backpack that offers photographers a blend of style, functionality, and durability. As a photographer constantly on the move, I've found this pack to be an excellent companion for both urban adventures and outdoor shoots. However, does its stylish looks outweigh its practicality? Let’s find out…
The Bellroy Venture Travel Pack 26L is a versatile and thoughtfully designed backpack that offers photographers a blend of style, functionality, and durability. As a photographer that travels and is constantly on the move, I've found this pack to be an excellent companion for both urban adventures and outdoor shoots. However, does its stylish looks outweigh its practicality? Let’s find out…

PLEASE NOTE: I WAS SENT THIS ITEM FOR REVIEW BUT NO OTHER PAYMENT OR CONTROL WAS EXCHANGED FOR PUBLISHING THIS UNBIASED REVIEW
Design and Build Quality
I’ve previously used a Belroy Sling and was always seriously impressed with the build quality and the 26l is exactly the same. Bellroy has crafted the Venture Travel Pack with a sleek, minimalist aesthetic that doesn't scream "camera bag." This low-profile design is perfect for photographers who want to blend in while navigating busy city streets or exploring new locations. The bag is constructed from a 100% recycled water-resistant woven fabric that feels robust and ready to withstand the rigors of travel.
The zippers are heavy-duty and feature weather-sealing strips, providing an extra layer of protection for your valuable gear. While these zippers may feel a bit stiff initially, they do loosen up with use. The overall build quality is impressive, with no noticeable issues even after months of use.

Comfort and Ergonomics
For photographers who often carry heavy gear for extended periods, comfort is paramount. The Venture Travel Pack excels in this area, thanks to its well-designed back panel and shoulder straps. The back panel features a contoured shape that follows the natural curve of your spine, with a solid lumbar support cushion at the bottom. This design helps distribute weight evenly and reduces strain on your back, especially when carrying a full load of camera equipment.

The shoulder straps, while slightly rigid, are comfortable and feature a sternum strap for added stability. The top grab handle is generously padded, making it easy to maneuver the bag in tight spaces or when stowing it in overhead compartments. Personally, I found the bag to be very comfortable to carry for long periods of time and loved carrying it around whilst exploring new cities. A lot of the time, you just forget it’s there.
Capacity and Organisation
With a 26-litre capacity, this backpack strikes a good balance between spaciousness and compactness. It's large enough to accommodate a professional camera body, an extra lens or two and accessories while still fitting under most airline seats as a personal item.
The main compartment opens both fully clamshell-style and as a top-loader, offering flexibility in how you access your gear. This feature is particularly useful for photographers who need quick access to their equipment without fully unpacking the bag.

One of the standout features for photographers is the "brain" pocket at the top of the bag. This compartment is divided into two sections and can easily fit a mirrorless camera like a Fuji X100V or even a larger camera with a pancake lens. It's an ideal spot for storing frequently used items or smaller camera gear that you want to access quickly. For me, it was the X100V and an Osmo Pocket 3 - perfect travel companions.
Camera Gear Storage
While the Venture Travel Pack isn't specifically designed as a camera bag, it adapts well to photographic needs. The main compartment can easily accommodate a camera cube, allowing you to organise and protect your gear efficiently. Alternatively, you can use packing cubes and pouches to create a custom setup for your equipment.

The bag's various pockets and compartments offer ample opportunities for organizing smaller items like memory cards, batteries, and filters. The side pocket is large enough for everyday carry items but can be useful for storing a travel tripod or monopod, depending on their length.
Unique Features
One of the most innovative features of this backpack is the hidden tote bag stored in a dedicated pocket on the front of the bag. This 15-liter tote can be incredibly useful for photographers who need an extra bag for carrying props, additional gear, or even souvenirs picked up during their travels. It’s also useful if you are exploring a new city and want to leave the main bag behind, just carrying the tote bag itself.

The water bottle pocket does take up some internal space but provides easy access to hydration while on the go. However, it may cause some gear in the main compartment to shift if not packed carefully. Personally, I used it for smaller items and never bothered with a water bottle. I found this compartment was ideal for storing toiletries and other potential ‘leak’ hazards as it is separate to the main compartment.

Weather Resistance
The water-resistant fabric and weather-sealed zippers provide good protection for your gear in light rain or drizzle. However, for heavy downpours or extended exposure to the elements, you may want to consider using an additional rain cover for extra peace of mind. I have been caught in a few showers and the bag has stood up to the test very well, but it’s always best to practice a bit of caution.

Versatility
One of the Venture Travel Pack's strongest suits is its versatility. It can seamlessly transition from a camera bag to a travel pack, hiking backpack, or even a daily office bag. This adaptability makes it an excellent choice for photographers who don't want to invest in multiple specialised bags. The addition of laptop storage pockets also make this great for those that need to edit on the go!

Pros and Cons
Pros
Versatile Design: Functions well as both a travel pack and camera bag.
Comfortable Carry: Ergonomic back panel and padded shoulder straps reduce fatigue.
Ample Organisation: Multiple compartments including a "brain" pocket for easy access.
Hidden Tote Bag: Extra storage option for souvenirs or additional gear.
Durable Materials: Water-resistant fabric protects against light rain.
Travel Friendly: I’ve been using this as a ‘carry on’ bag so no need to pay for a cabin bag.
Cons
Saggy Base: The rounded bottom makes it difficult for the bag to stand upright.
Water Bottle Pocket: Takes up internal volume that could be used for gear.
Side Pocket Depth: Items stored here can sink too low, wasting space.
Weight Distribution: Heavier loads may require more support; adding a waist strap could enhance comfort.
Cost: Certainly not the most budget friendly option.
Conclusion
The Bellroy Venture Travel Pack 26L is a compelling option for photographers seeking a versatile, well-built backpack that doesn't compromise on style or functionality. Its thoughtful design, comfortable carry, and adaptable storage make it suitable for various photographic pursuits—from urban street photography to outdoor adventures.

While it may not have all the specialised features of dedicated camera bags, its versatility and quality construction more than make up for it. For photographers who value a bag that can seamlessly transition between different roles and environments, the Bellroy Venture Travel Pack 26L is definitely worth considering.
Posts you might also like…
About the Author - Ross Jukes is a professional Photographer and Videographer with over a decade of experience. Working in both Digital and Analogue formats, Ross has worked with international clients, had his worked published numerous times and exhibited his work extensively. With a passion for all things photographic, Ross combines his experience, enthusiasm and dedication to his art form to create engaging and educational content for the photographic community.
Disclaimer: All links to Amazon UK/US are affiliated links - you will still pay the same price but I will receive a small commission. All information provided in this blog is intended either for educational or entertainment purposes and is accurate to the best knowledge of the author. However, further research/professional advice should be sort before making purchases/implementing any advice given and no responsibility is taken by the author or parties mentioned here within.

The Prompter People Pocket Cue V3 4K Teleprompter: A Game-Changer for Videographers and YouTube Creators
Sometimes, you have to put your hand up and say you were wrong and for me, I was wrong about Teleprompters. I always assumed they weren’t necessary and as long as you knew what you were talking about and felt confident enough, they were just a waste of money. That was until I tried out the Prompter People Pocket Cue V3 4K - A literal game changer for how I produce and make video content and instantly a must-have piece of kit.
Sometimes, you have to put your hand up and say you were wrong and for me, I was wrong about Teleprompters. I always assumed they weren’t necessary and as long as you knew what you were talking about and felt confident enough, they were just a waste of money. That was until I tried out the Prompter People Pocket Cue V3 4K - A literal game changer for how I produce and make video content and instantly a must-have piece of kit.
I reached out to Prompter People after having my interest piqued by one of the many positive videos popped up on my YouTube feed raving about how good it was. The pleasant people at Prompter People promptly sent me a prompter to practice with - try saying that drunk! As soon as I completed the easy assembly, loaded up my first makeshift script and got scrolling away, I was hooked - what had I been missing out on all of these years.

PLEASE NOTE: I WAS SENT THIS ITEM FOR REVIEW BUT NO OTHER PAYMENT OR CONTROL WAS EXCHANGED FOR PUBLISHING THIS UNBIASED REVIEW
I don’t claim to be a YouTuber but I can’t tell you how many hours I’ve wasted on recording and then recording videos because I’d forgotten something or simply got something wrong! Even worse, how many times I had been shooting a video for a client who was a little nervous in front of the camera only to get home and find that all of the takes were, well, useless. This isn’t just embarrassing for them but it makes me look incompetent! Up steps the Pocket Cue V3 and as we’ll see, this versatile little helper has quickly become a staple of my video making package.
Overview of the Prompter People Pocket Cue V3 4K
The Prompter People Pocket Cue V3 4K is a compact and portable teleprompter designed for modern content creators. It's compatible with a wide range of cameras and smartphones, making it an ideal choice for both professional videographers and aspiring YouTubers. The setup boasts optical quality beam splitter glass, ensuring high-quality image transmission while allowing the presenter to read the script comfortably.
Prompter People’s excellent TeleScroll software makes using the V3 a breeze and even for first-time prompter users, it’s easy to get the swing (well, scroll) of things. Better yet, the compact design makes it fantastic for travelling with and with the wide range of accessories, it is easy to tailor your setup to your individual needs. Whether it’s a permanent studio setup or something light and portable, the V3 fits into most production scenarios.
Build Quality
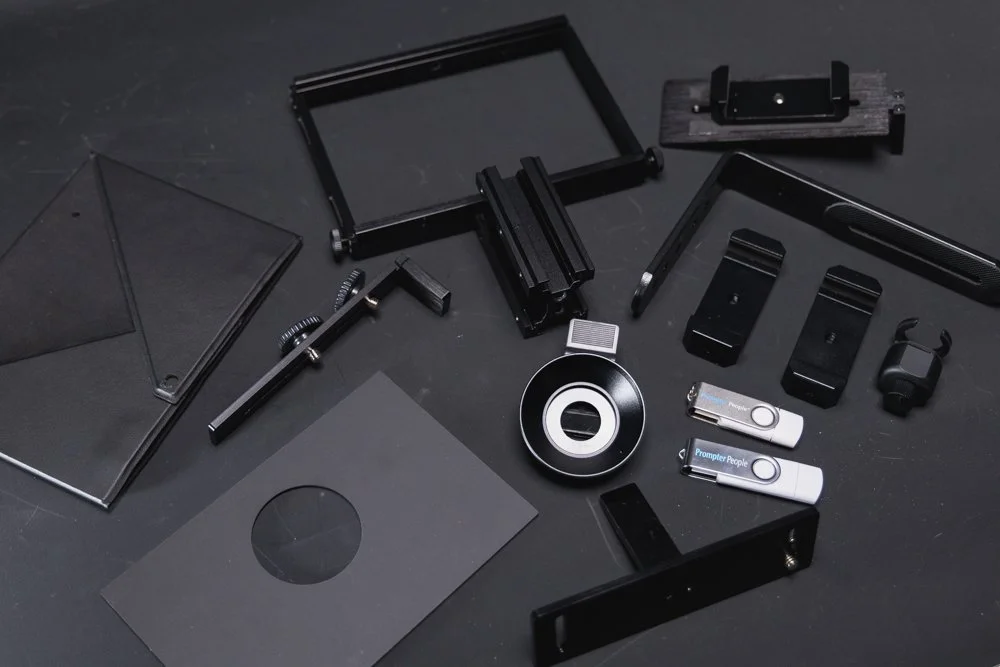
I really wasn’t sure what to expect for build quality for a teleprompter but I guess the most obvious thing is that it needs to feel robust and that it will stand the test of time. The Pocket Cue V3 absolutely jumped out to me as a quality product. The toolless design, built for ease of assembly and quick use means that you will instantly get a feel for all of the components and when handling each, you can feel the quality.


My version included a few optional extras, such as the stand which felt like a premium product - no corners cut here. The inclusion of a travel bag is a nice touch but also no surprise as this promoter is built to be used on set or at different locations. Even the bag itself is thoughtfully laid out offering maximum protection for all of the parts and that oh-so-precious beamsplitter glass. All-in-all, I have zero concerns over build quality and this thing is built to last.
Ease of Assembly
The first thing to note is that the unit is built to be used in different environments, whether on set, in a studio or as part of a home-setup. However, assembly is very simple and straightforward and the toolless design is intuitive. My only concern was getting the camera setup inside the hood correctly and after making a few adjustments, I was away. I had forgotten to take into account the field of view as I chose to shoot quite wide, but the Prompter People website clearly states the lens compatibility and this was complete on me - I simply had to zoom in a few millimeters and all is fixed.

Versatility
This is where the V3 really shines and you can tell that this is a product that Prompter People have put a lot of thought into. The V3 is built to be portable and is easy to travel with but adding accessories to suit your needs really brings it to life. I had the additional stand to use on productions and the robust legs were perfectly capable of taking my camera setup as well as the V3. An included L-bracket makes it an excellent option for filming vertical content for social media or adding the phone accessories completely illuminates the need for a traditional camera setup.
Pocket Cue V3 7” Widescreen 4K LCD Monitor
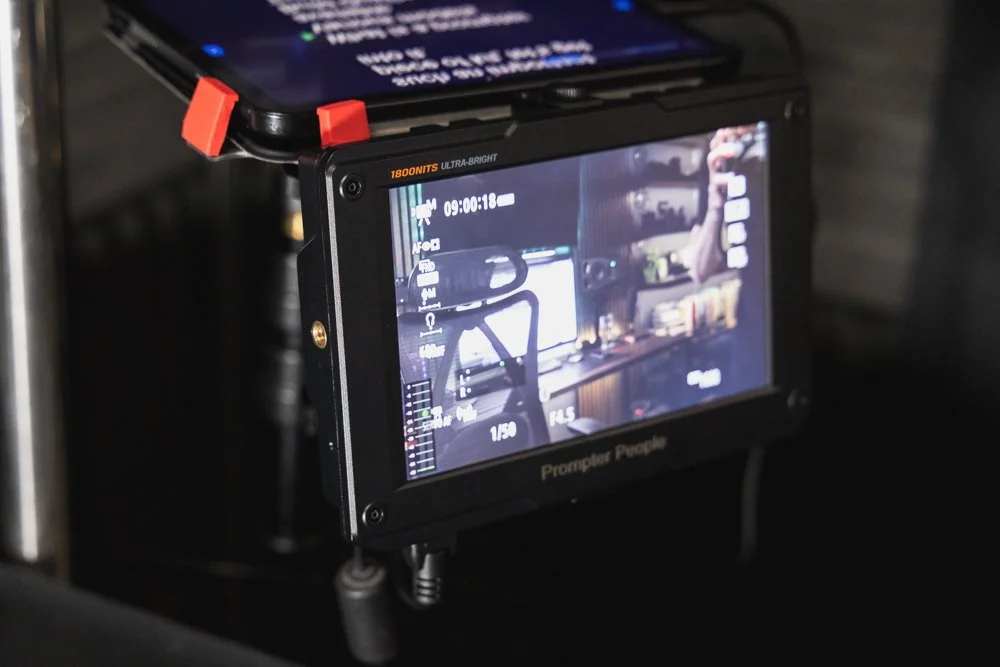
As versatile as the teleprompter is, for me, two accessories in particular really took this teleprompter to the next level. First up is the 4K LCD Monitor included in the monitor version. This impressive little monitor packs an 1800 NIT punch with 4K HDMI loop through that can display 1080p/1080i 180hz (1920 x 1080 180fps) | 4K 60HZ (4K 60FPS. The monitor can be powered via the included power supply or NPF style batteries. I’ve loved using this as a ‘talent’ monitor to check focus, framing and check audio levels etc. via my camera's HDMI out feed. I find that the monitor is essential to my setup and I’m not sure I would feel as confident in front of the camera without it.


Shuttle Cue Lite & Smart Remote
My second killer accessories are the remote option. The Smart Remote is a Bluetooth remote that works perfectly with a smartphone or tablet and is discreet and easy to use to move the text on the prompter along. However, I much preferred using the Shuttle Cue, a feature richwired remote with super smooth control for start/stop functionality and adjusting the speed of the prompter. I found this remote so intuitive to use and it just works seamlessly with the TeleScroll software. Between the Monitor and the Remote, they perfectly accompany the Pocket Cue V3 and make it quite a formidable package.


TeleSroll Software
If the hardware features weren’t impressive enough, the TeleScroll software is the beating heart of this entire system. In truth, I barely touched the surface of what this fully featured software can do as I was mainly concerned with its primary function, you know, prompting. However, when you start digging into the software and using the authoring tools and unleash all of the customisable viewing options etc. You soon see why TeleScroll stands out from the competition. Even more impressively, Prompter People have just launched VoiceScroll which looks like an incredible option and I will add an update to this review once I have had more time with it - no doubt it will work seamlessly.


Benefits of Using a Teleprompter Like the Pocket Cue V3 4K
Even though we have covered all of the features of the equipment and software, I just want to touch on some of the underlying benefits of using a teleprompter like the Cue V3. I personally think that by delivering clear, consistent messages whilst maintaining eye-contact with your audience, the perceived level of any production will be improved. The direct connection with the viewer will help maintain attention and engagement, critical in a world where attention is at a premium.
Using a prompter also allows for better consistency in messaging and video quality. For those that need a similar structure throughout a series of videos, a prompter really is essential. For those looking for a more fluid approach to their productions, the Cue V3 offers amazing versatility both in terms of portability and the use of mobile phones or the ability to shoot vertical content - it really does have all bases covered.
Who Would Benefit from Using the Pocket Cue V3 4K?
I can really see an argument for the Cue V3 in most video/YouTube setups. Whether you are a professional videographer that needs to produce client videos with clear, precise messaging - or a content creator that is sharing review, tips & tricks with an audience - having well structured content, thoughtful and clear delivery is essential in gaining the attention and trust of your audience. For videographers, it will help inspire confidence from clients and in some scenarios, you may even be able to charge for hire of a prompter, which really makes it a valuable asset.


For those producing online courses or cooking tutorials etc. having the ability to list complex information like it is all at the tip of your tongue will make you look more professional and cement you as a trusted source. Personally, when I am creating camera reviews etc. for YouTube - I like to have all of the specifications and key points listed on the prompter and then to ‘freestyle’ the bits that I want to talk about. This approach seems to fit my needs rather than feeling tied to a script, yet ensuring I cover off all of the points that I need to.

Pros of the Pocket Cue V3 4K
1. Portability and Versatility - Easy to travel with and setup for a range of different uses
2. High-Quality Optics - The Beam Splitter glass is superb quality with no impact on the final image
3. Easy Setup and Use - Toolless design makes it ideal for the less technical of us (me included!)
4. Improved Confidence and Delivery - You’ll look and feel like a Pro with expert video hosting skills!
5. Time-Saving - Productions will be quicker, easier and more consistent!

Cons of the Pocket Cue V3 4K
1. Learning Curve - It takes a bit of getting used to when presenting - practice makes perfect!
2. Cost - This is a premium level product that sits above more ‘budget’ options both in quality and cost.
3. Potential for Over-Reliance - It can feel like a safety net losing a little of the spontaneous magic.
4. Additional Equipment Required - Although not essential, the accessories really bring it to life.
Conclusion
I have labelled the Prompter People Pocket Cue V3 4K a ‘game changer’ and that’s not a term that I would use lightly. In terms of the impact of a single piece of equipment, I can’t think of any item that has changed my approach more to creating online content and in particular, YouTube videos than the Cue V3. I see so much benefit in using a setup like this and judging by the amount of popular YouTubers that use a prompter, it seems other people also agree.

However, the benefits don’t stop there. If you are a professional videographer creating client focussed work, having the ability to utilise a prompter really is a fantastic tool at your disposal. Anything that makes a client look better on camera will make them love you! In addition, the timesaving element and potential to charge for hire of the prompter really make this a suburb addition to any commercial videographers kit.

Probably the biggest downside is the initial outlay and the potential learning curve whilst getting used to using prompter. Depending on the individual, with a little practice it really does become natural to use a prompter and like me, you might find ways of using it that suit your own style. As for the cost, that may be a limiting factor to some, but having seen some of the more ‘budget friendly’ options - buying cheap may indeed lead to ‘buying twice’ as you will probably see what you miss out on by not choosing a well rounded option like the Cue V3.

Ultimately though, you will probably already have an idea if a teleprompter fits in your workflow and if the benefits outweigh the cost. For me, I’m not sure I could go back to not having the option to use a prompter and it’s something that I know clients will also appreciate. The biggest downside for me personally is that now I will be producing more YouTube videos and that means my face all over the internet - time to start saving for the hair transplant!
Posts you might also like…
About the Author - Ross Jukes is a professional Photographer and Videographer with over a decade of experience. Working in both Digital and Analogue formats, Ross has worked with international clients, had his worked published numerous times and exhibited his work extensively. With a passion for all things photographic, Ross combines his experience, enthusiasm and dedication to his art form to create engaging and educational content for the photographic community.
Disclaimer: All links to Amazon UK/US are affiliated links - you will still pay the same price but I will receive a small commission. All information provided in this blog is intended either for educational or entertainment purposes and is accurate to the best knowledge of the author. However, further research/professional advice should be sort before making purchases/implementing any advice given and no responsibility is taken by the author or parties mentioned here within.