
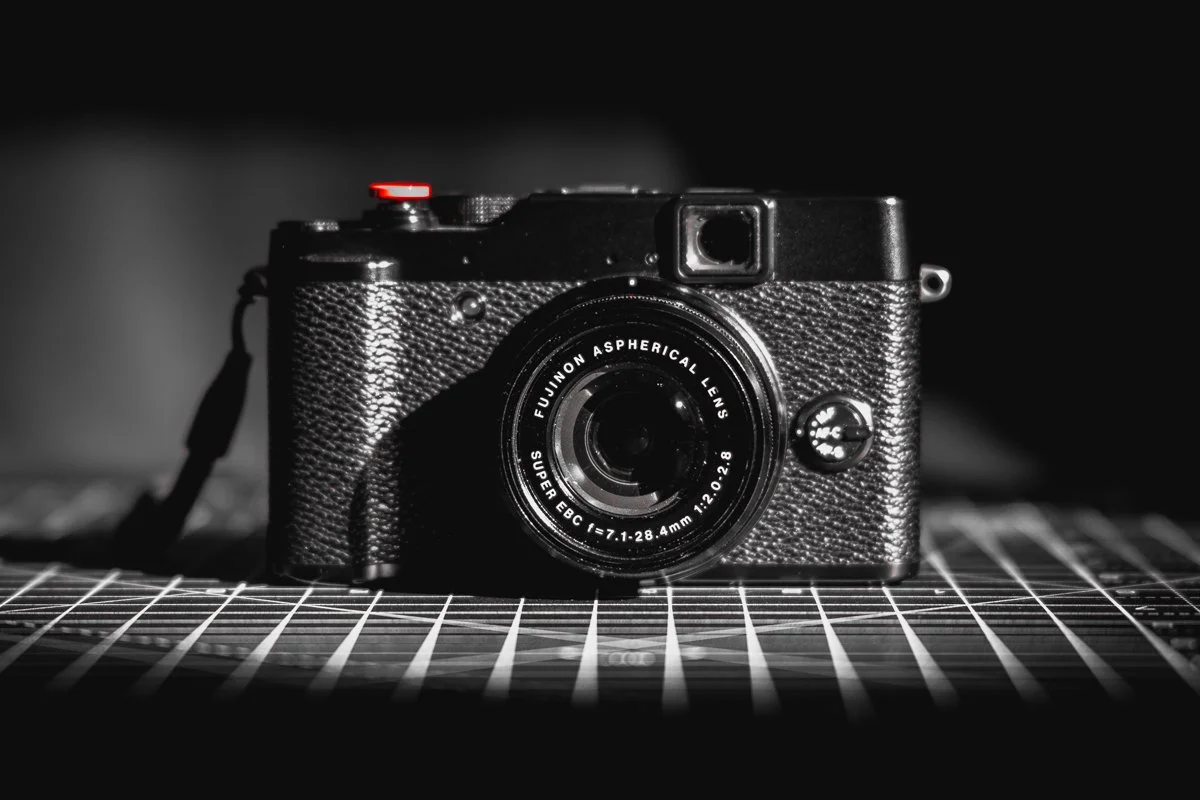
Fuji X100V - Amazing But Is It Worth The Hype?
Through more than a decade of evolution and gradual refinement, Fuijfilm's X100 series of cameras has continually impressed, especially despite their small form factor, and in the case of their latest X100V, it's a seriously excellent little camera.
Fujifilm's popular X100 series can be described somewhat as the camera world's Porsche 911. For over a decade now, they've been slowly iterating and improving upon what was already a pretty good base. As time has passed, so too has the X100, gradually gaining new features, fixing earlier drawbacks, refining things here and there, and keeping up with the times. But, is Fujifilm's X100V worth the upgrade?
Though it's been a couple of years since its launch, the X100V has recently seen a surge in popularity. That's mostly thanks to the influences of their appearances amongst social media circles such as Instagram and TikTok, among others. Due to this, the Fujifilm X100V is becoming ever harder to get your hands on. With soaring prices, second-hand examples are even more expensive than their original MSRP price tag.
PLEASE NOTE: I PURCHASED THIS WITH MY OWN MOMEY AND NO PAYMENT OR CONTROL WAS EXCHANGED FOR PUBLISHING THIS UNBIASED REVIEW
Video Source - Andrew Ethan Zang via YouTube
So, assuming you already have the older X100F, currently own a similar compact prime-lens camera, or if you want to delve into it as a first-timer, should you go through the hassle of scouring about increasingly scarce stock? In my experience... Absolutely! It's a great little camera for an everyday carry. With its ease of use and intuitive operation, the Fujifilm X100V is a joyous machine to have a bit of fun with.

It takes great photos, with a noticeable improvement in all regards when compared to its predecessor. A robust build quality ensures that you needn't have to baby it too much. Furthermore, it'll now feature an abundance of upgrades and trickle-down benefits from Fujifilm's bigger, more professional-grade kit. It's a fine addition to the brand's venerated X100 series, so let's take a closer look at all this buzz...
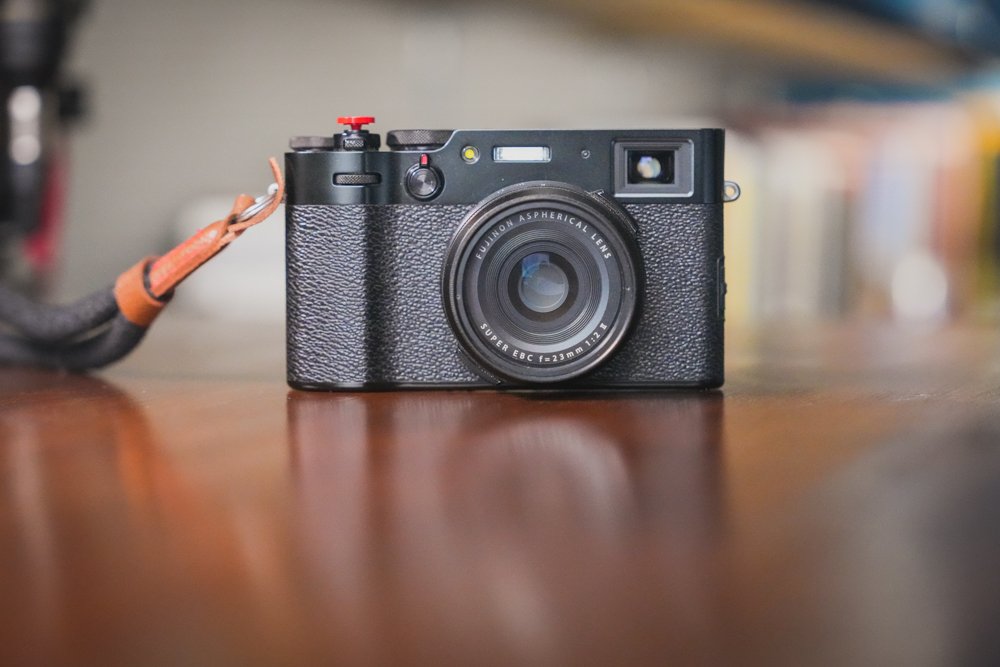
Robust Build, With Even Better Ergonomics
The old X100F wasn't really the most durable camera in the world. As an owner, you do have to be a tad cautious with how you use it, especially when it starts raining. But lucky for you and me, Fujifilm's latest X100V has the same-old solid build quality. And this time around, it's (almost) weather-sealed. Ideally, it might be a good idea to get a lens filter atop the built-in ND filter, for a bit more security.


While you're there, you could even shell out a bit more for their optional filter ring adapter for additional water resistance... Just to make doubly sure that water ingress is a tad harder. It's just another thing that you have to invest in, especially if you're typically using an X100V for something like street photography. Now, I'd still recommend avoiding any contact with heavy rain. Or, accidentally dropping it into a drain!
Video Source - DP Review TV via YouTube
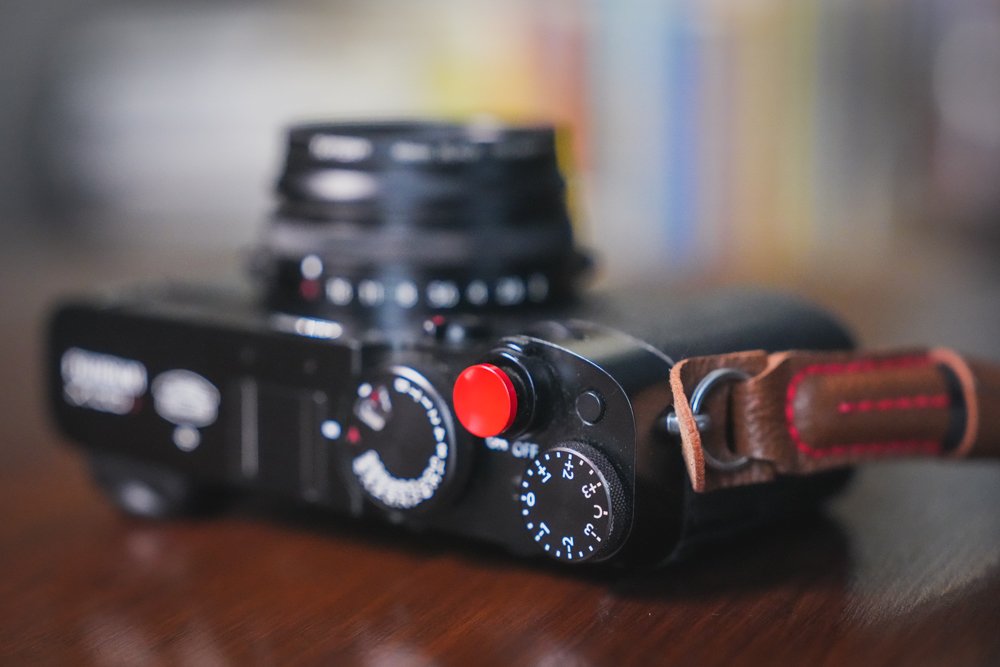
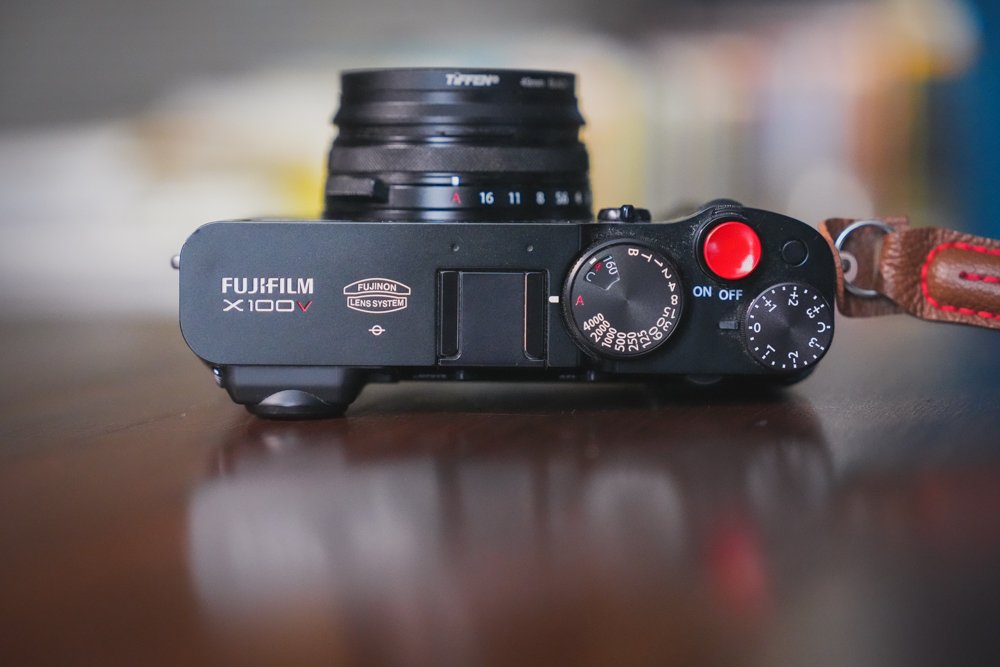
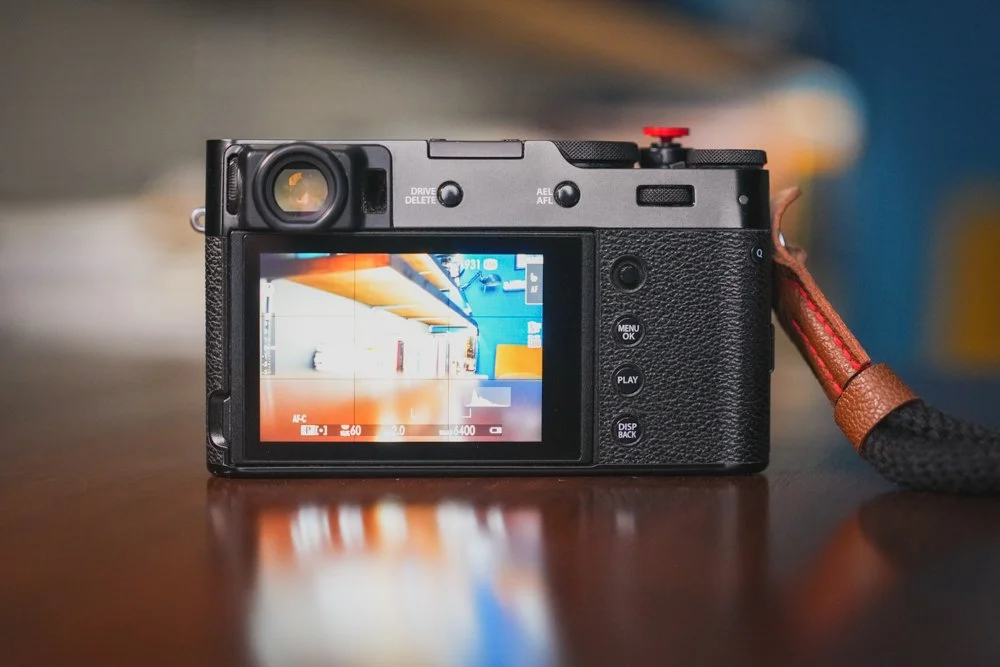
On top of the reinforced body, one noticeably major change between the old X100F and the new X100V is the ergonomics. There's a good feel and intuitiveness when using it. Even the little things, such as how the shutter speed dial has been reworked to allow better tactile feedback when adjusting the ISO, do make a difference. Not to mention, the added customisability of the dials, if you need custom controls.

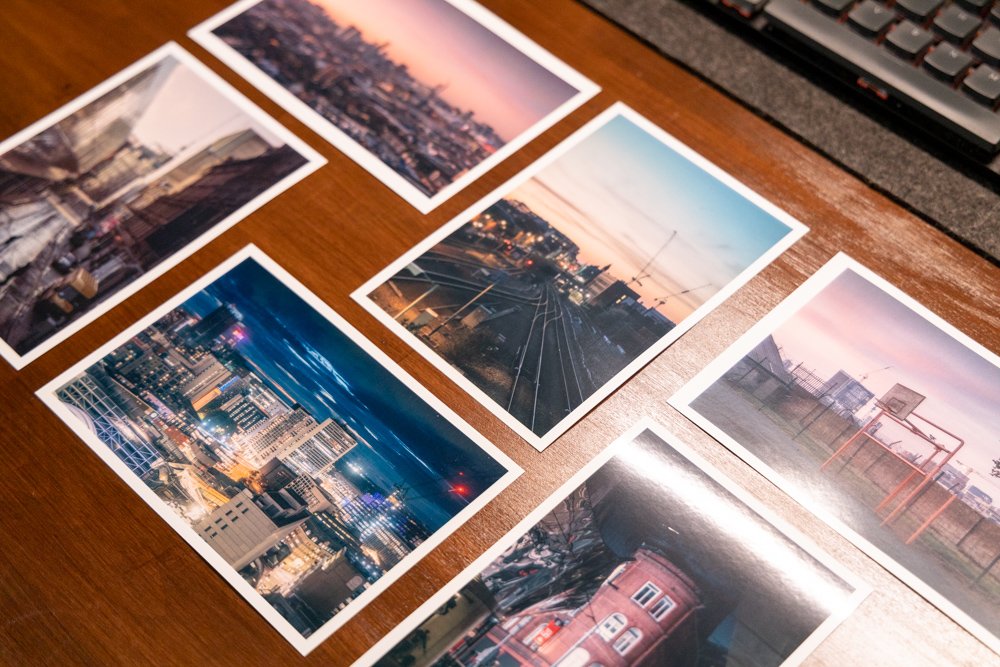
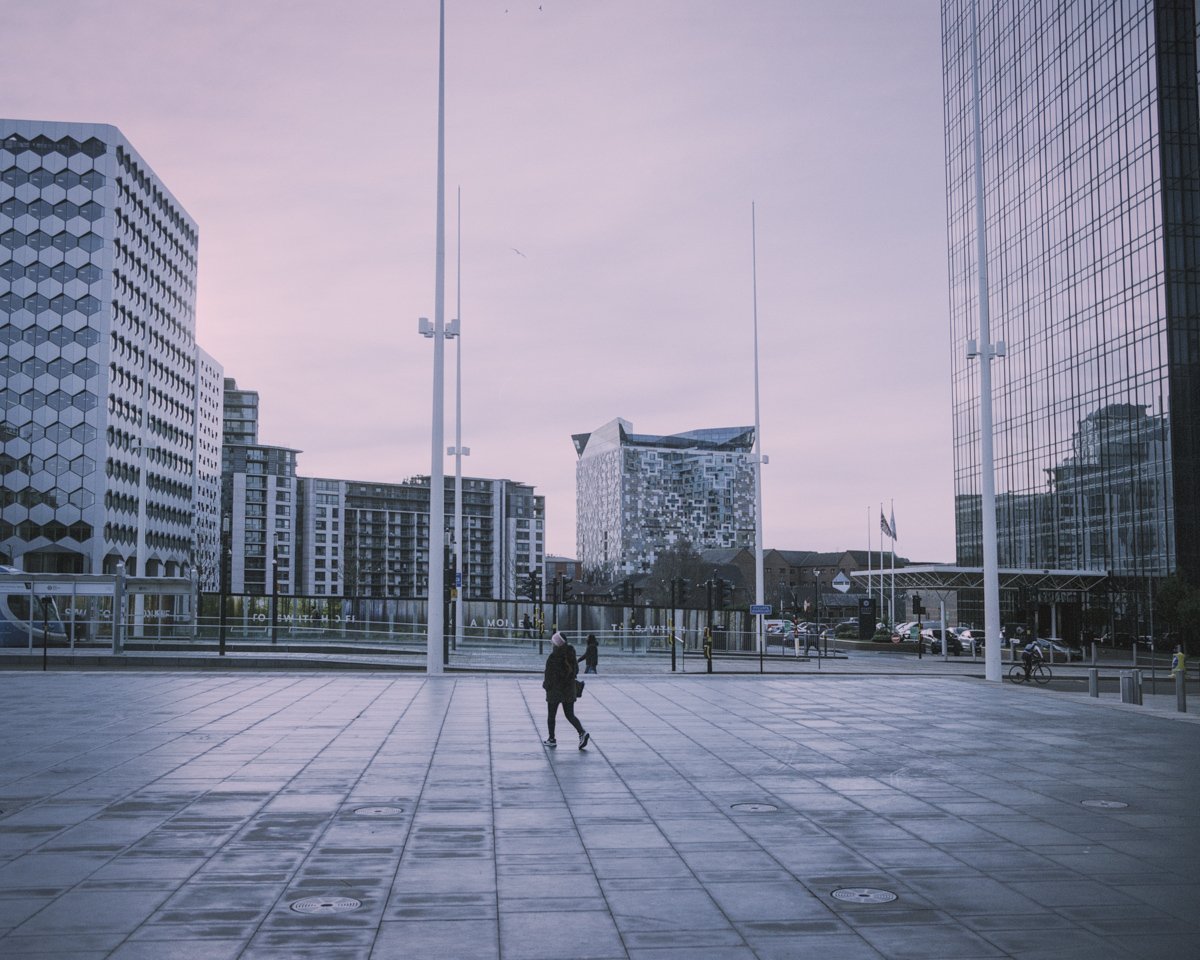
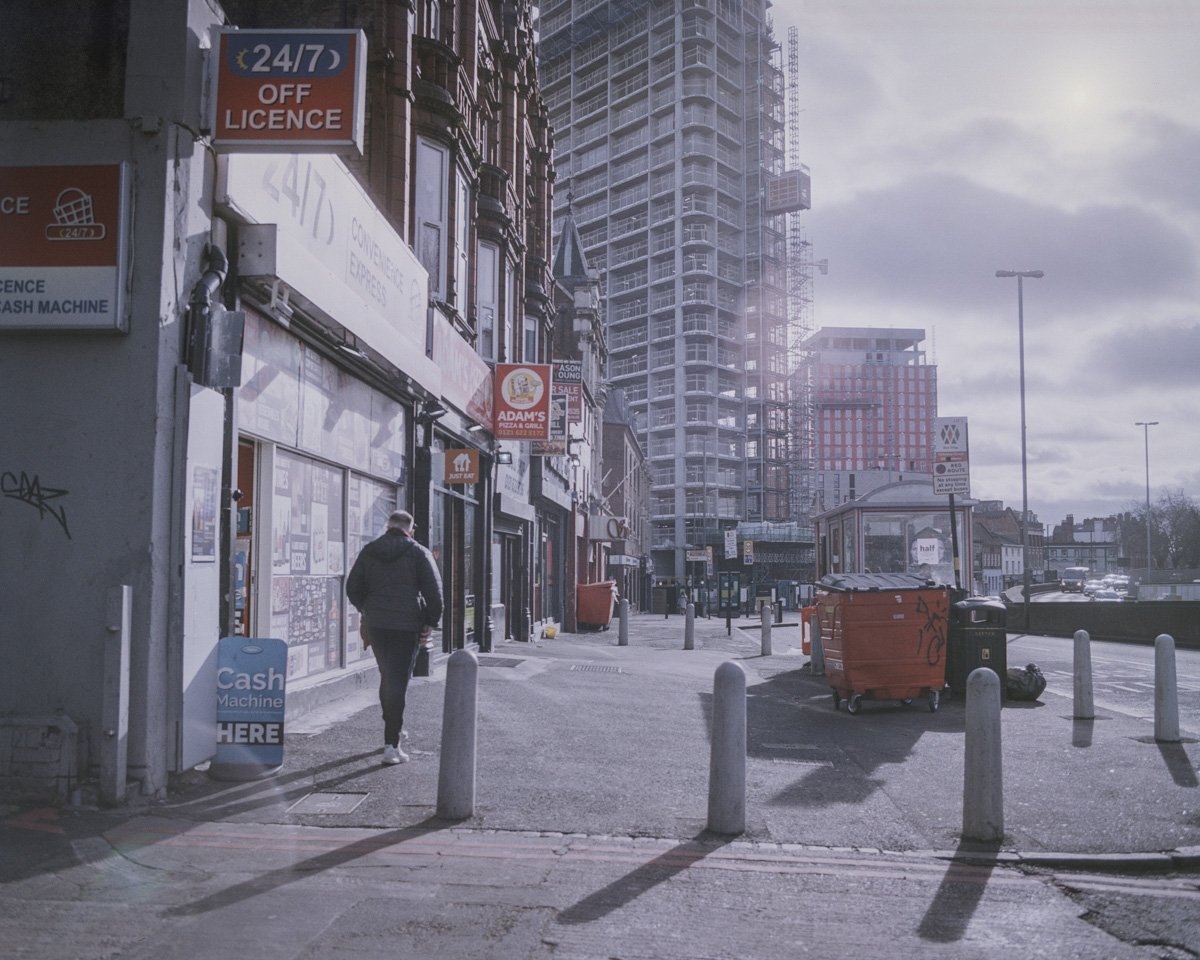
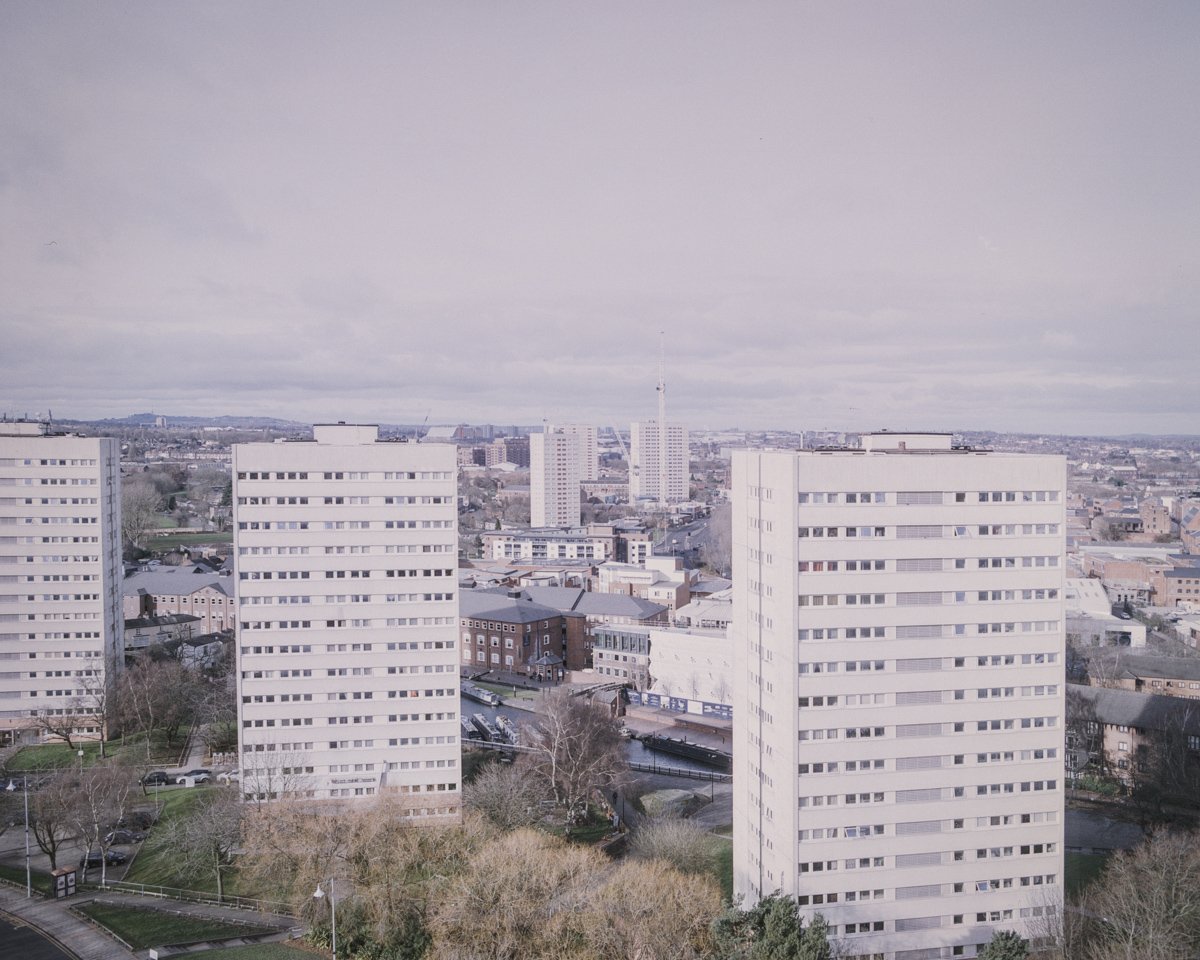
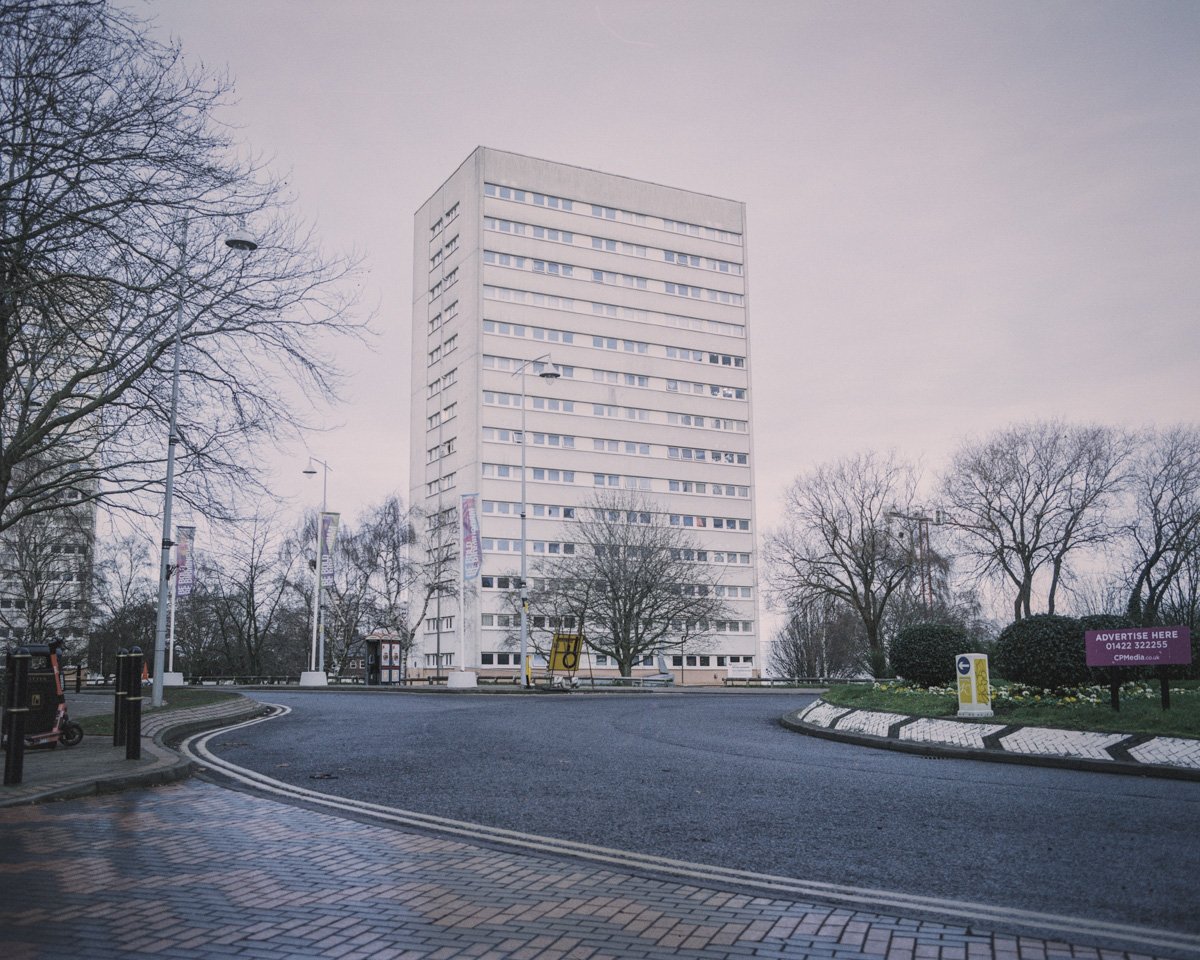
Image Quality is fantastic, see the gallery at the bottom of the page :)
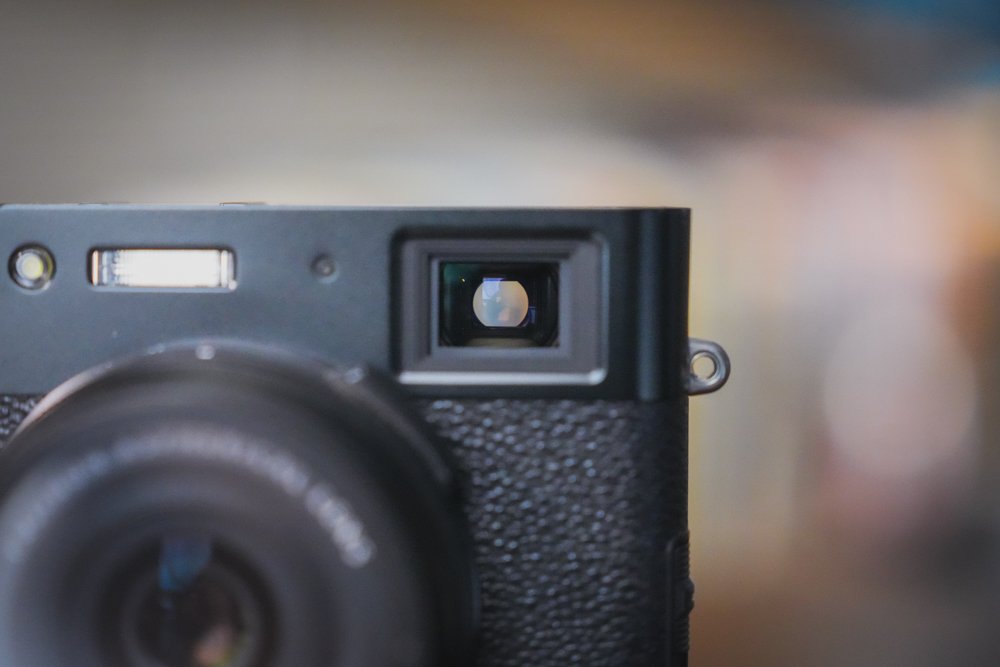
Elsewhere, the already good viewfinder has been redesigned. It's bigger now, and comfier to use during long, extended photoshoots. It's a similar optical-electronic hybrid to the one you'd get in the older models. Yet, it still goes to show that even the most minute iterations matter. All in all, the Fujifilm X100V is nearly the ideal and perfect choice if you need a day-to-day camera. Then, there's the subject of the rear display.

“The X100V is the sort of camera that’ll make you fall in love with photography, all over again”
It's The Attention To Detail That Matters
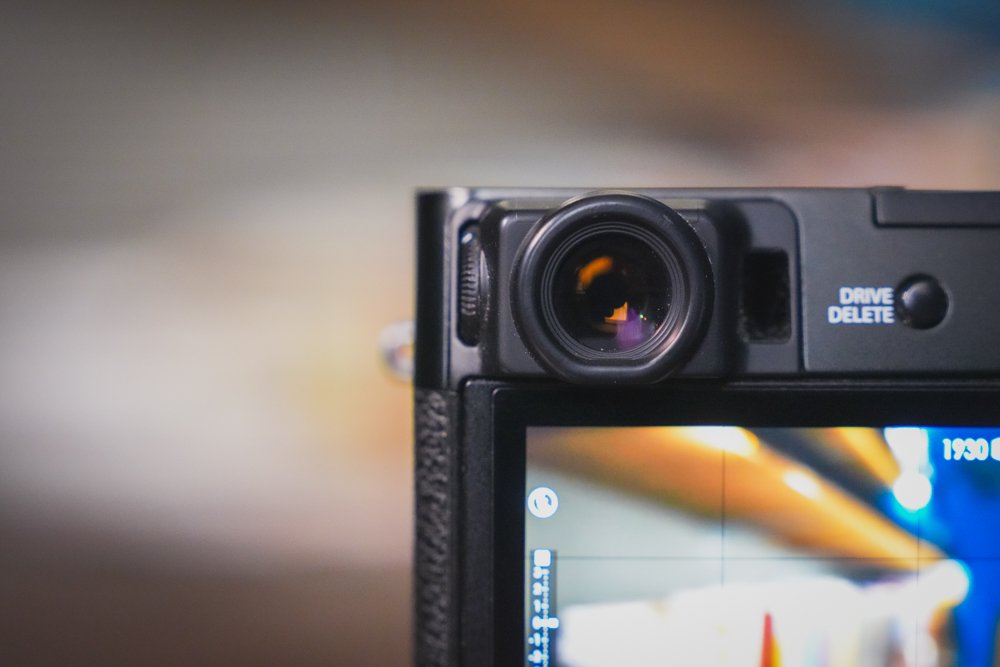
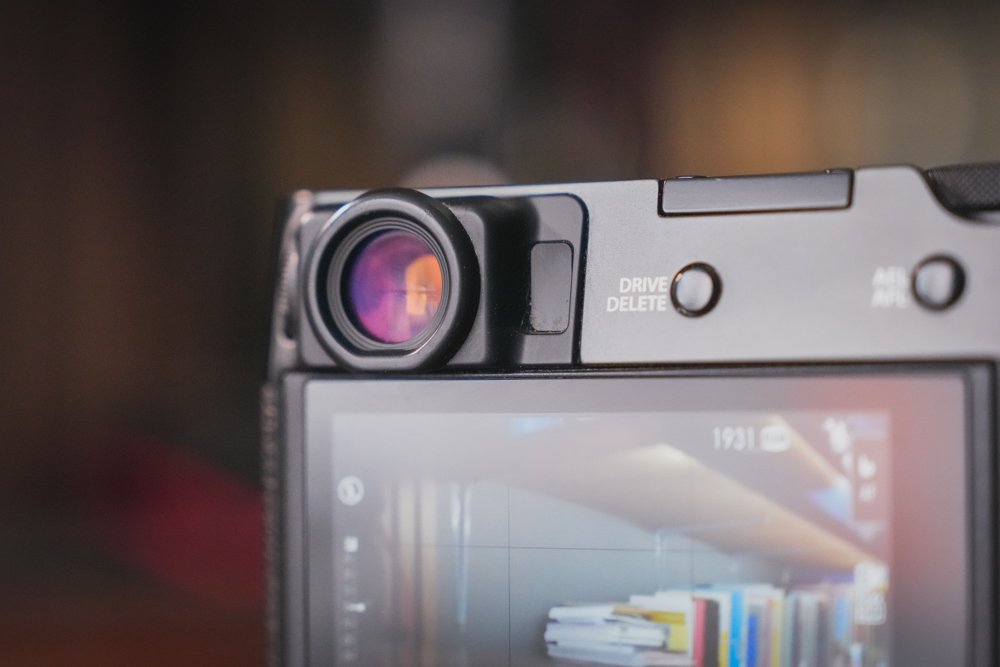
A noteworthy highlight in the long list of new stuff that came with the X100V is the screen. it now comes with tilting (which otherwise sits neatly flushed against the frame) and it's a touchscreen. Its touchscreen can be quite handy if you're trying to manually focus and navigate the menus with a simple swipe. While some might be hesitant to get rid of the old physical 4-button layout, it actually works pretty well.
No doubt, some of you might still prefer actual, clickable, tactile buttons. But, give yourself some time to get used to the touch functions, and it's surprisingly well-integrated. Additionally, the display now comes with a brighter backlight. So, glancing at the overlay under bright sunlight is a bit easier on the eyes. One other element of the Fujifilm X100V that's a big step forward is the new lens that it's packing.
Video Source - Benj Haisch via YouTube
The 23mm F2 lens might, at first, appear identical to its predecessor. Nevertheless, its innards have been slightly rejigged - though it remains a fixed focal length unit. On the plus side, images are sharper than it was before with the older models, especially at shorter distances or focusing in more closely. However, it does have a new bokeh signature that fans of the prior X100 series cameras may have to get used to.
Moreover, I noticed that the lens can be a bit slow to react to what you and the camera are seeing. It's nothing deal-breaking, but when you consider how well the autofocus performs (more on that later), you do need to account for it. As such, it can lead to some missed shots if you don't time them right. Hence, if you're trying to capture fast-moving objects, like passing cars, it can be a bit of a challenge.
Small In Size, But Mighty In Image Quality
Oh, and have I mentioned just how good the image quality is from the Fujifilm X100V is? In particular, given a relatively compact form factor. This is mostly thanks to Fujifilm's newest 26MP X-Trans APS-C sensor and processor combination. Which, if you're taking notes, is homologated from the brand's larger X-T3 and X-Pro3 cameras. In short, it features a BSI-CMOS sensor and Fujifilm's X-Trans colour filtering.

Low Light performance is excellent for such a small camera!
In addition, it has a lower native ISO value of only 160. Albeit, its maximum ISO value remains at 12,800. What you can expect are vibrant colours, with respectable noise suppression at higher ISO values. And, a smoother bokeh, though the effect is a tad distinct from older X100 series cameras. More specifically, it's got that onion ring effect, which does make images pop more, with a softer bokeh, overall.
Video Source - GxAce via Youtube
Using the X100V, I noticed that there's less of a haze effect at longer distances and greater improvement in image clarity and sharpness. Ah, and if you adore Fujifilm's film simulation modes, the X100V has you covered. You'll be able to choose between Provia, Astia, Classic Chrome, Pro Neg, Std Neg, Classic Neg, B&W, Eterna, and Velvia, among others. Plus, a variety of other custom effects that you can add to a shot.

While some might think these are gimmicky, they're actually a lot of fun to play around with. Now, aside from taking crisp images, the X100V also does so pretty speedily thanks to its electronic shutter. It allows you to take burst pics at speeds of up to 20fps when using the whole sensor. Or, up to 30fps with a 1.25x digital crop. Another interesting surprise with the X100V is its videography performance.

Focusing On The X100V's Autofocus
Video is an unexpected (more or less) strong point of the Fujifilm X100V, especially given its size as well as physical constraints. You get neat highlights such as recording at 4k/30fps or 1080p/120fps. Or, you may like its F-log recording function, though it's only in 8-bit. Granted, the X100V isn't, by any means, an ideal Vlogging camera. For example, the camera lacks any sort of stabilisation, digital or otherwise.

As such, video-related work should ideally be done atop a tripod or gimbal, unless you're okay with shaky recordings. But, if you are using it for a bit of video capture every once in a while, it's pretty decent. You'd be able to easily bolt on a microphone into the 2.5mm jack. Or, you could instead use the USB-C port and adapt to a more conventional 3.5mm jack. While we're here, let's rejoice for the inclusion of USB-C.
No more micro-USB... Only USB 3.1 Type-C for charging the battery, or transferring files. Oh, and another bonus for videophiles; the X100V includes continuous autofocus with face detection. Speaking of, among the biggest inclusions for the X100V is a revised on-sensor phase detection autofocus. In practice, that'll translate to its ability to focus on key subjects a bit better, with improved facial and eye tracking.

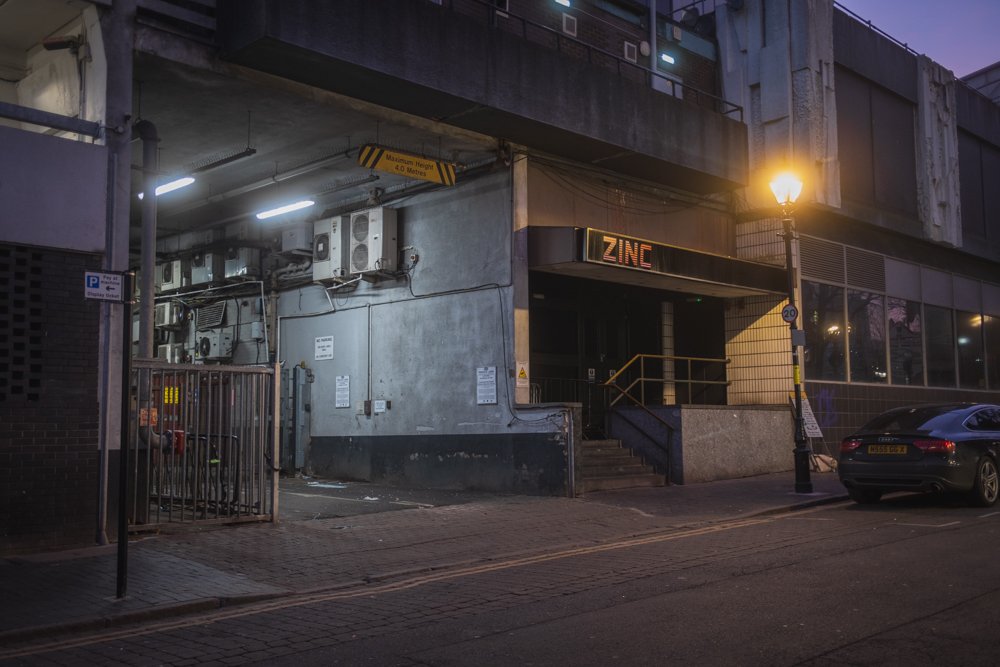
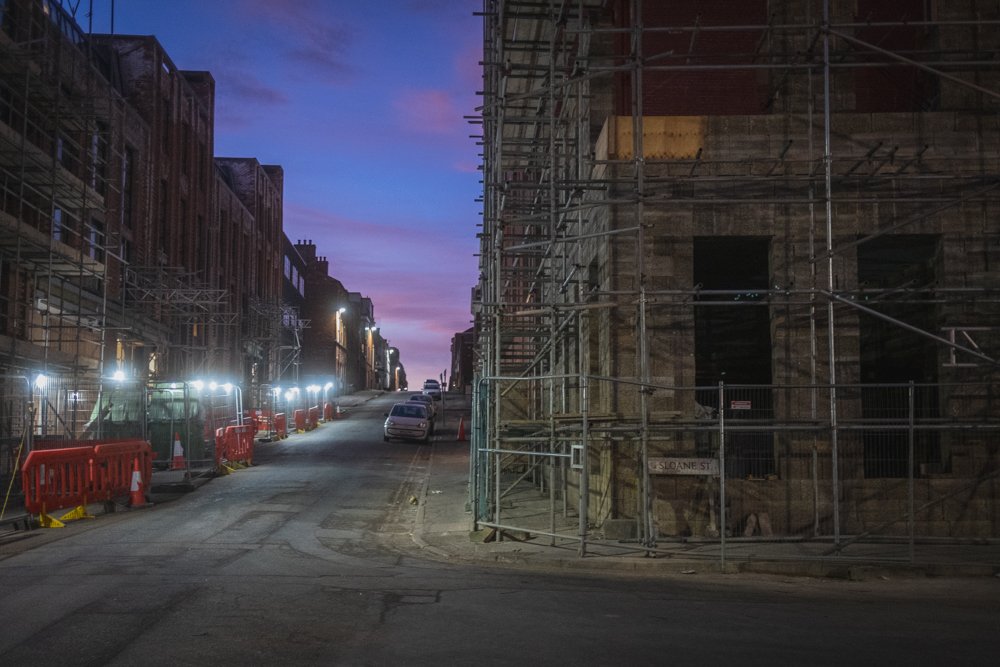
The X100V is amazing for a bit of urban exploration!
It now has 425 autofocus points across the entire frame - up 100 points compared to the X100F. And, it's paired with a customisable focus range limiter. I found the autofocus to be really good, and it's a big step forward in the right direction. It'll focus in onto a subject quickly - slightly faster than the old ones. That's even in low-light settings, with good accuracy. Still, there are certain mentionable cons to the X100V.
Some Of The Downsides To Account For
I mentioned earlier that the Fujifilm X100V comes with a fixed focal length. It's not bad, by any means. Yet, it does deprive you of some adjustability in a shot. In so doing, you ought to be prepared to crop that final image afterwards. All the while, simply needs to get used to the singular focal length that it offers. It's made more challenging given the fact that it's a fixed lens, so you can't interchange it.
Of course, that's not a major strike against the X100V, as fixed lenses are a mainstay among many other compact cameras, anyway. Another disadvantage of the X100V, and it's one that I noticed personally, is that it's not entirely pocketable. It's small enough that you can stuff it into a jacket pocket. Although, it's definitely not going to fit into a jeans pocket, forcing you to carry a bag to lug it around with you.

It's in that awkward middle ground where it's pretty tiny. Yet, too large to a point where you're not really able to discreetly bring it with you. And if I'm going to carry a bag, I might as well bring with me some of the bigger, more capable cameras, instead... Ones with interchangeable lenses, and could yield better photos. That's me being nit-picky, but it's still a bit of an unforeseen inconvenience, nonetheless.
As for how the market is right now, I suppose another slight catch for the X100V is its availability and cost. It was a fairly-priced compact camera, given its capabilities and feature set, when it came out. But nowadays, you might find trouble even sourcing one for anywhere close to MSRP. Your options include... Waiting until the market stabilises, paying the high markup, or simply opting to get the older X100F.
Should You Upgrade To The X100V?... Some Closing Thoughts
Having mentioned the X100F, do check out my other review on that, if you need a more in-depth look at how it differs from the X100V. TL;DR, while it's an older model, it's still a pretty good camera. That does beg the question... If you already have the X100F, would it be worth upgrading? I mean, if you're happy with it, then there's not really anything here that'll make you rush out to get the later X100V.
With that being said, I simply adore the improvements that Fujifilm has put in place when updating their beloved X100 series. The Fuji X100V is an engaging, intuitive, easy-going camera that takes great photos in a pinch. Yet, offers a whole host of features... From a speedy and accurate autofocus system... To that capable sensor-processor combo, in addition to its enhanced video-recording functionality.
Video Source - YHMA via YouTube
The lens is sharper, the build quality is more durable, and the tech is more up-to-date. So, you might see why it's such a desirable little camera. There's a good reason why the X100V's market value has risen to levels where they're no longer as attainable as they once were. As a result, they're becoming tougher to find. But, should you locate one for a good price and in good condition, it's tempting to go for it.

I absolutely love mine, and it'll forever remain a part of my collection. Despite the high prices that it now commands, the X100V isn't one that I'll be selling off anytime soon. With smartphone cameras becoming ever smarter, and pro-grade cameras becoming more feature-packed, it's nice to go back to those simpler times. The X100V is the sort of camera that'll make you fall in love with photography, all over again.
IMAGE GALLERY
These images are intended to give you an idea of what the Fuji X100V can achieve. You might not like my particular brand of ‘urban’ imagery but it will give you a taste for what this camera is about. You will also notice, I took particular advantage of one amazing sunset! I shoot with a Black Pro Mist filter on the X100V to add to the cinematic/film like (ish) feel - but for me, this camera really comes alive in low light situations and is amazing as a ‘carry everywhere’ camera!


Specs And Details


About the Author - Ross Jukes is a professional Photographer and Videographer with over a decade of experience. Working in both Digital and Analogue formats, Ross has worked with international clients, had his worked published numerous times and exhibited his work extensively. With a passion for all things photographic, Ross combines his experience, enthusiasm and dedication to his art form to create engaging and educational content for the photographic community.


Disclaimer: All links to Amazon UK/US are affiliated links - you will still pay the same price but I will receive a small commission. All information provided in this blog is intended either for educational or entertainment purposes and is accurate to the best knowledge of the author. However, further research/professional advice should be sort before making purchases/implementing any advice given and no responsibility is taken by the author or parties mentioned here within.

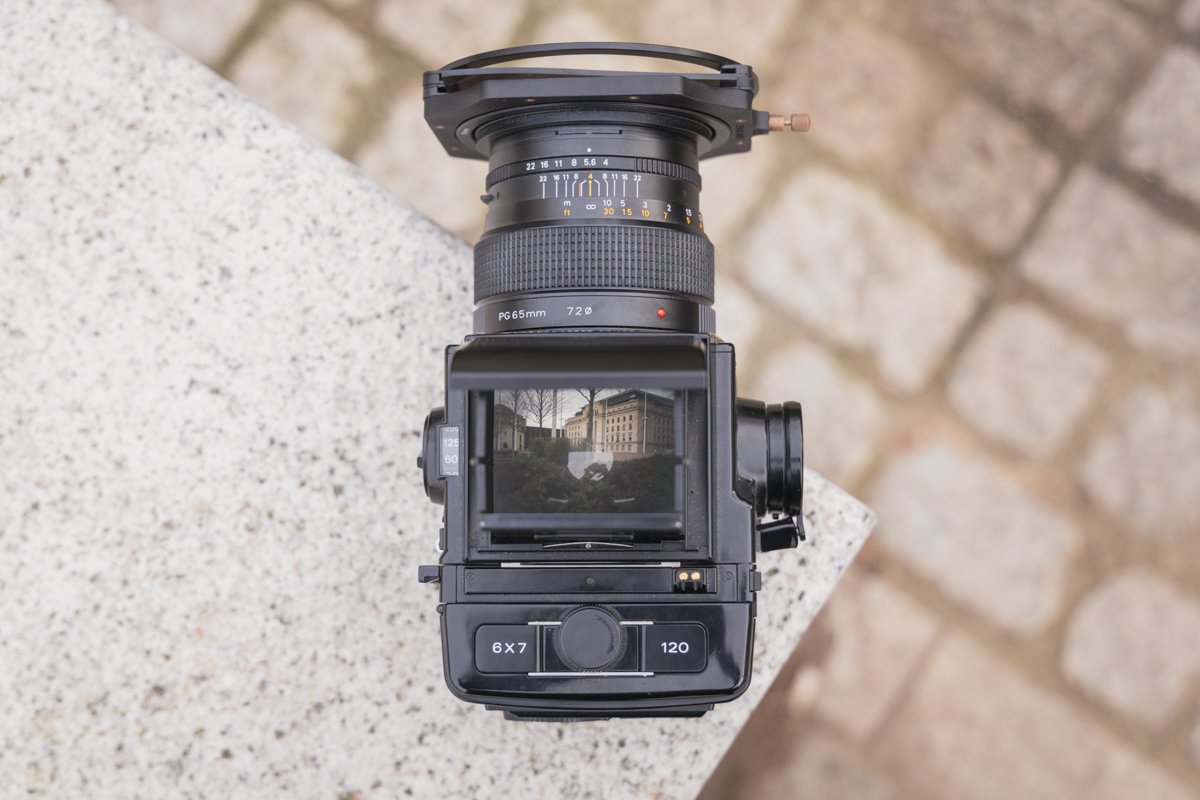
Bronica GS-1 - The Most Underrated Medium Format Camera Ever?
I've been searching, yearning for a medium-format film camera like this for a long time. It wasn't easy to get my hands on it, and for some reason, its mere mention is but a hushed whisper floating from one forum post to another. Not a lot of people know about it, and one might argue that it's criminally underrated. In that sense, it's a good time to now introduce you to a new piece in my collection, the Bronica GS-1.

I've been searching, yearning for a medium-format film camera like this for a long time. It wasn't easy to get my hands on it, and for some reason, its mere mention is but a hushed whisper floating from one forum post to another. Not a lot of people know about it, and one might argue that it's criminally underrated. In that sense, it's a good time to now introduce you to a new piece in my collection, the Bronica GS-1.
Now, if you know anything about 6x7 format cameras, you may've heard of the Mamiya RZ67 and RB67, as well as the Pentax 67. So, why not the Bronica GS-1? Why was it side-lined in the pages of history? On top of that, why did I get the GS-1 instead of its more popular rivals? For starters, the GS-1 perfectly matched a set of criteria that I set out when I was on the prowl for a medium-format film camera.
PLEASE NOTE: I PURCHASED THIS WITH MY OWN MOMEY AND NO PAYMENT OR CONTROL WAS EXCHANGED FOR PUBLISHING THIS UNBIASED REVIEW
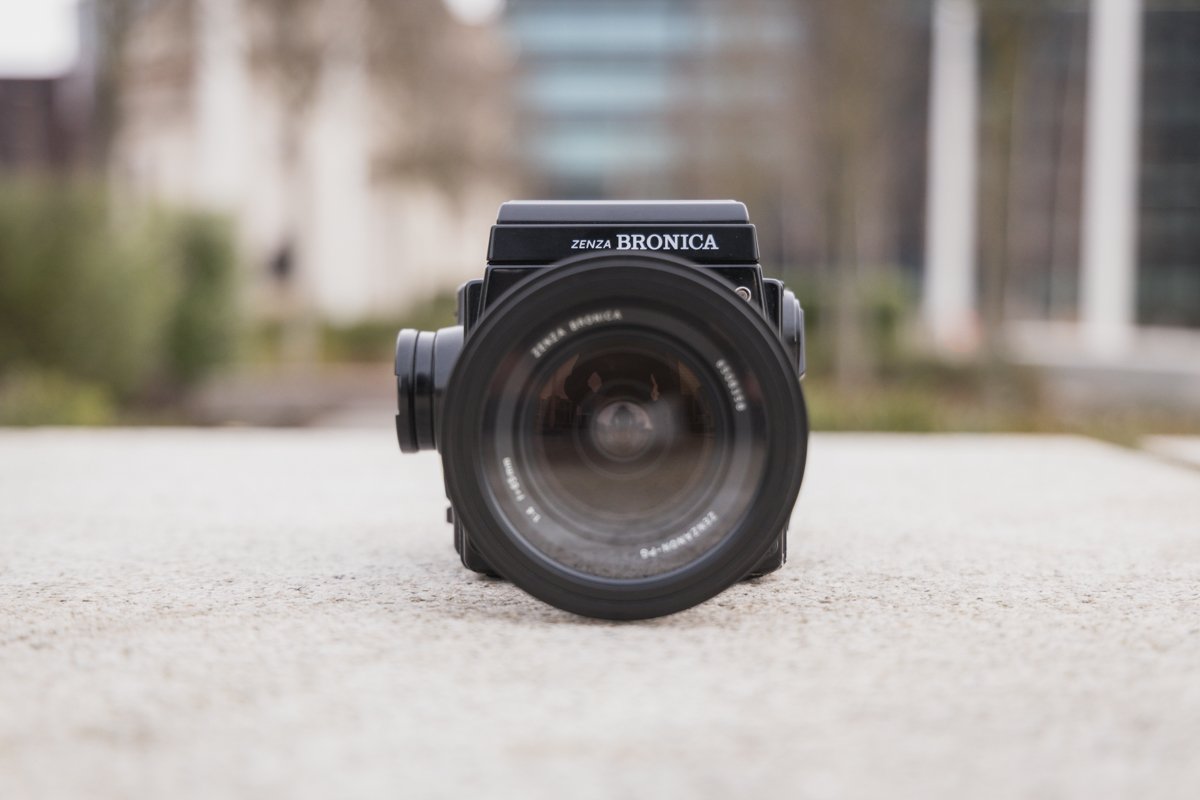


This being... a 6x7 aspect ratio, (relatively) compact sizing, good ergonomics, great image quality, good lenses and it could be had for a bargain price. The 6x7 format was, in particular, very desirable among other formats that I planned on shooting. Moreover, Bronica's GS-1 is smaller than either the Mamiya or Pentax cameras. The latter two are quite hefty and cumbersome to operate, which would be quite a hassle for day-to-day use.

Having previously experienced both the Mamiya and Pentax offerings before and now handling the GS-1 - I found the latter to suit my needs the best. For a camera that's no longer in production, and one that's been left under-appreciated and under-mentioned amongst photographer and mainstream circles, was choosing Bronica and its GS-1 a mistake? Not at all. In fact, it's time that the GS-1 gets its own, silent revolution.
The Ideal Ergonomics For A Comfy Experience
So, about my particular GS-1... I bought it with a pop-up waist-level viewfinder. I consider it a bonus find for me since it’s my preferred way of shooting! Otherwise, the Bronica GS-1 could be coupled with other finders. That includes a 90-degree rotary prism (more on that later), as well as a metered and non-metered prism. The customisability is thanks in no small part to the GS-1's incredibly modular body.
That is further improved thanks to the excellent ergonomics when handling the GS-1. Therefore, most of the controls that you need... Be it the flash sync, lens disconnect switch, shutter speed, and the film back release button... Are all positioned within easy reach. This litany of switches and knobs also includes the mirror lock-up (MLU) button and double-exposure settings. These two are crucial for night-time and experimental shots.

You'll usually have to fiddle around with the exposure and MLU switches when the sun goes down if you want the best low-light experience possible. It's not the most intuitive system in the world. But, once you get used to it, night photography with the Bronica GS-1 can yield great results (be sure to source the correct shutter release cable for it!). Meanwhile, there's the other key talking point of the GS-1 over its period contemporaries - the build quality and packaging.


The body of the GS-1 itself feels solid, robust, and well-built. Granted, while it's slightly smaller than the Mamiya or Pentax that we mentioned earlier, Bronica's entry into the field is still rather large and heavy. As such, you'd better be prepared to lug about that excess mass with you wherever you go. On the plus side, you do have an interchangeable film back system, and Bronica even sold a Polaroid film back for it.
Video Source - Worldwide Camera Exchange via YouTube
“Has the heart and soul of a film camera, but paired with the conveniences and aspirations that bring it up to par with modern digital cameras”
Modular And Customisable To Your Heart's Content
Speaking of, the modularity of the GS-1 means that exchanging an accessory for another is a breeze. One great example would be the lenses. Personally, the lens that I gravitate to the most with it, and given my use case, is a 100mm lens. From time to time, I will vary between it and a 50mm or 65mm lens. This does bring us to the first significant point of consideration (and downside), if you're thinking of getting one.
Bronica themselves only made 9 different lenses for the GS-1... A 50mm, 65mm, 80mm, 100mm, 110mm micro, 150mm, 200mm, 250mm, and a 500mm super-telephoto lens. Given limited aftermarket support, this does limit your usability quite a bit, seeing that there are only so "many" lenses to choose from. It's not something that I need to worry about with how I intend to use my GS-1, but you may feel otherwise.
Video Source - Brae Hunziker via YouTube
Still, the native lenses are pretty good. So good, in fact, that Bronica later re-used the lens formula and coatings from the GS-1 lenses, and adapted them to the rest of their camera line-up. Elsewhere, it has a healthy mixture of both mechanical and electronic elements. For instance, the GS-1's shutter speeds are electronically-controlled. Hence, allowing you to vary from 16 seconds to 1/500 seconds (and Bulb mode).
Additionally, you get a flash sync across all available shutter speeds - another huge plus point! Moreover, the GS-1 can be had with two teleconverters, a 1.4x and a 2.0x. And, two extension tubes, an 18mm and its 36mm counterpart. Some may say that the Bronica GS-1 has the heart and soul of a film camera but paired with the conveniences and aspirations that bring it up to par with modern digital cameras.
Some Good, Some Bad, And Some Ugly
Although, those very same electronics which distinguish the GS-1 are also a double-edged sword. It's worth mentioning, as well, that the GS-1 is battery-powered. In other words, you'll have to rely on its battery for everything from the shutter and even the cable release. With that in mind, if that singular PX28 battery is on the verge of dying, or if the electronics go kaput, you'll be deprived of using your GS-1 entirely.
When put side-by-side with other comparable older cameras, they at least have a few mechanical tricks and functions that could still work without electrical support. Meaning that even if their electronics give way, you can technically still use them, unlike the GS-1. To be fair though, many owners of the GS-1 can agree that thus far (given its old age), the electric circuitry is somewhat comparatively reliable.
Video Source - Brae Hunziker via YouTube
Still, you ought to be cautious if you're buying an old GS-1. I'd recommend checking the electronics more diligently than you'd otherwise do. Regardless, with all this talk of the GS-1's build, how well does it take actual photos? Well, it turns out, really fantastically so! The images that come out of it are very crisp and clear. I personally have no issues with the image quality at all - it's a silver lining with all big cameras.
A larger frame means more image. The large 6x7 negative means I'm able to extract more detail out of a typical shot. Furthermore, it emphasises the shallow depth of field, and is similar in quality to many digital cameras of today (with the right technique), but inside the form factor of a film camera. Overall, this makes the Bronica GS-1 a very satisfying hardware to shoot with.


Some Of The Compromises To Look Out For
The experience is even better if you're willing to shop around a bit harder and find the optional AE (auto-exposure) prism viewfinder, mind. However, it's not all sunshine and rainbows, as there is one aspect of operating the GS-1 that's less than ideal. More specifically, you'll need to use a bit of elbow grease when you're shooting in portrait. This is because Bronica made one small oversight compared to its rivals.
Mamiya, on the other hand, had rotating film backs (That’s the ‘RB’!) that let you switch from landscape to portrait in a pinch. Meanwhile, the GS-1 doesn't have this. So, you'll either have to manually rotate your camera 90 degrees anytime you're shooting in portrait, which is no doubt a pain if you've mounted it onto a tripod. Or, you could shell out a bit more to get one of Bronica's rotating tripod adapter accessories.


In short, it's probably better to keep the GS-1 as a handheld camera rather than one that you'd regularly pair with a tripod or fixed mount. Another huge downside with the GS-1, as with all older cameras, is the accessibility to spare parts. The older it gets, the tougher it'll be to source spares, should they break. And, it's just as challenging to find shops or people who know how to work on it, if you need repairs done.
It's something that you have to live with once you delve into the rabbit hole of owning and using any old, out-of-production photography gear. Then, going back to those electronics, the GS-1, remember, isn't an all-mechanical being. Having experienced how iffy electrics can be with these older cameras, if they ever go awry, it's likely a lot easier to simply replace the entire camera, rather than trying to fix it up.
Is The Bronica GS-1 Worth It?... Some Closing Thoughts
Not too long ago, the arrival and incredible growth of digital cameras brought and end to the dynasty of film. It meant having to say goodbye to the Bronica GS-1, as well as its compatriots. It's a shame too, since that bulky hunk of metal and plastic is one that I very much enjoy using. Every time I go out, I try to bring the Bronica GS-1 with me as often as I can. For a medium-format camera, it's a perfect package.

In summary, it's a great choice for either rookie photographers, or even experienced veterans like myself, who are looking to get the perfect medium-format camera. In terms of maximal ‘bang-for-buck’ it’s difficult to look beyond the GS-1. When compared to those Mamiya and Pentax 6x7 pickings, the GS-1 is relatively more ergonomic and compact for those busy shoot-and-scoot sort of days. If that's not convincing enough, the GS-1 is also a steal!
With a bit of searching, you could walk away with a good GS-1 for around £500 or so. I suppose that's the prime benefit of being so underrated for so long, yet delivering a great camera that'll capably ro capture amazing images. By contrast, you'd need to spend a couple hundred more at least (if not thousands!) on an equivalent Mamiya or Pentax. In which case, you might as well spend that on accessories.

Though, trying to source the GS-1 body, lenses, and the rest of the optional kits from used marketplaces can be a bit of a challenge. In some cases, you may even be able to walk away with 6x7 lenses for under £150 apiece. But, looking for intact and reliable ones is akin to finding a needle in a haystack. Most GS-1 owners seem to have much better luck shopping for mint GS-1s and their accessories from Japan - which can have it’s own problems, as well as import taxes.
For me though, the GS-1 is as close to the perfect medium format camera as I’ve come so far. Considering, it doesn’t look like there will be any ‘new’ film cameras for a while (outside of toy cameras and technical offerings) it seems that the GS-1 will be my ‘go-to’ for quite some time, and I am perfectly fine with that…
Specs And Details


About the Author - Ross Jukes is a professional Photographer and Videographer with over a decade of experience. Working in both Digital and Analogue formats, Ross has worked with international clients, had his worked published numerous times and exhibited his work extensively. With a passion for all things photographic, Ross combines his experience, enthusiasm and dedication to his art form to create engaging and educational content for the photographic community.
Disclaimer: All links to Amazon UK are affiliated links - you will still pay the same price but I will receive a small commission for providing the link. All information provided in this blog is intended either for educational or entertainment purposes and is accurate to the best knowledge of the author. However, further research/professional advice should be sort before making purchases/implementing any advice given and no responsibility is taken by the author or parties mentioned here within.

Canon Selphy CP1500 - Pocket Sized Powerhouse Printing!
While it might seem archaic to even have a printer nowadays when emails and DMs exist, for photographers, there might still be value in needing to quickly and easily print your photos, especially so in the case of the Canon Selphy CP1500.
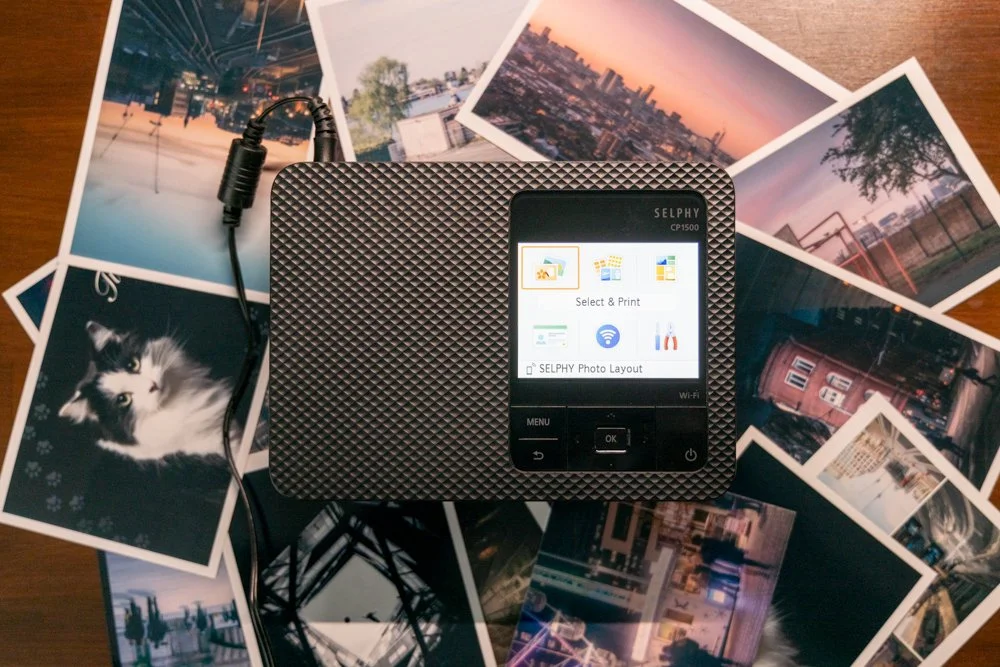
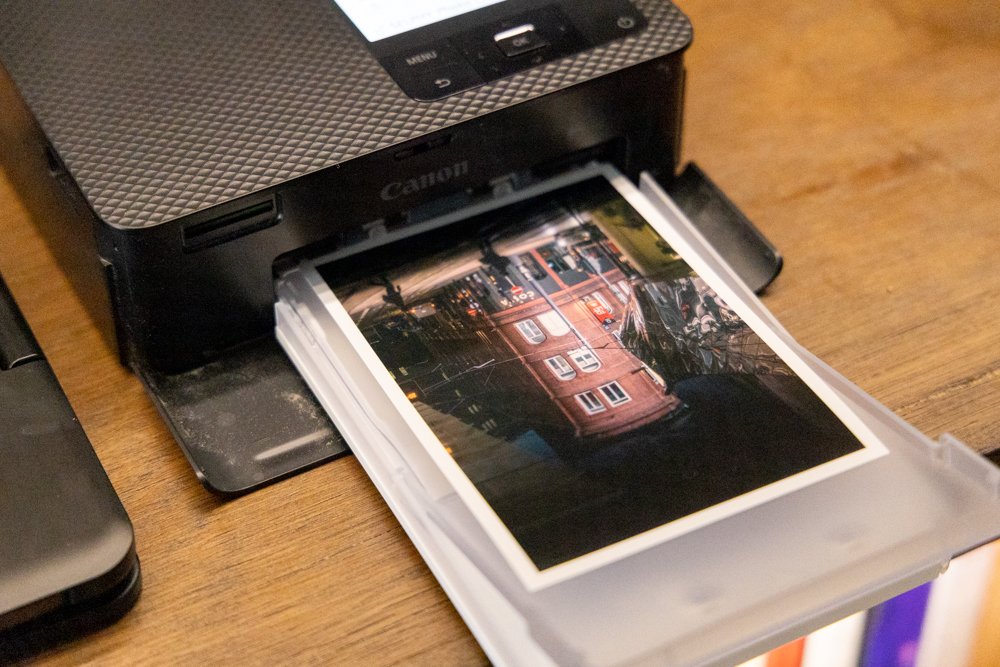
Although it might seem archaic in this day and age where we can beam documents and photos through the internet, it's still pretty handy to have a printer around. With Instagram and email, you may assume that photographers won't ever find the need for a printer. But, having used Canon's Selphy CP1500 mini-printer, I've come to appreciate keeping it about the office. Granted, it's a very particular form of printing.
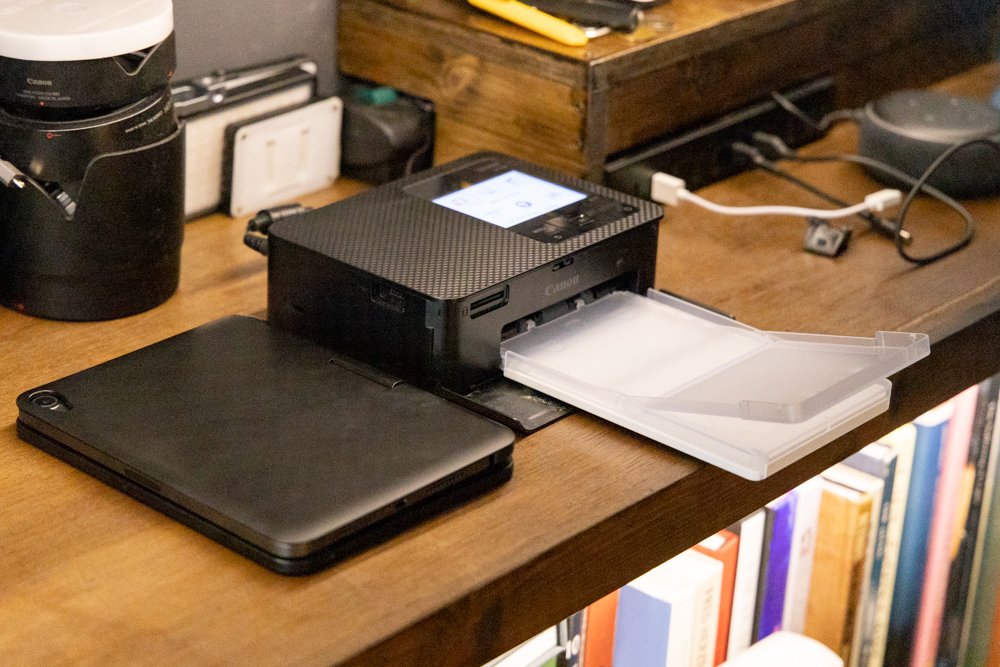
For one, it's a very tiny machine, with its compact frame weighing in just 850g. Though chunky, it's lighter than many smaller laptops out there. Moreover, you also have to contend with the Selphy CP1500's odd printing format. At the very largest, it'll only produce 6.0x4.0-inch prints (or 148.00x100.00mm), with its max resolution of 300x300dpi. You'd likely get better value out of larger printers in its price range, depending on your needs.
PLEASE NOTE: I PURCHASED THIS WITH MY OWN MOMEY AND NO PAYMENT OR CONTROL WAS EXCHANGED FOR PUBLISHING THIS UNBIASED REVIEW
Video Source - Camera Labs via YouTube
But for others, it's the ideal package. Canon's Selphy CP1500 is targeted towards a very broad audience, and includes both casual mainstream users, as well as professional photographers. Especially, if your use case values ease of use, convenience, quality of the print, and speed. I personally have used it in the studio to print photos and I can't recommend it enough, given that it's also fairly portable.
So, you could lug it about from one photoshoot to the next. Granted, doing this requires that you buy the optional £180 battery pack to power it. I don't personally recommend it, so you're better off plugging the printer into a regular wall outlet. Otherwise, the Selphy CP1500's battery will last you a claimed 72 6x4-inch prints per full charge. That aside, there are plenty of other reasons why you should get one...
Convenience And Ease Of Use
As mentioned, effortlessness is a major highlight of the Canon Selphy CP1500. To start a print, you could pair the printer with the Canon Selphy app on your phone. It's more than just a mobile control panel, too. Using the app, you could upload your photos, create collages, or even make on-the-fly edits. This includes cropping your prints, adding filters, drawing over them, inputting annotations, or maybe writing some text.
Then, once it all looks good in the preview, you can then print it out. Speaking of convenience, the Selphy CP1500 doesn't even require you to physically plug in your computer to it. Instead, you'll load the photos and prep a print via Wi-Fi or Wi-Fi Direct. And for anyone asking, it unfortunately doesn't have Bluetooth. Another option includes plugging it in via USB-C, or printing it out from an SD/SDHC/SDXC memory card.

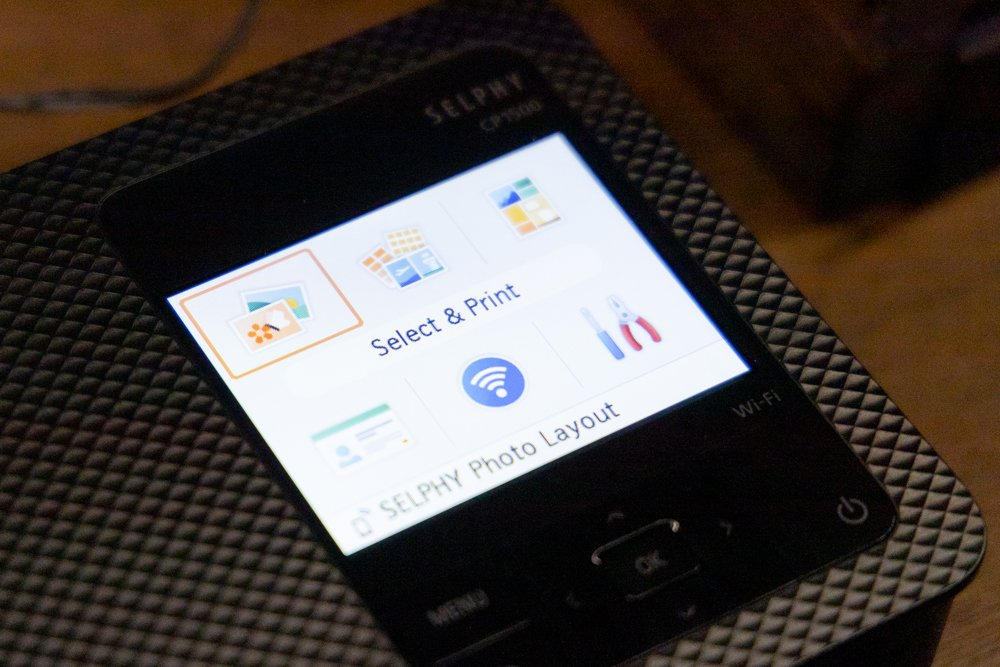
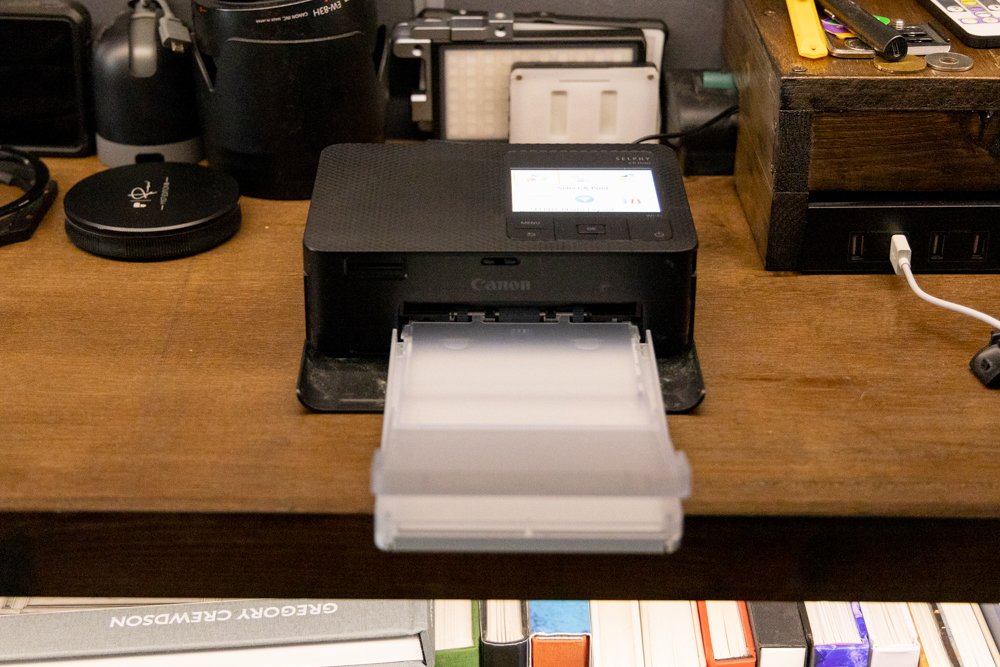
Besides using the Canon Selphy app, the CP1500 can be controlled through its built-in 3.5-inch colour LCD display. It's not a touchscreen, but at least the physical buttons are clicky, tactile, and easy to operate. In addition, Canon has revised the paper feeding mechanism from its predecessor, the CP1300. That makes the process of supplying the CP1500 with fresh paper easier and sleeker. Oh, and then there's the ink.
For now, I'll mention that feeding the dye-sub cartridge (much more on that later) is quite easy. So, if you need to replace the cartridge, all you need to do is pop out the filler flap on the side of the printer and it's done in a jiffy. At this point, we'll now get into not one, but two unique aspects of what makes the Canon Selphy CP1500 quite a bit different compared to most other printers, even small-format ones.
“A fantastic and useful addition to any photographer’s studio or office”
Small (Prints) Can Sometimes Be Better
The first noteworthy element of the Selphy CP1500 is those small postcard-sized prints. In the case of a Canon Selphy CP1500, it's a double-edged sword. It's a huge downside for some, as the distinct format is unique compared to what most are used to working with. Again, the largest possible print size is 6x4 inches. So, if you need anything bigger, you're left having to send your photos to a lab or print shop, anyway.
Although, there are additional formatting options to choose from - but, smaller. There are papers sold in Canon's catalogue for the CP1500 in sizes as small as a credit card. Moreover, there are varying types of paper sold, like sticky paper (used for stickers), or 6x4-inch print papers with tear-off tabs on either side. Size-wise, there are papers for the CP1500 sized in 4.7x3.5 inches, 3.4x2.1 inches, and 2.1x2.1 inches.


Still, there are a few neat tricks that these small print papers can pull off. For example, you'll note that it mostly prints out in a glossy finish. But, at your discretion, you can print out from the Selphy CP1500 in a selection of semi-gloss and satin finishes. What's cool is that these differing finishes can all be printed on the same type of paper. Nonetheless, the paper alone isn't what makes the Selphy CP1500 worthwhile.
It's only when it starts printing, and ink is applied to the paper that you now realise why this printer is all the rage. For context, Canon uses its own format of printing style, rather than the more ubiquitous inkjet or Giclée that many comparable printers on the market use. They call this dye-sublimation (or dye-sub, for short), and one that allows your prints to truly pop and showcase impressive image quality.
A Unique Approach To Printing Colours
Canon's dye-sub paint technology, as used in this Selphy CP1500, is well-regarded for its bright and vivid colours. Altogether, it excels in providing a great amount of depth, and visual clarity, not to mention properly highlighting a wide range of colours... From subtle changes in shading, to brighter variations in hue. This can't truly compete on the same level as costlier, bigger, and high-tech inkjet printers, of course.
But for a compact package, the Canon Selphy CP1500 is one of the best mini-printers that you can get on the market today, as far as quality is concerned. On top of that, it'll print out rather speedily, too. Thanks to its dye-sub-inking system, a single 6x4-inch print in the highest quality will take just 41 seconds. That's a noticeable 6-second improvement from the old CP1300. But, how does this dye-sub thing work?
Video Source - Feral Publication via YouTube
Well, Canon's dye-sublimation inking works by running each sheet of special printing paper, as we noted, and feeding them through the printer four times. Meanwhile, individual layers of cyan, magenta, as well as yellow dyes are applied on top of one another. Lastly, the final, protective layer is printed on top of its other coloured layers. This upper layer is resistant to both smudges and fingerprints, which is nice.
And apparently, Canon claims that this upper coating is able to last for up to 100 years. Notably, unlike a competing inkjet system, you won't have to worry about any messy or runny ink. Furthermore, despite its resolution being "just" 300x300dpi, the quality of the final print pops more than a lot of other printers. It's thanks to the coloured dyes being applied on top of one another, rather than adjacent in the same layer.
A Handy Tool For Any Photographer
Still, you might be wondering... What does any of this have to do with me, a photographer? Well, I believe the Canon Selphy CP1500 can be a fantastic and useful addition to any photographer's studio or office. In one scenario that I've come across many times before, you're able to leverage the Selphy CP1500's speed, reliability, and consistency to print out a bunch of photos at once. What would you use it for, I wonder?
Well, how about mocking up projects, such as a photobook? You could print out a load of pictures, and move them around while working out how and where the pictures should go... Before finalising a design which you can commit to. Or, perhaps you could use the Selphy CP1500 to print out memories. No doubt, you'll surely have at least one picture from the past year's efforts that you'd have a fond memory of.

Some prints are just for fun, though the templates and overlays really add to the experience!
With a tiny printer on hand, you could keep a collage of your favourite pics, to look back to when you're done with a photoshoot. For a more business-minded use case, a printer is, I feel, a must-have. You can print out a ton of your best photos, and share them with others to promote your work. If you're lucky, you might attract some new clients. The easier route to doing this, naturally, is sending over an email.
But, it can be nice to pass on something physical and palpable to grasp onto. If you're going to an event, for instance, you may consider printing out some extra samples of your finest work. Then, hand them around to showcase your services, or simply as a gift to any passer-by. It may seem old-fashioned, but a creative photographer, like you, will surely spot some innovative ways of using those diminutive prints.
Worth It For The Expense?... Some Final Thoughts
So, using the Canon Selphy CP1500 to print out memorabilia, sampling mock-ups, showcasing your work, creating postcards of your own, or printing out an ID photo for a passport. These are only a handful of the use cases where mini-printers like the Selphy CP1500 could prove useful. To be fair, if you want super-high-quality (and bigger) prints done, you'd be best to trust a lab or printing service.
This thus leads us to another disadvantage of Canon's baby printer - cost. If you're printing stuff in large bulks... And combined with the cost of the printer, dye-sub ink, and specialised printing paper... The final tally can sometimes be costlier than beaming over your photos to a print shop. Roughly speaking, it adds up to around £0.32 for each 6x4-inch print. The Selphy CP1500 itself retails for an MSRP of around £139.99.
Video Source - Peter McKinnon via YouTube
Additionally, Canon only sells the dye-sub ink alongside the paper in bundles. And, it just so happens that each ink cartridge only has just about enough ink to run through the entire pack of printing paper before you need a top-up. So, it's up to you whether the ease and convenience of being able to print out photos anywhere and at any time, without delay, is worth the premium. To me, it certainly is worth the cost.
Even though, as discussed, you need to buy Canon-specific dye-sub ink cartridges and printing paper. So far as I've searched, there aren't any cheaper, third-party dye-sub inks or paper that you would use as a more attainable and cost-effective substitute. Though, despite the high cost of running it, I still think it's one awesome little printer to have in your office or studio, even if you're only using it once in a while.
About the Author - Ross Jukes is a professional Photographer and Videographer with over a decade of experience. Working in both Digital and Analogue formats, Ross has worked with international clients, had his worked published numerous times and exhibited his work extensively. With a passion for all things photographic, Ross combines his experience, enthusiasm and dedication to his art form to create engaging and educational content for the photographic community.
Disclaimer: All links to Amazon UK are affiliated links - you will still pay the same price but I will receive a small commission for providing the link. All information provided in this blog is intended either for educational or entertainment purposes and is accurate to the best knowledge of the author. However, further research/professional advice should be sort before making purchases/implementing any advice given and no responsibility is taken by the author or parties mentioned here within.

Trying Three Lomography Films!
When it comes to film, I have a pretty simple palette. My ‘go-to’ film of choice has always been Portra 400. Recently, I’ve had a brief love affair with Fuji Pro 400H but falling in love with a discontinued film is a bad idea!

When it comes to film, I have a pretty simple palette. My ‘go-to’ film of choice has always been Portra 400. Recently, I’ve had a brief love affair with Fuji Pro 400H but falling in love with a discontinued film is a bad idea!
As you can probably tell from my Vanilla film choices (and Vanilla happens to be my favourite Ice Cream - my middle name is definitely not ‘Danger’!) I tend to keep things simple. Every now and then I might experiment with an expired film if I’m feeling particularly adventurous! However, in my instant hunt for reasonably priced film, I stumbled across Lomography.
If you’ve even stepped foot in the film world, you will have come across Lomography. Their dedication to analogue photography and commitment to quit is pretty much unmatched! Despite having a great range of affordable cameras to explore (I myself had a Dianna-F for many years and in part, it was that camera that got me back into shooting film!) they also have an amazing range of film!
PLEASE NOTE: I WAS SENT THESE ITEMS FOR REVIEW BUT NO OTHER PAYMENT OR CONTROL WAS EXCHANGED FOR PUBLISHING THIS UNBIASED REVIEW

My ‘typical’ film look and feel…
It was their more experimental offerings that got me interested though and after exploring the options, it was time for me to ‘Break Bad’ and ditch the Portra for something a. Little more exciting - I was going full Rum Raisin!
There were a couple of caveats, I pretty much only shoot Medium Format and it must be C41 development so that I could develop the film myself. Fortunately, Lomography had me covered with a great range of 120 colour negative film. The three I would be shooting with were Metropolis, Lomo Purple and Lomo 800.
“If you’ve even stepped foot in the film world, you will have come across Lomography.”
The only real stipulation that I put on myself was that I was going to shoot all of the films on the same camera and lens setup. It’s not that I would be drawing a direct comparison between the films, we’’re dealing with three very different beasts here! It was more to keep the process straightforward. So the Bronica GS-1 and 65mm lens were my weapons of choice!
My developing would all be done at home so your results with these films may very, but I tried to be as consistent in my approach as possible! That included editing the images - all images have only had a very light edit and I have tried to keep the colours/tones somewhat representative of how the film looks. The only slight caveat being the Lomo 800 were I did use a Black Pro Mist ¼ filter - just to soften the lights at night.
LOMOGRAPHY METROPOLIS
Metropolis is probably most famous for its muted, desaturated look with a good kick of contrast. As a Portra shooter, the desaturated look sounds like it should be right up my street. However, this was probably the film I was most suspicious of. I tend to go for warmer, more wholesome tones and this felt like it might be a little, dystopian…
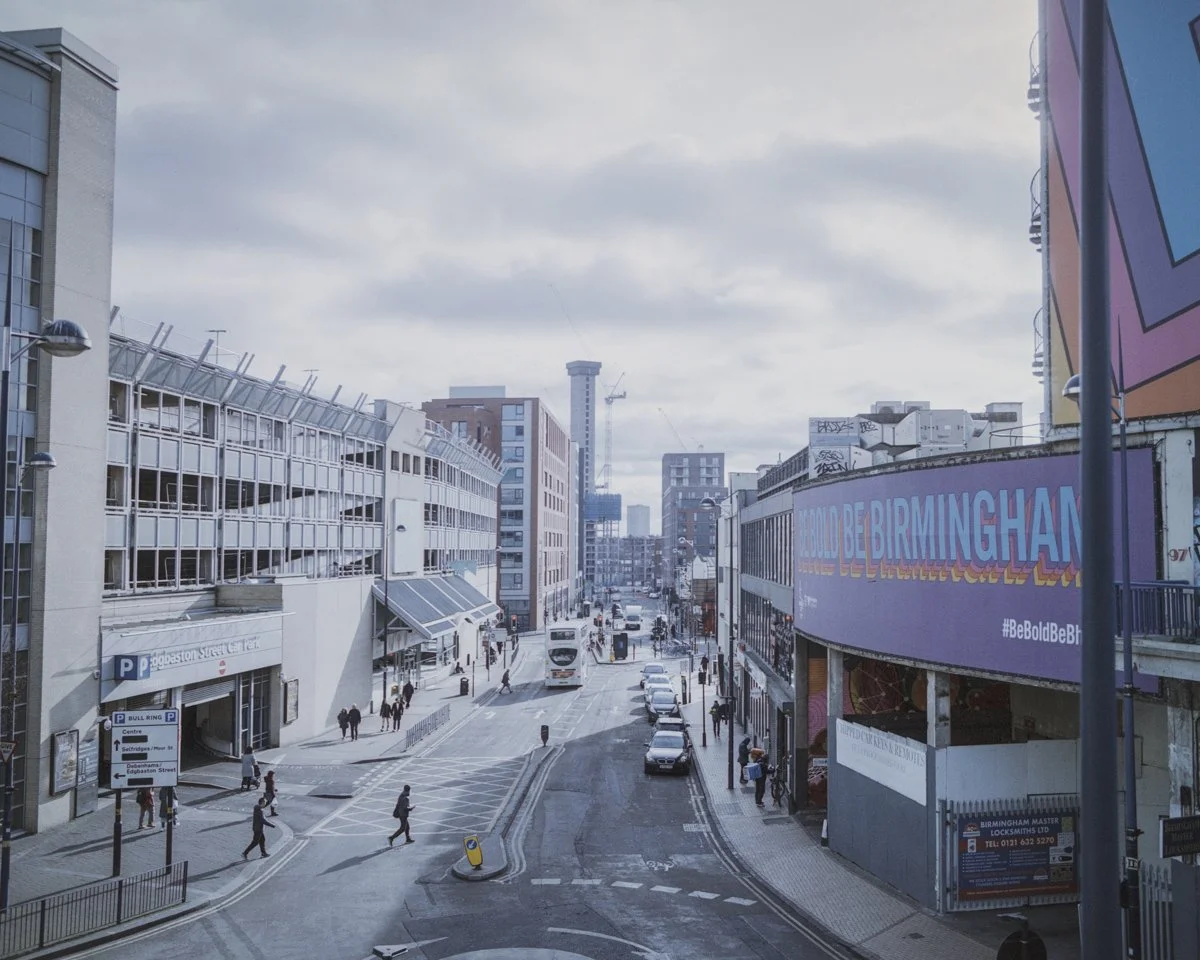
However, when I saw the results, I was pretty impressed! This is probably more a reflection of my shooting style but the film renders a lot different to what I would normally go for. But it was a pleasant surprise and I could certainly see myself using it more often and certainly the kind of film that would be useful for certain projects or even entering photography competitions with a more urban feel!

I personally think it looks better when you have a bit of strong, directional light. If you shoot more urban scenes then this is certainly a great film for you. It has a little punch of colour that pops through and draws the viewer into the image. The contrast is great and gives it a gritty feel, without being too overdone.


As with all films, choosing what speed to shoot it at is really a personal choice. I shot this film at 200 to give the film a little extra light and I’m glad I did. That said, I also think this film would look cool and underexposed a little, it would certainly render shadows deep and black thanks to that strong, contrasty look.

LOMOGRAPHY LOMOCHROME PURPLE
OK, I’ll admit I had no idea what to expect from this film! I’d done a little bit of Googling to see what it was all about but didn’t think it would be my cup-o-tea! I was wrong, I loved how these images came out! But there was one big problem with this roll of film, me… Let me explain.
I used the same camera/lens combo for all the films I tried - the Bronica GS-1. Whilst I was loading the Purple - I noticed the film leader and distance to the ‘Start’ markers on the backing paper was quite short. As I wound the film on to get to ‘shot 1’ - I was convinced the film was not being collected by the pick-up spool!

I hastily opened the back of the camera (believing the film would still be unwound) only to find the film had been collected correctly and I’d just exposed the first shot - what an idiot… but it gets worse. When I close the film back, it obviously resets the shot counter as if it’s loading a new film!

I quickly applied a bit of logic and switched to multiple exposure mode (thinking this would move the film counter on but not advance the film) - again, I managed to mess that up and what’s the result of all this stupidity - I wasted about half the roll of I’ll! There is a price to pay for this level of stupidity and when you shoot film, that price can quickly add up!

However, I did manage to get a few shots on the roll and I’m glad I did because I love how this film looks! This is the answer to all of my 'Vanilla’ Portra shooting and is so far removed from my normal style! It really did put a smile on my face as I was scanning the negatives and seeing those bright, bold colours shine through!

I’ll admit, I’m sure this film won’t be for everybody and I certainly preferred the way it renders vegetation/sky rather than what it does in urban environments. However, it was great fun to shoot with and I wouldn’t hesitate in shooting with it again! Sure, you can adjust hue in Lightroom to get a similar look but where’s the fun in that and the one thing this film stuck is, is fun!
LOMOGRAPHY LOMO 800
So on a more serious level, this film is one that I was very excited to shoot with. Not because it has any weird or wonderful quirks but because it is probably most similar to a ‘standard’ colour negative film - albeit an 800 speed film. This film wouldn’t give me anything strange or peculiar, but if it was a decent alternative to Portra 800 then I’m here for it, as the kids say…

Shooting the film raised one important question - do I shoot in the day, or in the night. Obviously, ISO 800 lends itself to slightly lower light conditions but I thought I’d fire off at least one late afternoon shot, just to see how it does. I wish I’d shot a lot more in the daylight! I think this film looks awesome in a sunset/soft light scenario! The soft pastel tones, beautiful grain structure and slightly warm feel make this film ideal for these kinds of scenarios!

However, I’d banked on it being a film I could use at night and guess what, it excelled in that department too! The 800 speed meant that my exposures didn’t need to be super long! I overexposed by about a stop and the longest exposure I was getting (in normal shooting conditions) was around two seconds. For a couple of shots, I did choose intentionally to stop down a little and get a bit more movement in the light trails.


This film worked wonderfully in the dark and I’m very impressed by the results. My only slight concern is the warmer base tone that comes through - but this is obviously easily corrected in post. If I was to have another, very mild criticism of the film it’s that the negatives themselves felt a little bit thinner than normal and therefore, were prone to curling. I honestly don’t know if this is me being super sensitive or if most 800 speed films are like this, but it’s something to be mindful of.


That said, I would have no problem buying a whole bunch of this film as my go to low light option. More so, I would also buy a load to shoot in the day/dusk as I think this would be a fantastic option. I’ve often heard good things about Lomo 800 and I can say that I am a well paid-up, ticket holding member on that particular band-wagon!
MY FINAL THOUGHTS…
I had so much fun shooting these films. I have felt for a while that I need a change of speed with my film photography and shooting these stocks has highlighted that there is so much more to film photography than the old favourites! Would I use these films on a daily basis, possibly not but I can argue a good case for projects shot in each of these films and that is something that I’m sure I will do!

Lomography is more than just a retailer though and this is the message that I really wanted to get across. Brands like Lomography are at the heart of film photography and are opening up a world of possibilities to people like me and hopefully, you. From their cameras and films to their absolute enthusiasm about the community, it’s great to see brands not just trying to ‘sell’ us something, but genuinely caring about the people that matter, the creative process and the end results! Long live Lomography…
About the Author - Ross Jukes is a professional Photographer and Videographer with over a decade of experience. Working in both Digital and Analogue formats, Ross has worked with international clients, had his worked published numerous times and exhibited his work extensively. With a passion for all things photographic, Ross combines his experience, enthusiasm and dedication to his art form to create engaging and educational content for the photographic community.
Disclaimer: All links to Amazon UK are affiliated links - you will still pay the same price but I will receive a small commission for providing the link. All information provided in this blog is intended either for educational or entertainment purposes and is accurate to the best knowledge of the author. However, further research/professional advice should be sort before making purchases/implementing any advice given and no responsibility is taken by the author or parties mentioned here within.